
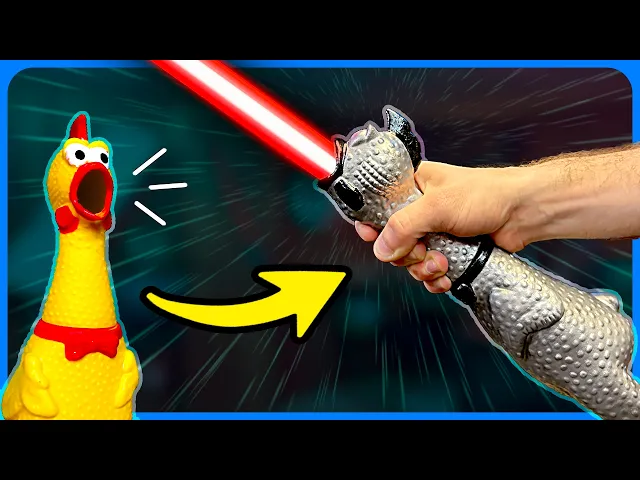


Rubber Chicken Lightsaber
Hopefully these instructions are enough to replicate this build, but I plan on making a quick assembly video for this updated design soon. Also, if I made any major mistakes in these instructions or something is unclear, just leave me a comment.
Shopping List: https://www.linkslist.app/DKsWRBx
Printing Instructions: I've designed 2 different versions of this hilt. Head.stl is the default version- it can be printed normally without any modification, ready to go right off the bed. HeadAlt.stl is a variant that increases thread durability of the blade's set screw. For this variant, you'll need to pause the print at around 64-64.25mm high to insert one of the nuts provided with the Xenopixel core. This nut will be much more durable than the pure plastic of the default version, but print pauses can be risky. It also minimizes the size of the hole visible from the outside. Choose whatever feels right for you.
For slicer settings, I'd recommend about 4 walls and 15% infill. Layer height is up to you, but probably don't go above .2 mm. Re-orient the lower half (legs) upside down, the bowtie about 45º or so leaning back, and the button straight up. Supports are only needed in a few areas, so I recommend manually painting them in: underside of the upper half (head), back of bowtie, speaker holes inside the lower half (legs), within the bowtie cutout on the lower half (legs), and the feet. Everywhere else isn't really necessary- they'll just be more material to remove later.
Optional: If you have a multicolor printer and don't want to spray paint it later, you'll need to manually set/paint the filament colors in your slicer. Just look at photos for reference. If I get enough people requesting it, I might consider splitting each color of the design into separate models to make it easier to multicolor print.
Assembly: After removing all supports, assemble the bowtie button by pushing the button pin through the hole from the inside. Dab a tiny bit of superglue onto the tip of the button (not too much- you don't want to accidentally glue the bowtie onto the body) and press the bowtie onto the button. Hold these together for at least 20 seconds. You'll now need to use some of the hardware provided with the Xenopixel core. I've simplified the design so you only need to use one of the short set screws with a spike on one end and one of the self tapping fasteners. Start to screw the set screw into the back of the neck below the chicken's comb. (If you printed the variant using an embedded nut, you'll want to start threading this screw from the interior of the neck. I know this is clunky, but for some reason, I decided that it'd look more polished if the external hole was only big enough for the hex key.) Tighten this screw until it is just barely far enough away from the internal cutout (so you can insert the blade later). Now take the self tapping fastener and screw it into the Xenopixel core- the proper hole is on the back side of the core, second above the battery. (Theres 2 of these holes directly behind the power button, with two lines '=' separating them. You want the lower of these 2). Screw this in until the power button starts to push forward. You'll want to keep screwing until the front of the button is fairly flush with the exterior of the core. (There is room for adjustment here- more on this later). Slide the core into the lower half of the chicken, aligning the protruding screw with the chicken's internal cutout. Test the bowtie button- if there's way too much play and/or it's not engaging with the power button, pull the core out and tighten the screw on the back a little. If it's way too tight and you can't insert the core, then loosen the screw. (Tried my best to give enough wiggle room here to help get the proper fit.) Now slide the top of the chicken onto the core and twist to tighten it down- but don't over tighten, you don't want to break the plastic threads. Plus, you'll be unscrewing this often to access the charging port. The hilt is now complete. Insert the blade into the chicken's throat and tighten the set screw just enough to secure the blade.
Sound Files: The custom sound fonts for this build are still kind of a work in progress- if I make any notable changes, I'll update here. If you've never loaded a custom sound font onto a Xenopixel core before, I'd highly recommend watching some tutorial videos on it. It's worth knowing how things work and how not to ruin your core. I've provided 2 different sound fonts here- one that I call "Light Meat" and the other "Dark Meat", mostly based on the vibes of each sound. (I think I personally like the dark version better.) For a Light Meat chicken, it's as simple as dropping the font in like any other sound font (like I said, go watch a video specifically for this). But the Dark Meat font is mildly more complicated. Basically, I couldn't find an easy way to implement a custom preon that pairs with a particular ignition effect, so I modified the main Xenopixel settings file to include my custom preon effects. I'm sure there's possibly another way to approach this, but I couldn't find any documentation for it. So, when you import the Dark Meat sound font, you'll also need to replace your core's settings file with the one I've provided. Everything else about the saber should be untouched. I also recommend removing other sound fonts from your sd card if you don't plan on ever using them- you should probably store them in a safe place though, just in case.
Operation: Aside from simply pressing the bowtie to operate, you should actually read your Xenopixel manual. This isn't really my product, so you should go to them for learning how to use it. I absolutely recommend using the Xenopixel app though- makes things a lot easier.
Rubber Chicken Lightsaber

Jar Jar Binks Candy Tongue Lightsaber

Jar Jar Binks Display Tongue (Replacement Monster Mouth Candy Tongue)

Ring Pop Key Rings

Pumpkin Krabs
![Coaster Waffle [FREE] 3d model](/_next/image?url=https%3A%2F%2Fstorage.googleapis.com%2Fproduction-thangs-public%2Fuploads%2Fenhanced_images%2Fv1%2F2bf05f52-ee46-492f-a9e3-b92ffcb5ef9e%2FIMG_5881.heic&w=3840&q=75)
Coaster Waffle [FREE]
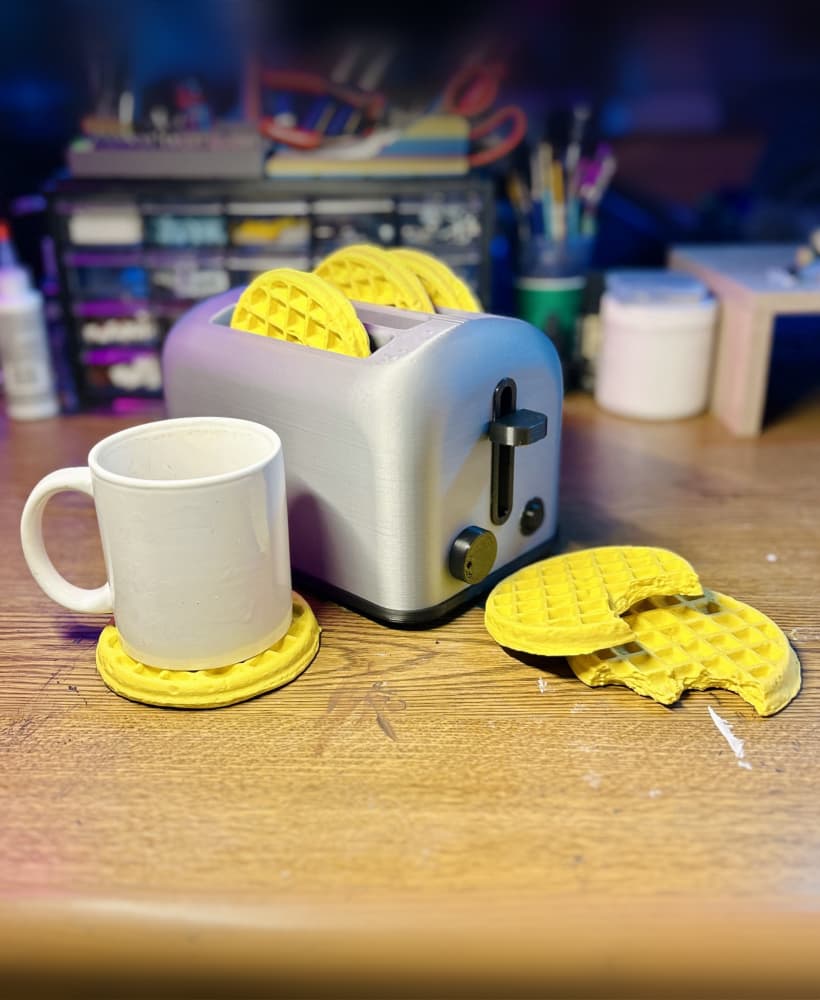
Coaster Waffles with Storage Toaster

Wacky Waving Inflatable Lightsaber

Life Size Minecraft Furnace

Robot Mr. Krabs (Imitation Krabs)

Giant PEZ Dispenser

Giant Wii Remote (Functional)

Giant Furby Robot (Coco the Furby Dog)

Human Elf on the Shelf

Wearable Furby Mask

Giant Croc Hat

Henriegga – The Chocolate Egg-Laying Chicken
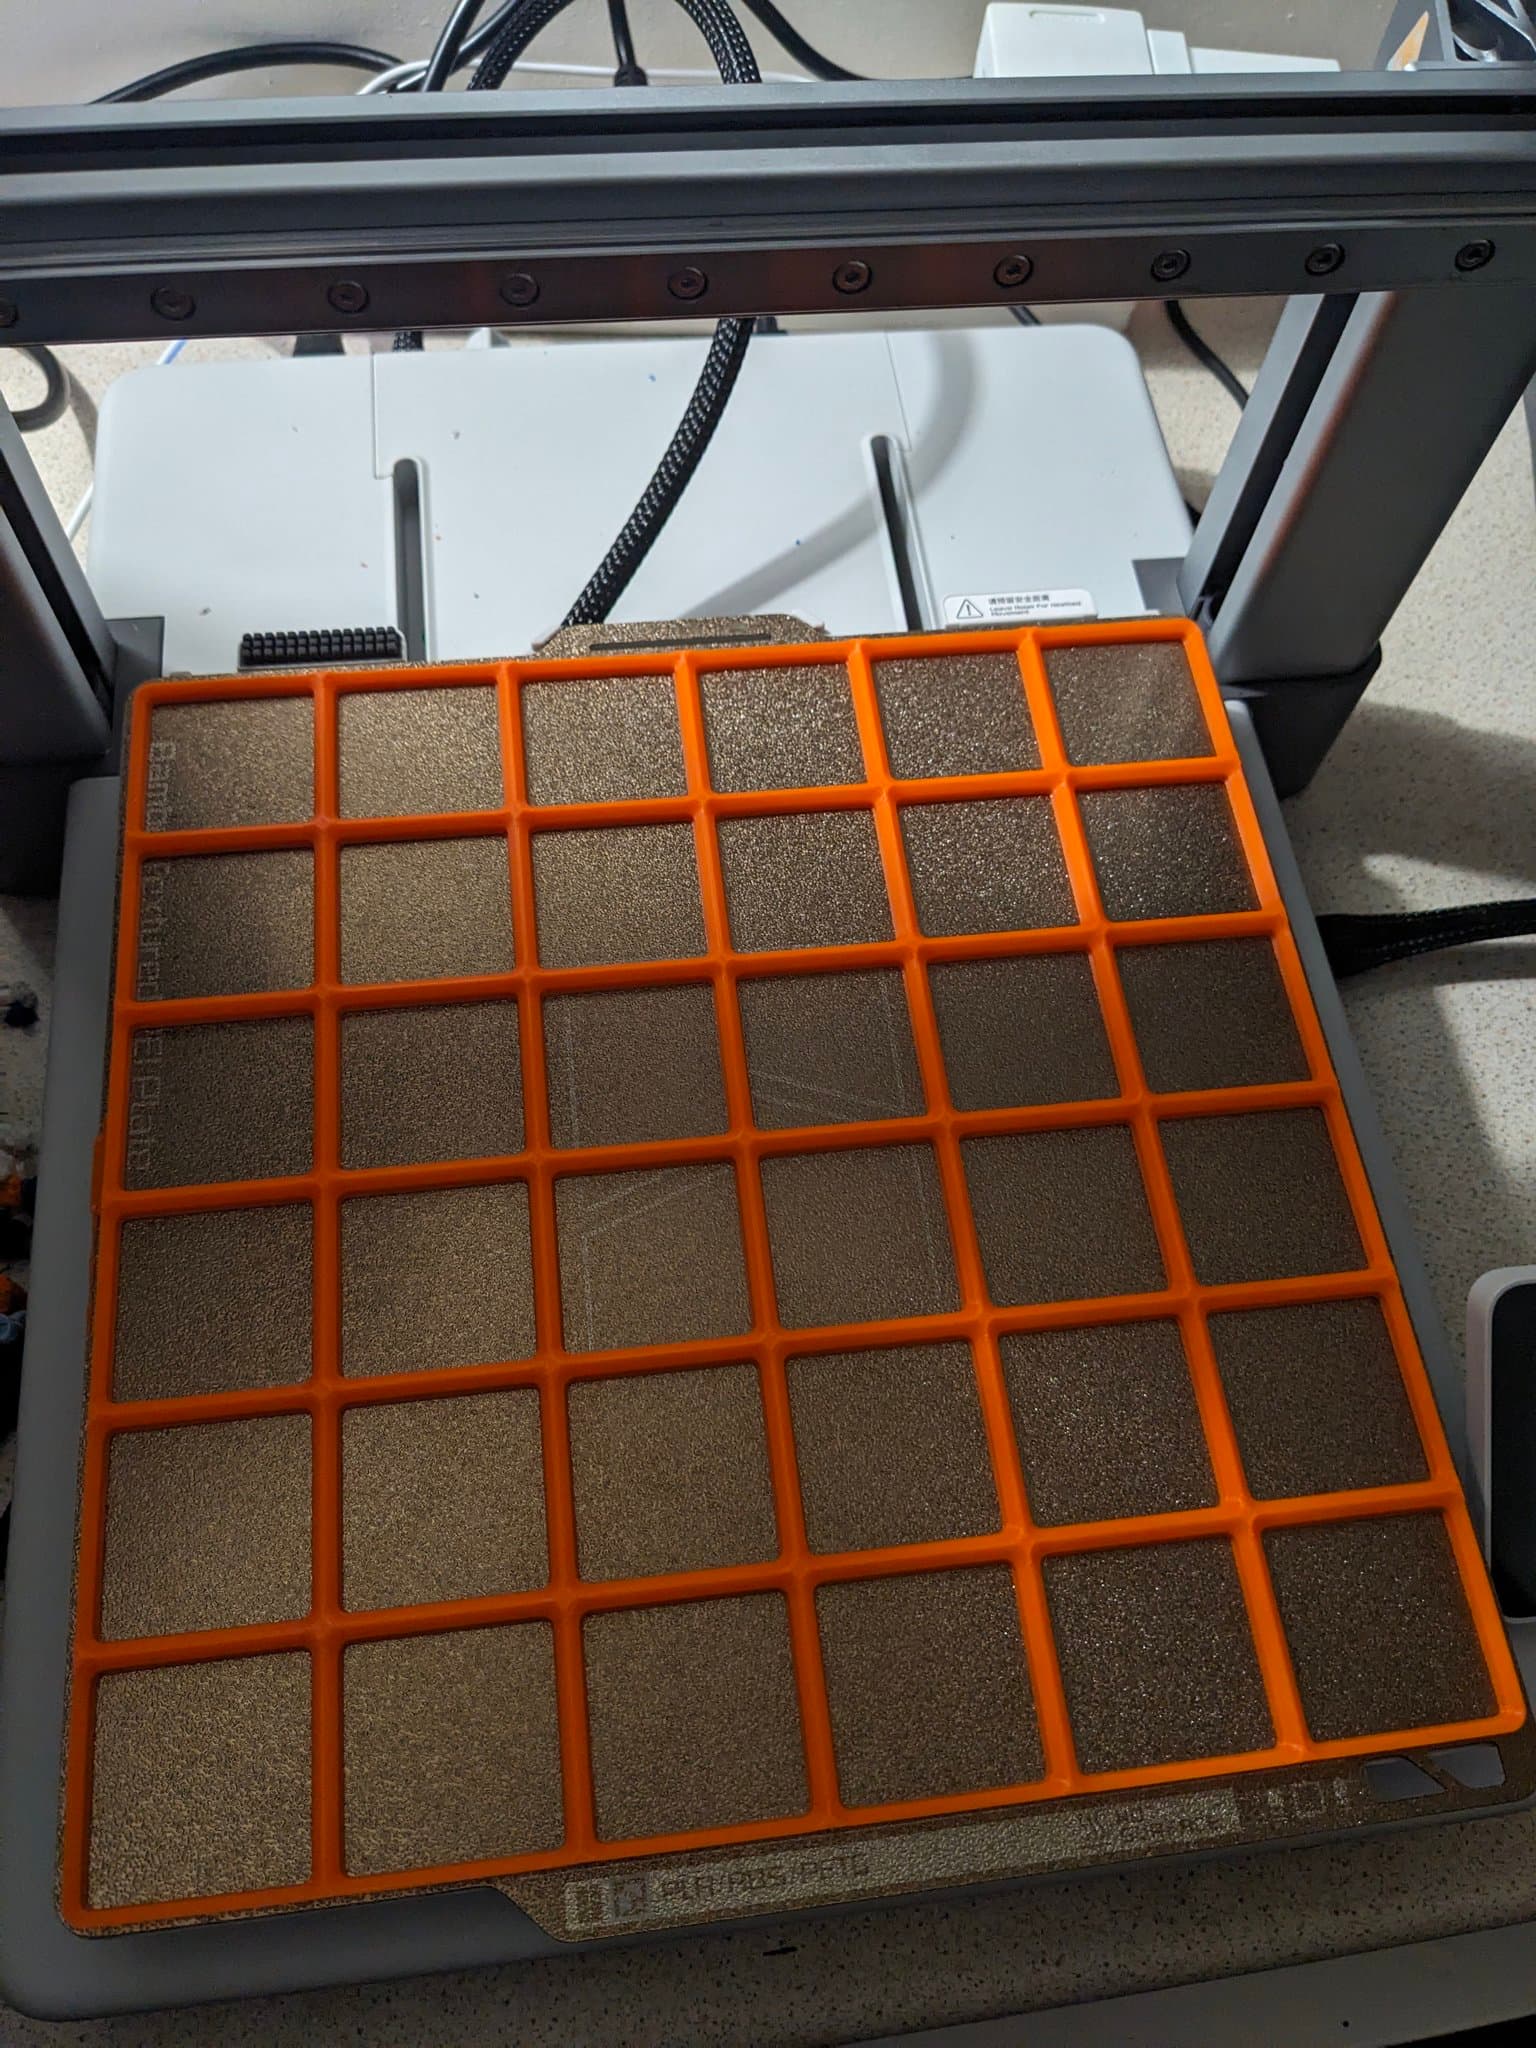
Gridfinity Baseplates
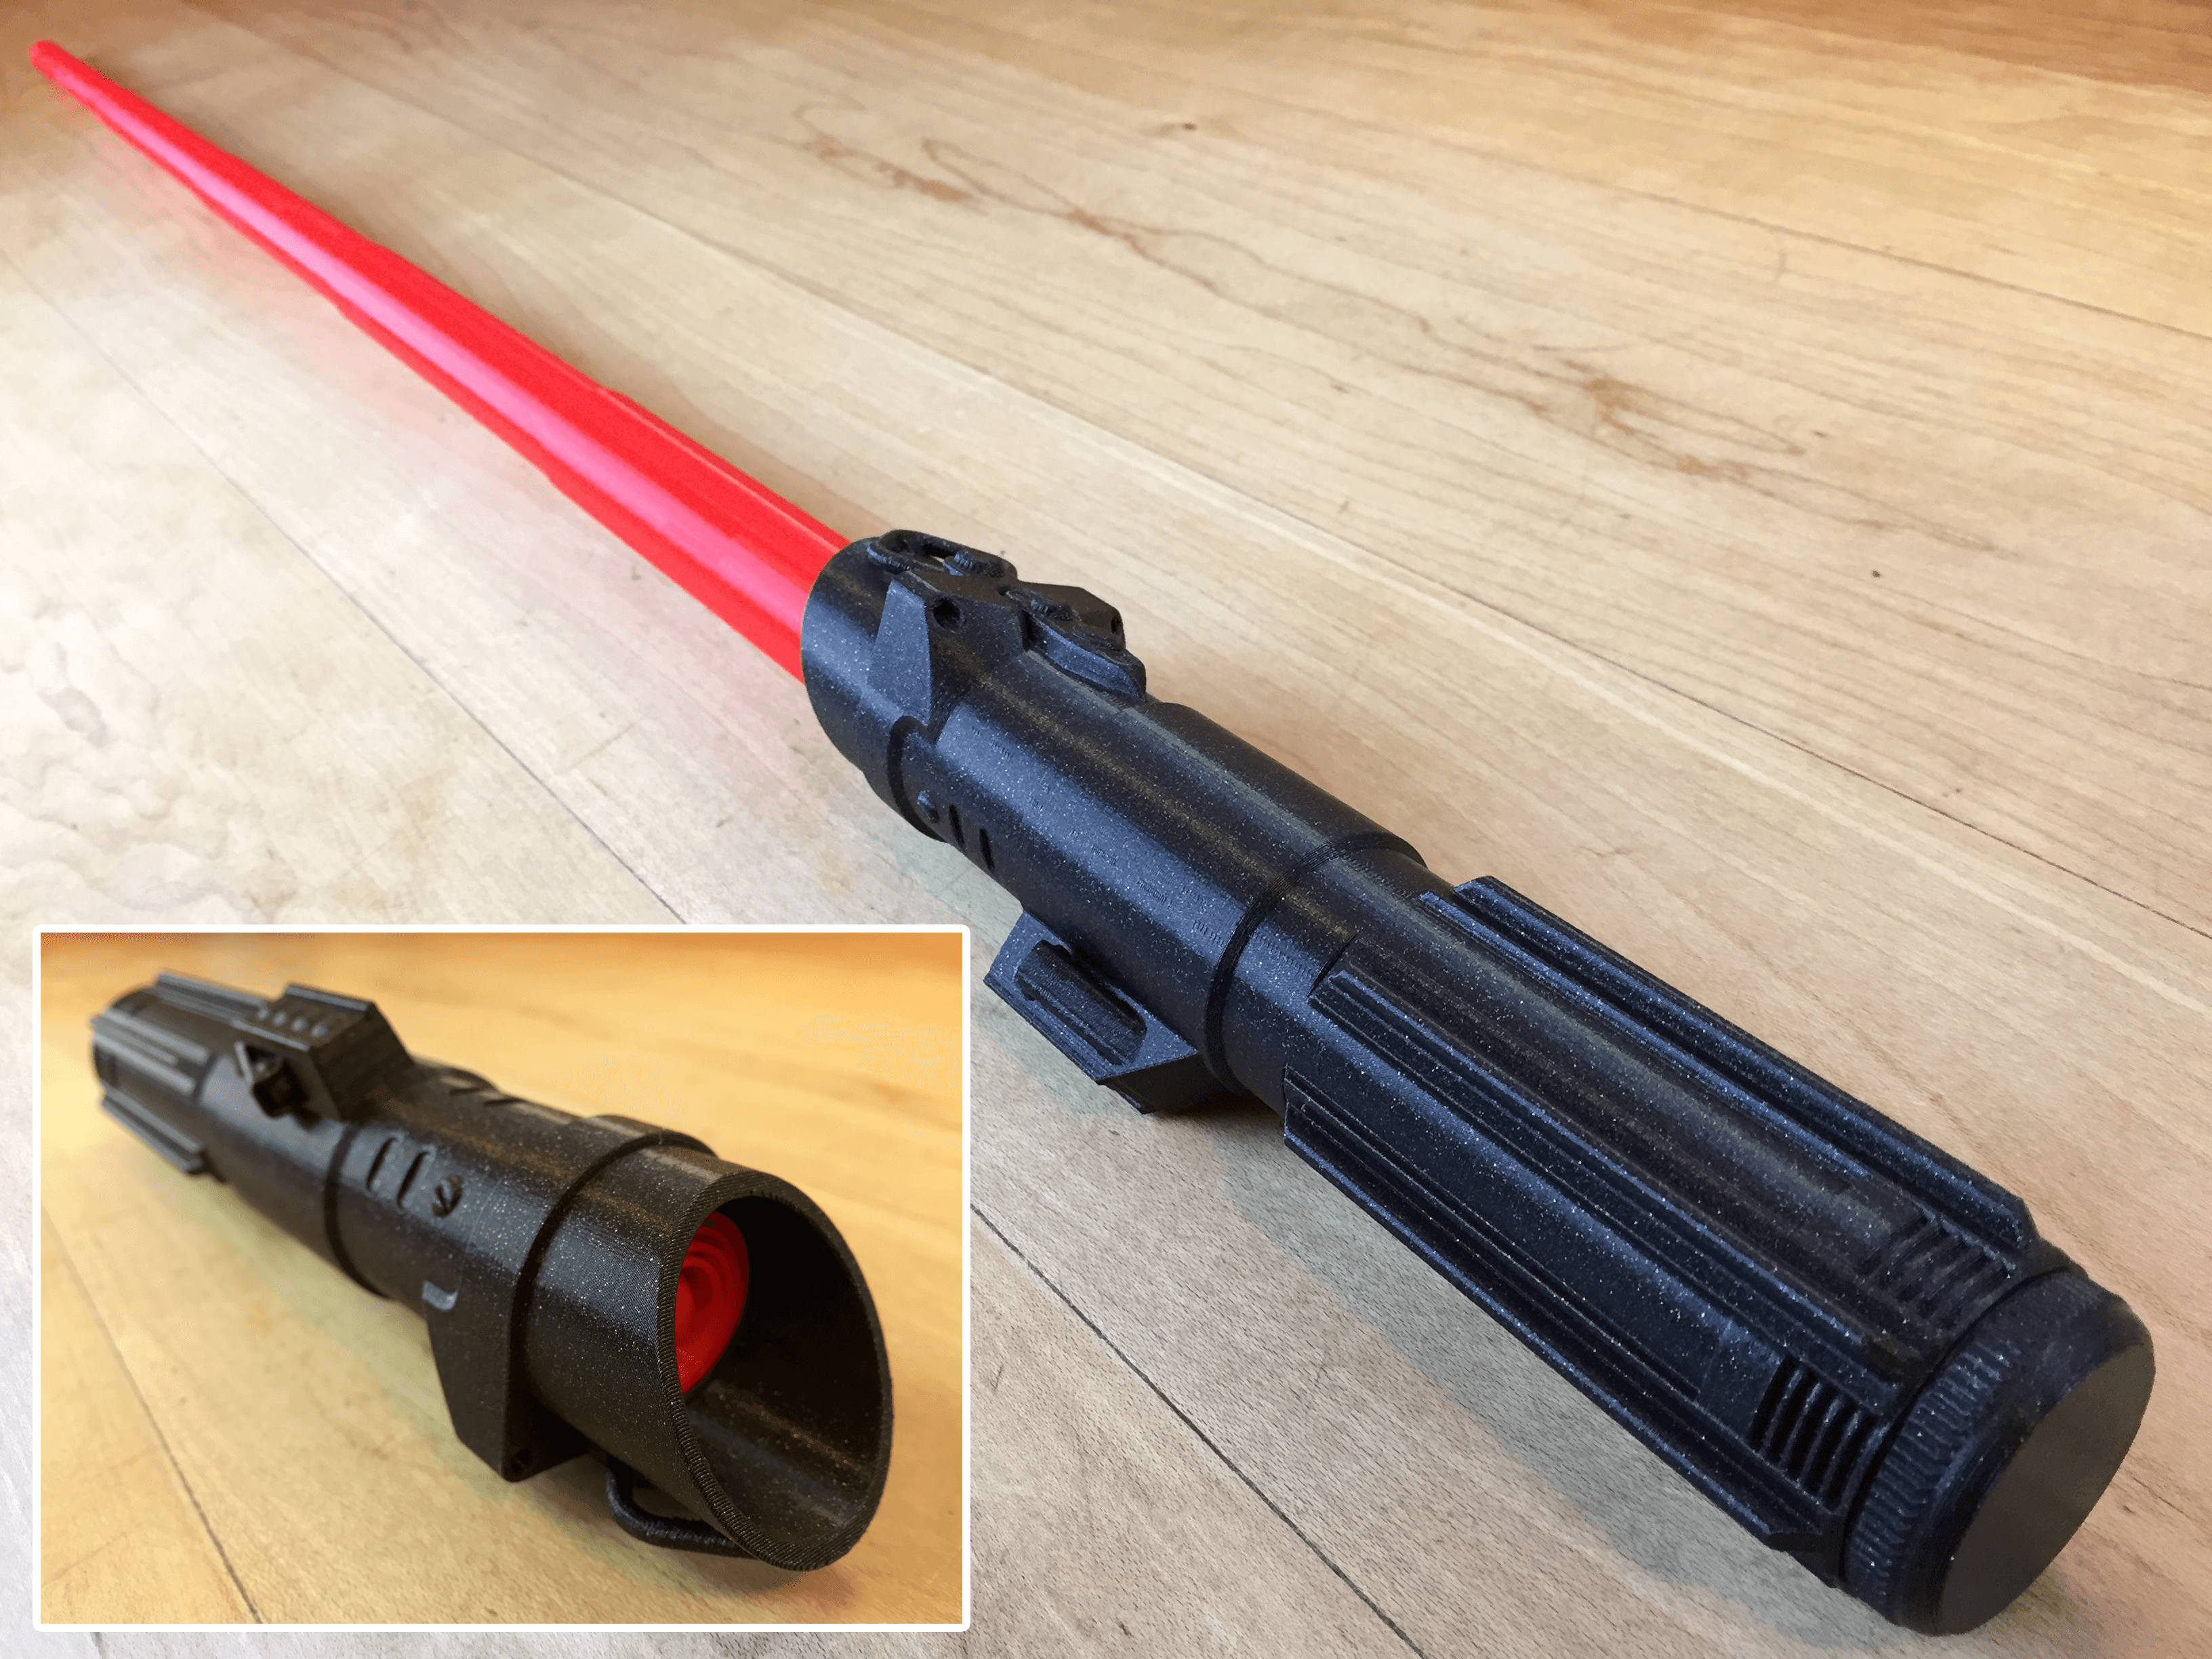
Collapsing Sith Lightsaber

Notebook with pencil case
.png&w=3840&q=75)
do I need to do the settings with the default version