
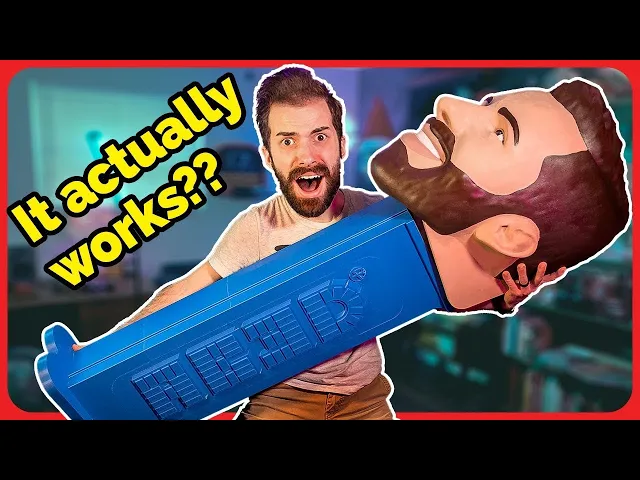


Giant PEZ Dispenser
Important(ish) details:
-
My PEZ dispenser in the video is 12.7x (1270%) scale of the original PEZ dispensers. These files are all at original scale, so you can either match mine, or go bigger!
-
I never actually addressed it in the video (maybe i'll make an instagram/tiktok post about it), but the texture on the side of the dispenser stand is actually an effect i achieved within my slicing software. In Cura, you can select a model and choose to use it to mask certain settings. This is not necessary to get a decent print, but if you want that extra chef's kiss touch, I'll explain the process in detail at the bottom of this post.
-
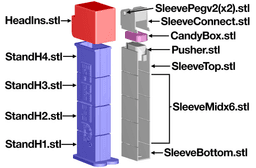
I use shorthand in my filenames too much. In files like "StandHM3.stl", the 'H' stands for 'Holes' (referring to the 4 holes I added to allow metal supports in the corners), the 'M' stands for 'Mask' (referring to the previously mentioned model mask to allow for texturing, also available as a separate file), and the '3' is just to help keep track of the 4 total pieces needed for the full stand.
-
Candy Box v2 has a small notch in one side to make it easier to open, but v1 works fine.
-
This whole project is kind of a work in progress still. I don't really plan on posting a second full video on it, but I never actually found a solution for the spring I'm happy with. If you wanna try forming your own spring from scratch, I included a forming block to get the sizing right. If anyone figures something else out that works better, please let me know. Also the attachment method for the head is garbage- I'm sorry.
-
Refer to my youtube video along with the diagram below for assembly
Shopping List (for 12.7x scale version- if scaling to a different size, please adjust the screw size accordingly):
-
2x 30mm M6 screws (head attachment)
-
4x 3mm or less music wire / metal rod (optional structural supports in corners of stand)
-
Something to use as a spring- I used a couple pieces of music wire bound together to find the right level of springy-ness (you can try different amounts of wire, different gauges, and different material (aluminum, steel, brass) to fine tune it)
-
Good strong adhesive for assembly, like 3D Gloop! or something
Making Your Own Head: I made my own head (included in files) for this project, but you can turn just about anything into a PEZ dispenser head. Just scale it up to the right size, use HeadNeg.stl to remove the bottom and inner cavity (this file also helps in making sure you've scaled your head properly- but adjustments can be made if you know what you're doing), then join the HeadIns.stl file with your head model.
Texturing the Sides: This should be possible in other slicing software, but here's instructions for Cura.
-
Import a StandHM file and its corresponding Mask file (matching numbers)
-
Select both and right click the models to choose "Merge Models" (this should force the models to match up to the proper placement)
-
Scale this piece up to your desired size (mine is 1270%)
-
Right click the model to choose "Ungroup Models" (this separates the models. Depending on what piece you're working with, your Mask model might automatically drop down to the build plate, thus knocking it out of alignment with the Stand model. If this is happening, you'll need to temporarily disable "Automatically drop models to the build plate" in Cura's preferences- just remember to re-enable it AFTER slicing/exporting)
-
Select the Mask model and click "Per Model Settings" from the left sidebar (looks like 4 squares)
-
Choose "Modify settings for overlaps" and change it from "Infill mesh only" to "Cutting mesh"
-
Click "Select Settings" and choose "Fuzzy skin" (if you don't see fuzzy skin, you'll need to enable this experimental feature in your settings- look it up)
-
Enable "Fuzzy Skin" in your overlap settings
Giant PEZ Dispenser

Jar Jar Binks Candy Tongue Lightsaber

Jar Jar Binks Display Tongue (Replacement Monster Mouth Candy Tongue)

Ring Pop Key Rings

Pumpkin Krabs

Rubber Chicken Lightsaber
![Coaster Waffle [FREE] 3d model](/_next/image?url=https%3A%2F%2Fstorage.googleapis.com%2Fproduction-thangs-public%2Fuploads%2Fenhanced_images%2Fv1%2F2bf05f52-ee46-492f-a9e3-b92ffcb5ef9e%2FIMG_5881.heic&w=3840&q=75)
Coaster Waffle [FREE]
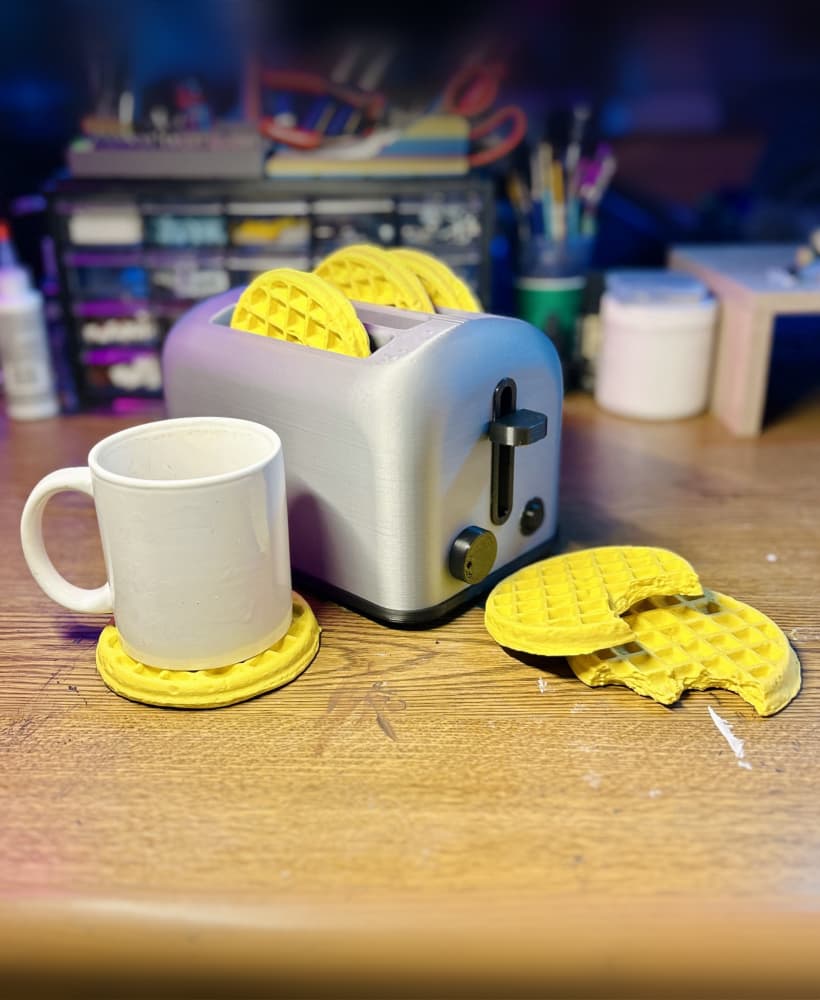
Coaster Waffles with Storage Toaster

Wacky Waving Inflatable Lightsaber

Life Size Minecraft Furnace

Robot Mr. Krabs (Imitation Krabs)

Giant Wii Remote (Functional)

Giant Furby Robot (Coco the Furby Dog)

Human Elf on the Shelf

Wearable Furby Mask

Giant Croc Hat

V2 GIANT Duct Tape Dispenser (Support Free)
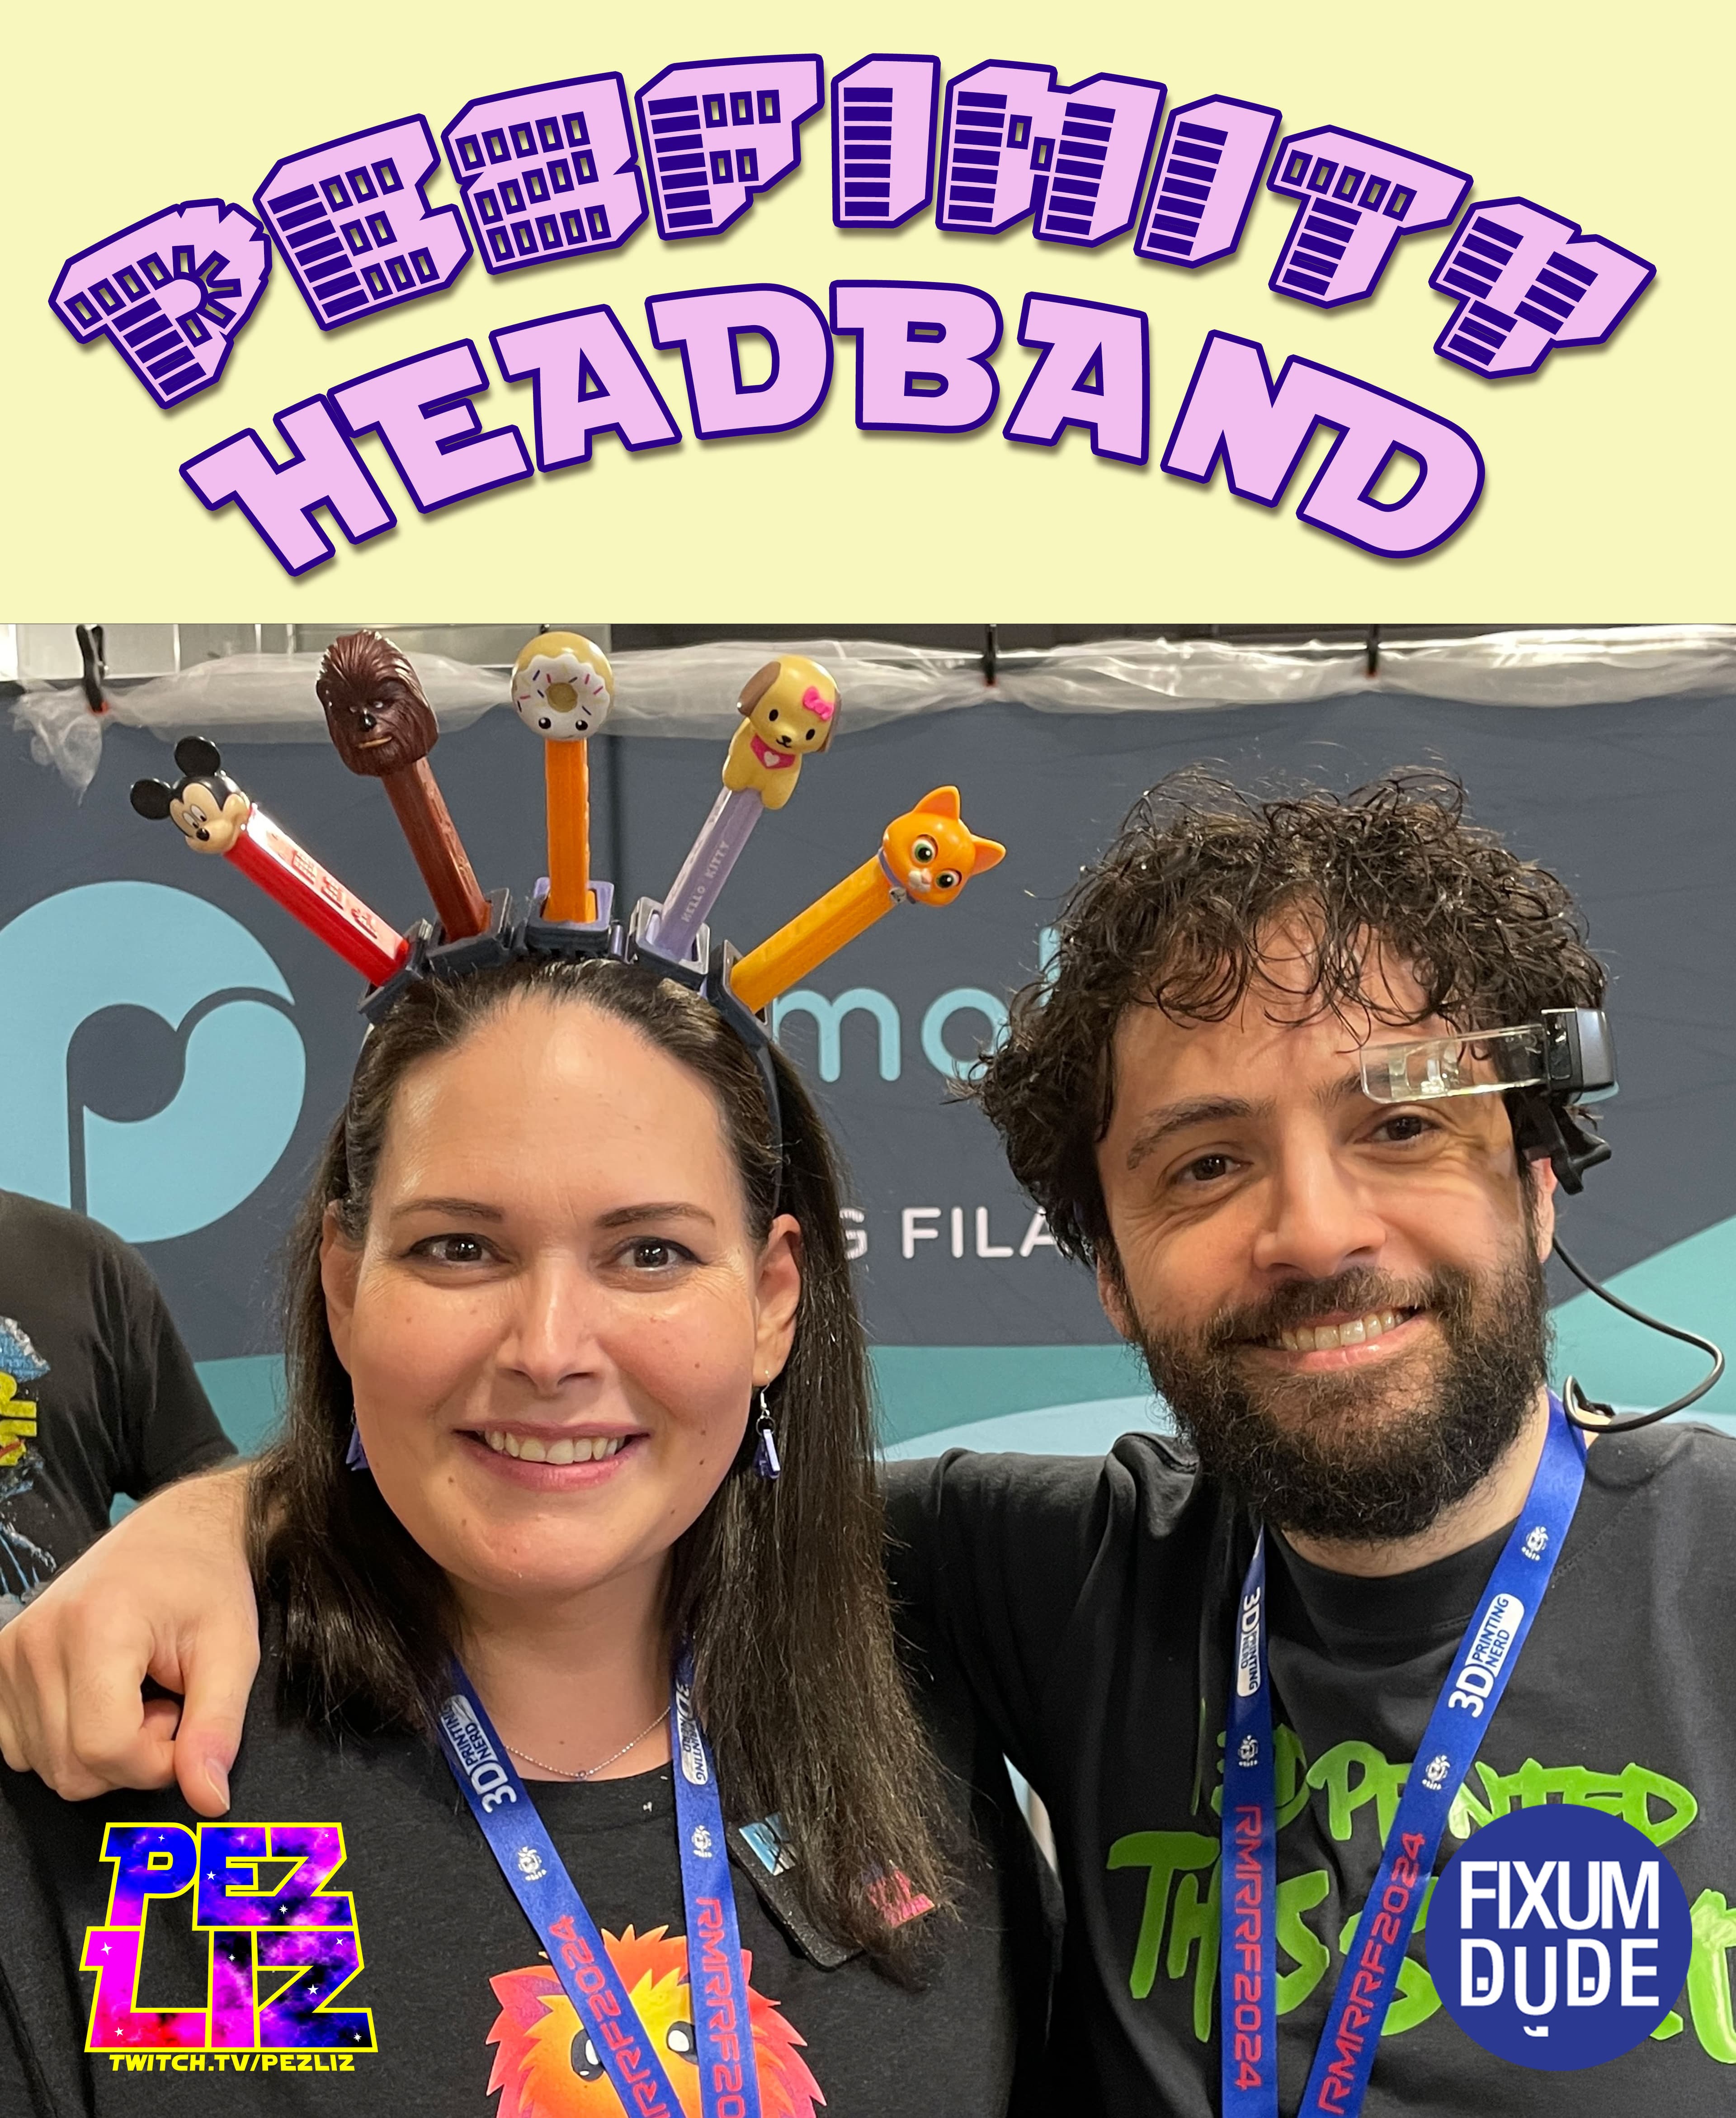
PezFinity Headband

CANDY GAT - THE 3D PRINTABLE CANDY SHOOTER

CandyGat PZ11 - PEZ Shooter
