


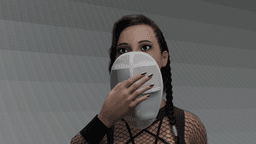


Cage Mask
Cage Mask by Perihelion Prints
Ready to print and wear or display. Perfect for parties, cosplay, or as part of a performance costume.
======
This unique full-face mask, reminiscent of a fencing or kendo mask, serves as a frame for expressing yourself through how you choose to assemble it.
Recommended materials/tools for assembly:
Some sort of thin fabric (tulle recommended) Small magnets (10mm round neodymium magnets recommended) A way to attach the fabric to the mask (hot glue works well)
======
Scaled to fit most adult heads.
For attachment to head, use elastic cord or ribbon. Hot glue should work. For fitting, place the mask on your face. Measure how much ribbon you'll need to go around your head, starting from just above the middle "bars" around your ears. Then add a bit more and cut two equal halves. Glue one to each side of the mask, and use the leftover length to tie both pieces into a knot or bow behind or head. Or you can edit the file to come up with your own solution.
Sculpted in Blender. STL and .blend files included. Dimensions in millimetres.
======
"Character Lyna" used in demo render (https://skfb.ly/6QUtO) by Sunny25 is licensed under Creative Commons Attribution (http://creativecommons.org/licenses/by/4.0/).
"Gothic Girl" used in demo render (https://skfb.ly/oPEAI) by Toni García Vilche is licensed under Creative Commons Attribution (http://creativecommons.org/licenses/by/4.0/).
"Pearl Necklace" used in demo render (https://skfb.ly/6WSM9) by C.U.V is licensed under Creative Commons Attribution (http://creativecommons.org/licenses/by/4.0/).
"Trapless sundress" (https://skfb.ly/6VMr7) by yang_xiaogang is licensed under Creative Commons Attribution (http://creativecommons.org/licenses/by/4.0/).
======
0.20mm layer height recommended.
Works with PLA, PETG, etc.
Filament Usage (estimated): 60m
Printing Time (estimated): 3h45m
^ Estimates based off slicing for Prusa MK3.9. Your mileage may vary.
======
For assembly, start by printing the mask frame. Recommended to print flat, with "snug" supports. See reference image.
This mask is designed to run quite large, in an attempt to cover the majority of faces. Although you may want to do a test print and scale it if you're going for more of a snug fit.
Once the frame is printed, you will need some fabric, and some way to attach it. Tulle fabric is recommended, and you can layer it up to strike a balance between coverage and visibility.
A helpful strategy is to do one half of the mask at a time. Cut out a strip of whatever fabric you want to use, layer it up at this time if you'd like, and place magnets at key points on the frame, on the inside and outside. Note: If you're layering the fabric, keep track of how many layers you are applying so you can keep it consistent on the other half of the mask.
Don't worry about cutting it exactly to fit, in fact you'll want a bit more than you'll need, as you can easily cut off excess later.
Refer to the assembly pictures for reference. Take care to brush out as many wrinkles and folds in the fabric as possible at this time, since you're about to make it permanent. It doesn't have to be perfect, though, just keep in mind the look you're trying to achieve. Be patient at this stage, and work methodically to avoid gaps or creases.
Once you're happy with the position of the fabric, you can attach it with the method of your choice. Hot glue works quite well if you're careful not to make a mess or burn yourself in the process.
Once the glue is set and one half of the fabric is attached, cut off the excess, using the border of the mask to hide any edges of the fabric.
Repeat this process for the other half of the mask, install some sort of ribbon or cord, and voila!

Low-Poly Masquerade Mask

Ornate Masquerade Mask

Princess Masquerade Mask

Princess Mask

Full Face Kitsune Mask

Faceless Doll Mask

DJ Mask

Bat Mask

O-Ring Face Mask

Half Mask

Featureless Mask

Dragon Queen Mask

Farfalla (Butterfly) Masquerade Mask

Volto Bianco Mask

Valence - Set of 8 Blank Full-Face Masquerade Masks

Cat Mask
.png&w=3840&q=75)
Set of 4 Half Masquerade Masks

Moretta/Servetta Muta - Venetian Masquerade Mask

Wolf Masquerade Mask
