
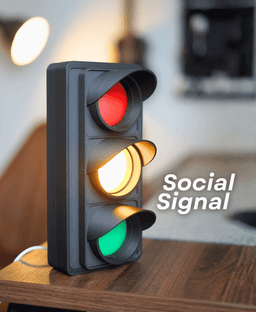


Social Signal
Instructions Hardware Filaments
Social Signal - Intermediate The best way to signal if you don't want to be bothered. Use it outside your room to let people know if you're feeling antisocial OR if you're just busy with work.
Mounts on your wall or rests on your desk The stop light is designed so it can sit on your desk, or mount on the wall. Use it in your home office, or outside your room. You can mount it to the wall using command strips
How does it work? The puck light sits in a track inside the social signal. Theres a slider on the side so you can change the color based on how busy you are. Magnets hold the light in place.
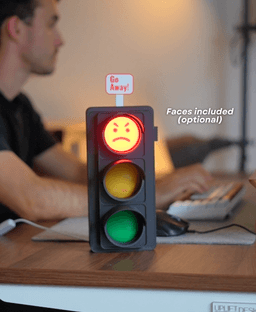
The colors aren't actually a different light. They are printed lenses! Heat up the lens, press it in the form, and you gets a nice curved lens. You can use a heat gun or hot water to heat the lens. If you are using hot water I was able to by microwaving a mug of water for 2 minutes and 30 seconds

PlayBook'd LUDO

Cactus Cluster

PlayBook'd Tic Tac Toe

Lucky Bamboo Mahjong

PlayBook'd - Go

Telephones Booth

Spinny Succulents - Pack III

Desktop Golf Gen 2

PlayBook'd - Playing Cards

Desktop Dumpster
PlayBook'd Cribbage

PlayBook'd Crosswords

Snack Attack - Gen 2
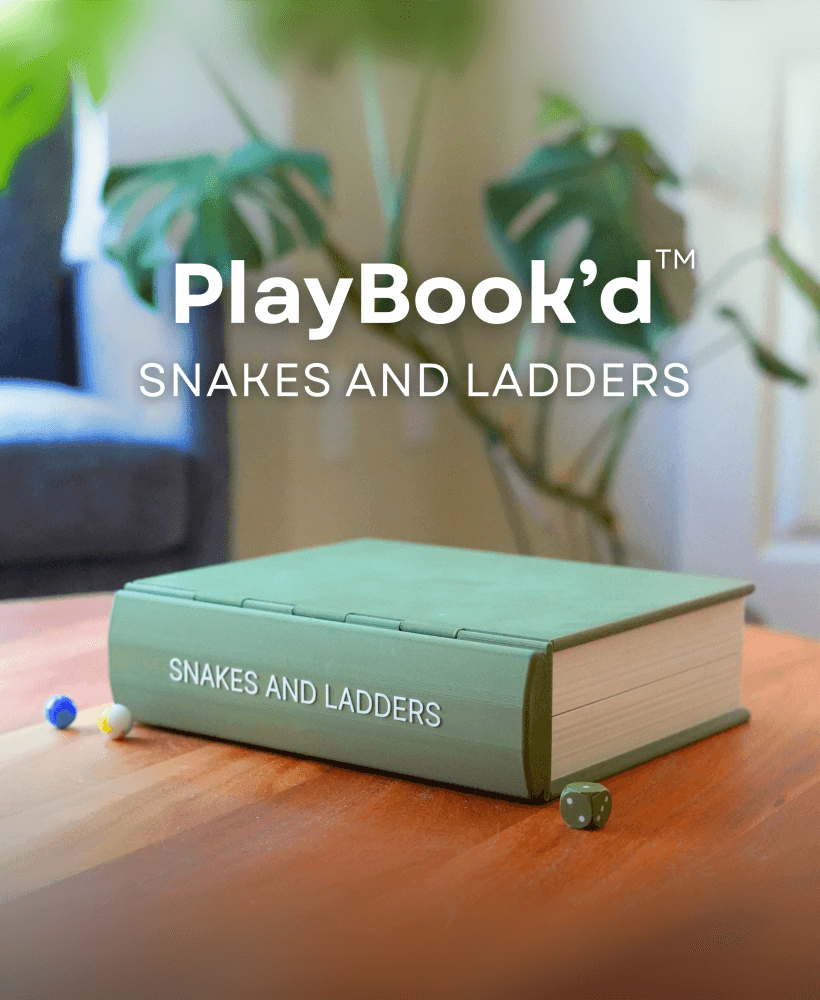
PlayBook'd Snakes and Ladders
.png&w=3840&q=75)
Date Night Daisy
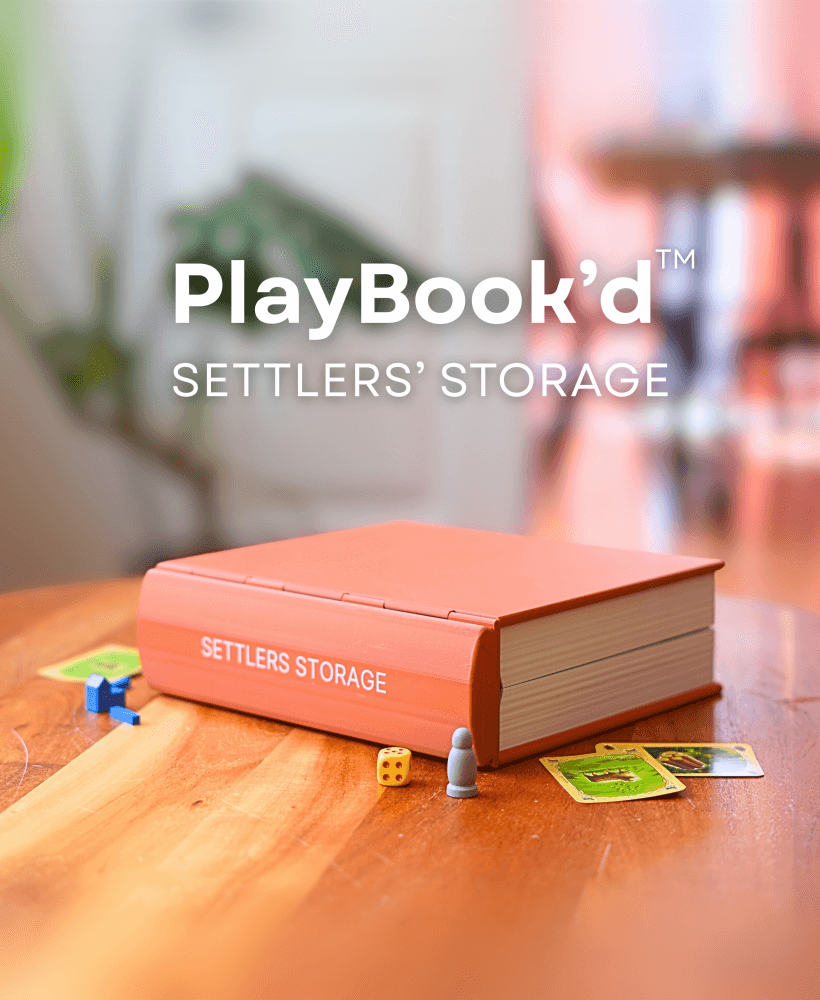
PlayBook'd Settlers' Storage

Scoopy Stacks

Butterfly Fridge Magnets - Pack II

Playbook'd - Checkers
The holes seem way undersized for 5x3 magnets. I have the exact same ones linked from above that I got on Amazon, but the aren't going in, even with trying to tap in with a hammer.
Anyone else having this problem and if so, how did you get around it? Really don't want to waste filament and reprint after modifying the model and increasing the diameters a bit
Hi! I’m sorry to hear you’re having trouble with the magnet holes. They’re designed with our standard tolerances for press-fit magnets, but depending on print settings and filament type, the fit can sometimes be a bit tight. You can gently warm the area with a heat gun or lighter to slightly soften the plastic; this usually helps the magnets slide in more easily. I also like to use a magnet pen, which makes pressing them in much simpler.
Hello, I have a K2 Plus and is giving me an error raft first layer expansion -1 not in range and tree support wall count -1 not in range do you know what is that means?
Hi, That does sound frustrating. It is likely that this is happening because we have manually painted tree supports on this model in the Bambu Labs 3mf. The best fix for this would be to download Bambu Studio and slice the file straight from there to print. It is very user friendly and free to use. It will also make printing a lot smoother since you get all of our recommended settings in the 3mf aswell.
Bambu studio has been having the same error codes too lately. No idea what is going on again most likely a glitch idk
That's very annoying. What error code did you see?
Bambu labs puck light is gone. What can I use instead?
Hi! You can usually find alternative ones on Amazon
I recently downloaded and printed this model. I love it but the files differs somewhat from what is seen here. The "Traffic Light V4 - Housing.stl" portion of the model has no bar, as shown in pictures and instructions, to help keep the light cable from getting caught up; it is missing the slot for the sign to pop out. Additionally, no objects for the sign or faces are included in the file.
Hi, This model was last updated on 10/20/25. in the recent update we did change a few things as well as add some. The bar was causing issues with the wires rubbing on it and after prolonged use it was fraying the wire; so we made the decision to remove it. As or the faces and sign, they should be in the 3mf. They are each on their own individual plate to keep it organized.
A customer reached out to me requesting 4 color light for her group home for people with disabilities. The colors would be red, yellow, orange & green. Is it possible?
That is a great Idea; right now we only have a 3 light option. I can add the idea to the list of possibilities for the future though.
Just a shot in the dark, has anyone utilized puck lights off amazon? Don't mind ordering from bambu, amazon is just a lot faster
This puck light on amazon will also work. It is the same one we use for the night light lilies.
What temp did you use for the heat gun to shape the colors, and for how long? I'm at this step and don't want to cook them if i can keep from it. Thanks in advance!
Hi, you just want them warm enough to be able to shape. My heat gun is just hi, low, and off; so I do medium for like 15 seconds (depends on how hot your heat gun gets). The lens should start warping when its hot enough
Definitely use your own discretion. You will know when it is hot enough because the lens will immediately start forming to the mold. You can always heat is up and try again if it doesn't come out right the first try
I had the same error in Bambu Studio, but fixed it with the auto arrange then it sliced correctly. Give that a go and see if it works for you as well.