1.5K downloads · 1 year ago · [Instructions](https://prinnit.com/ForgeCore/design/369rdVTq3soDP6AkqDOSHtfCLLf?tab=instructions&hig · View this model's project page to learn more
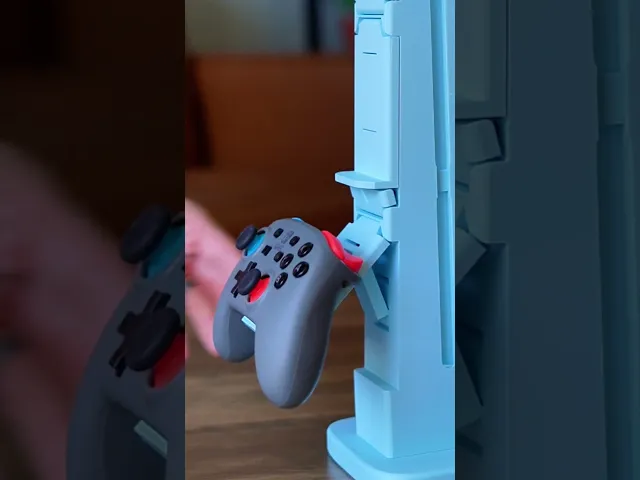
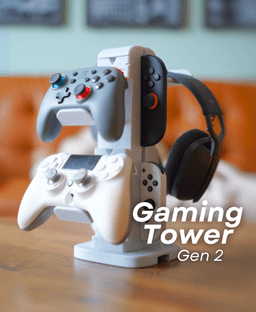
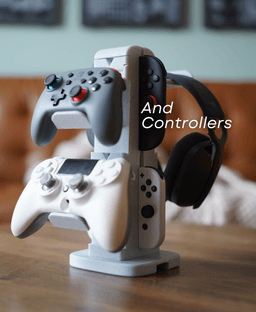
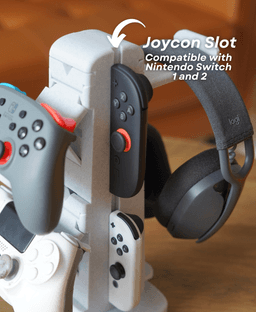
My original Gaming Tower was one of my most popular designs. But that was over a year ago, and it doesn't work with the Switch 2. So I cleaned up the look, added charging ports, and updated it to work with the new Nintendo switch
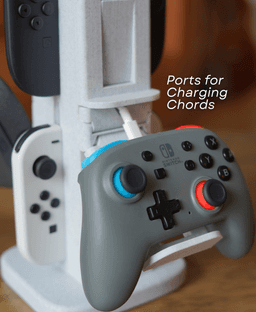
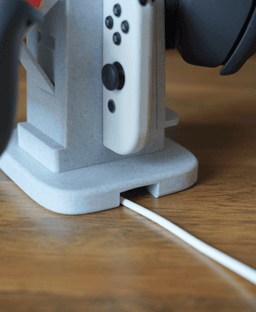
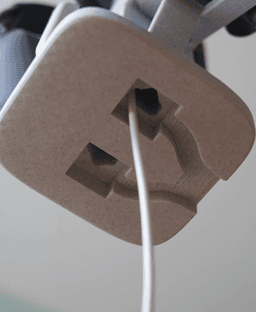
Built in Charging
Each Holder has a hole for a charger. You can hide your charges inside, and plug in your controller between gaming sessions. This keeps your chords tidy and right where you need them.
Adaptable
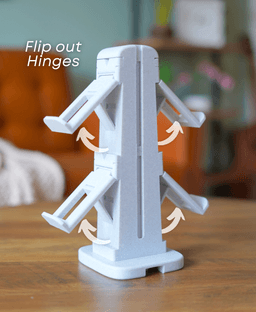
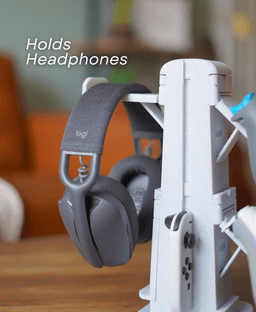
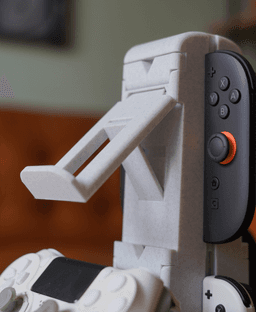
The hinges have 2 positions, which lets you use them for controller OR headsets. whatever suits your setup
Easy Printing and Assembly
The entire Gaming Tower prints in place on your printer. Drop the tower down onto the threaded base and enjoy the satisfying spin as it assembles itself.
For anyone printing this, make sure that the bridges are oriented correctly. In order to get a good print in Bambu Slicer, I had to add modifiers to adjust bridges above cable channels, as it was trying to bridge the whole length of the channel, instead of the width.
I have a question for you. How much time does it take to think of a new design, then start designing the model, and then after, trouble shoot it. Also after you could post the new design.
more than you might think. Most designs take 30+ hours of work from ideation to final model. Some less, sometimes way more. Depends how complex the model is, how many iterations there are, and if it requires new skills
Unsure why this is happening, but mine doesn't sit flush, and my usb-c holes at the bottom don't like up? It's completely flush but on like a 45 degree angle, the tower faces the corner of the base... Any solution for this, I just printed as instructed, and didn't change anything print settings wise.
Hi! It looks like maybe it didn't screw on properly, but that is an easy fix. I would suggest unscrewing it and trying to screw it together starting at a different position. After a try or two it should line up.
Awesome print. Came out great first try! I was wondering how you keep your switch controllers from being right on top of eachother. Yours seems to be secured in above the other one where as mine are sitting right on top of eachother.
Thanks for sharing! My spacing looks different because I used a switch 2 controller and a regular switch controller to show that both types can fit on the tower!
This model is been a disaster for me :( It became spagethi 4 times came out of the build plate and when i put it down to print at night it ruined the whole printer and my a1 is now completely broken. For your upcoming designs i recommend to be easier to stick to the build plate.
I’m sorry to hear the print gave you such a tough time; that sounds really frustrating. Bed adhesion can sometimes be tricky depending on the plate and surface condition you have. A helpful tip is to wash the plate with warm water and a little dish soap to remove any residue, then apply a thin layer of a washable glue stick before printing (for pei plate). This usually helps the first layers stick reliably and can prevent the print from coming loose.
Hi, thanks for sharing the picture. It looks to me like the pole may just need a bit of super glue to stay in place. That should be a quick and simple fix to get it secured. Hope this helps!
I know it can feel a little inconvenient, but it can’t be set up as one integrated unit in the file since that would make it less sturdy. For a strong, lasting hold, we recommend using glue as a permanent solution, as mentioned in the Helpful Instructions.









.png&w=3840&q=75)




Thank you for sharing!
For anyone printing this, make sure that the bridges are oriented correctly. In order to get a good print in Bambu Slicer, I had to add modifiers to adjust bridges above cable channels, as it was trying to bridge the whole length of the channel, instead of the width.
Thank you for the feedback! Just updated the file to correct this!
Finally, even though there was no response, my suggestion on IG was viewed... thank you so much!!
Took me a bit, but finally got to it!
I have a question for you. How much time does it take to think of a new design, then start designing the model, and then after, trouble shoot it. Also after you could post the new design.
more than you might think. Most designs take 30+ hours of work from ideation to final model. Some less, sometimes way more. Depends how complex the model is, how many iterations there are, and if it requires new skills
Hi! It looks like maybe it didn't screw on properly, but that is an easy fix. I would suggest unscrewing it and trying to screw it together starting at a different position. After a try or two it should line up.
Thanks for sharing! My spacing looks different because I used a switch 2 controller and a regular switch controller to show that both types can fit on the tower!
This model is been a disaster for me :( It became spagethi 4 times came out of the build plate and when i put it down to print at night it ruined the whole printer and my a1 is now completely broken. For your upcoming designs i recommend to be easier to stick to the build plate.
I’m sorry to hear the print gave you such a tough time; that sounds really frustrating. Bed adhesion can sometimes be tricky depending on the plate and surface condition you have. A helpful tip is to wash the plate with warm water and a little dish soap to remove any residue, then apply a thin layer of a washable glue stick before printing (for pei plate). This usually helps the first layers stick reliably and can prevent the print from coming loose.
Hi, thanks for sharing the picture. It looks to me like the pole may just need a bit of super glue to stay in place. That should be a quick and simple fix to get it secured. Hope this helps!
Can it be set up as one integrated unit in the file?
I know it can feel a little inconvenient, but it can’t be set up as one integrated unit in the file since that would make it less sturdy. For a strong, lasting hold, we recommend using glue as a permanent solution, as mentioned in the Helpful Instructions.