
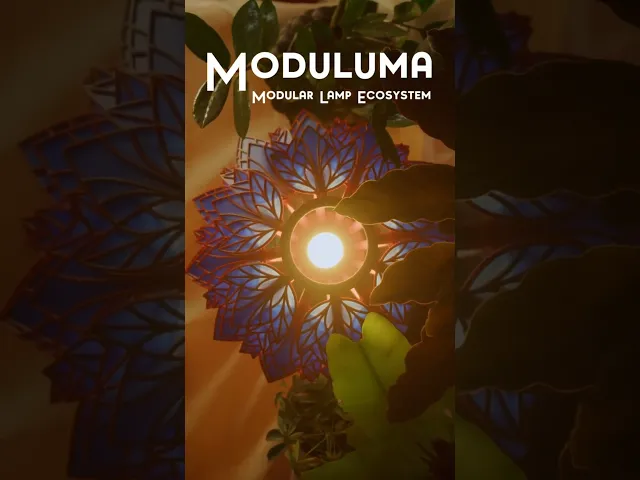


Moduluma - Prisma Petal Add-On
This is the Prisma Petal Addon for the Moduluma Lamp Ecosystem!
The Moduluma Ecosystem is a modular lamp system where vases, shades, inlays, and decorative elements can be freely combined to create countless unique designs. Every part is interchangeable, tool-free, and designed for easy assembly, giving you endless freedom to create lamps that fit your style and space.
The Prisma Petal is a modified version of the already existing lamp, retrofitted into the Moduluma Lamp Ecosystem. While the leafs are not interchangeable with the new leafs, its a great addition to the system, giving one new shade design for combination with the Moduluma Vases.
How to Print: Print the number of leaf parts indicated in the print plate description, depending on which lampshade you are using.
How to Build Your Moduluma Lamp: Print all the parts you need for your build:
One Vase + 4 x Clips Inlays for the Modular Vases (if using a modular vase) Prisma Petal Lamp Shade: 1x Moduluma Base 1x Top Ring 7x Spline Odd 7x Spline Even Leaf 1 x 21 Leaf 2 x 28 Leaf 3 x 28 Leaf 4 x 14 (in total 91 Leafs) Assembly Steps:
Prepare the Vase: Press-fit the inlays into the Modular Vase if you’re using one. As parts are mirrored, insert them all the same way—either with the print-plate side facing out or all facing in.
Insert Clips: Press-fit the clips into the top side of the vase. Add Fixture: Insert your lamp fixture (E14, E27, or Bambu Lab LED kit).
Build the Shade: Attach all splines (Spline Even and Spline Odd) to the base and put the top connector ring on top of the splines.
Clip the leaf parts to the splines: Sort the leafs by size: The smallest is Leaf 1, and the largest is Leaf 4. Attach the leafs in the following order: For Spline Even: 1 - 2 - 3 - 4 - 3 - 2 - 1 For Spline Odd: 1 - 2 - 3 - 4 - 3 - 2 Start by inserting Leaf 1 (the smallest) into the top slot of each spline. Connect Shade and Vase: Position the finished shade above the vase and press-fit it onto the clips. Take care not to slip; if the fit is tight, press gradually around the lamp in sections until secure.
Cable Management: Route the cable into the slot at the bottom of the vase. Your lamp is now finished and decorated with the lush, clustered design of the Triple Leafs. If you have any questions or run into issues, feel free to reach out anytime!
Moduluma - Prisma Petal Add-On

Moduluma - Orbiflora Lampshade Add-On

Moduluma - Organic Lampshade 2 Colors

Moduluma - Arboris Shade Addon

Moduluma - Florahedron Lampshade Add-On

Moduluma - Organce Lampshade One Color

Moduluma - Modular Shade Downwards

Moduluma - Modular Upward Shade

Moduluma - Lotus Shade

Moduluma Modular Vase Big

´Moduluma - Modular Vase

Moduluma - Big Spiral Vase

Moduluma - Vase Spiral

Moduluma - Small Vase

Moduluma - Big Modern Vase

Moduluma - Leaf Art Nouveau

Moduluma - Techy Leaf

Moduluma - Autumn Leaf

Moduluma - Leaf Crystal

Moduluma Modular Vase Insert Bark
