


Not So XL Rudolph
140 downloads · 8 months ago · Not So.. XL Rudolph. For smaller build plates under 300x300x300
🦌 Not So.. XL Rudolph Assembly Guid
This model is restricted by licensing terms.
View license.
Not So.. XL Rudolph. For smaller build plates under 300x300x300 🦌 Not So.. XL Rudolph Assembly Guide Preparation & Printing Notes Welcome to the Not So.. XL Rudolph build! Please review these essential tips before assembly.
- Glue Recommendation As with all XL models, permanent assembly requires glue.
- Recommendation: Kraft Protz 3D Printing Glue
- Link: https://amzn.eu/d/1XxcmFe
- Model Size & Tolerances The XL Rudolph has fewer components than previous XL models.
- Connectors: are designed with a higher tolerance on the Not So Xl version to allow for scaling down if you want to make it smaller. If fitment is too loose (due to printer/filament tolerances), you may scale the connectors up by 1-2%.
- Testing: Always print a small part and its connector first to test the fit before printing larger pieces.
- Dry Build: Perform a dry assembly (without glue) first to ensure everything aligns properly.
- Supports & Print Settings Supports are required for some parts of the model.
- Settings: Default tree supports are active. To ensure easy removal, set the top Z distance to 0.275.
- Filament Saving: Advanced users can manually paint on supports only to critical areas to save filament.
- Surface Finish: The front and back face pieces are the most heavily supported, but the supported areas will not be visible once assembled. After support removal, a little heat can be used to slightly smooth the surface finish before final fitment.
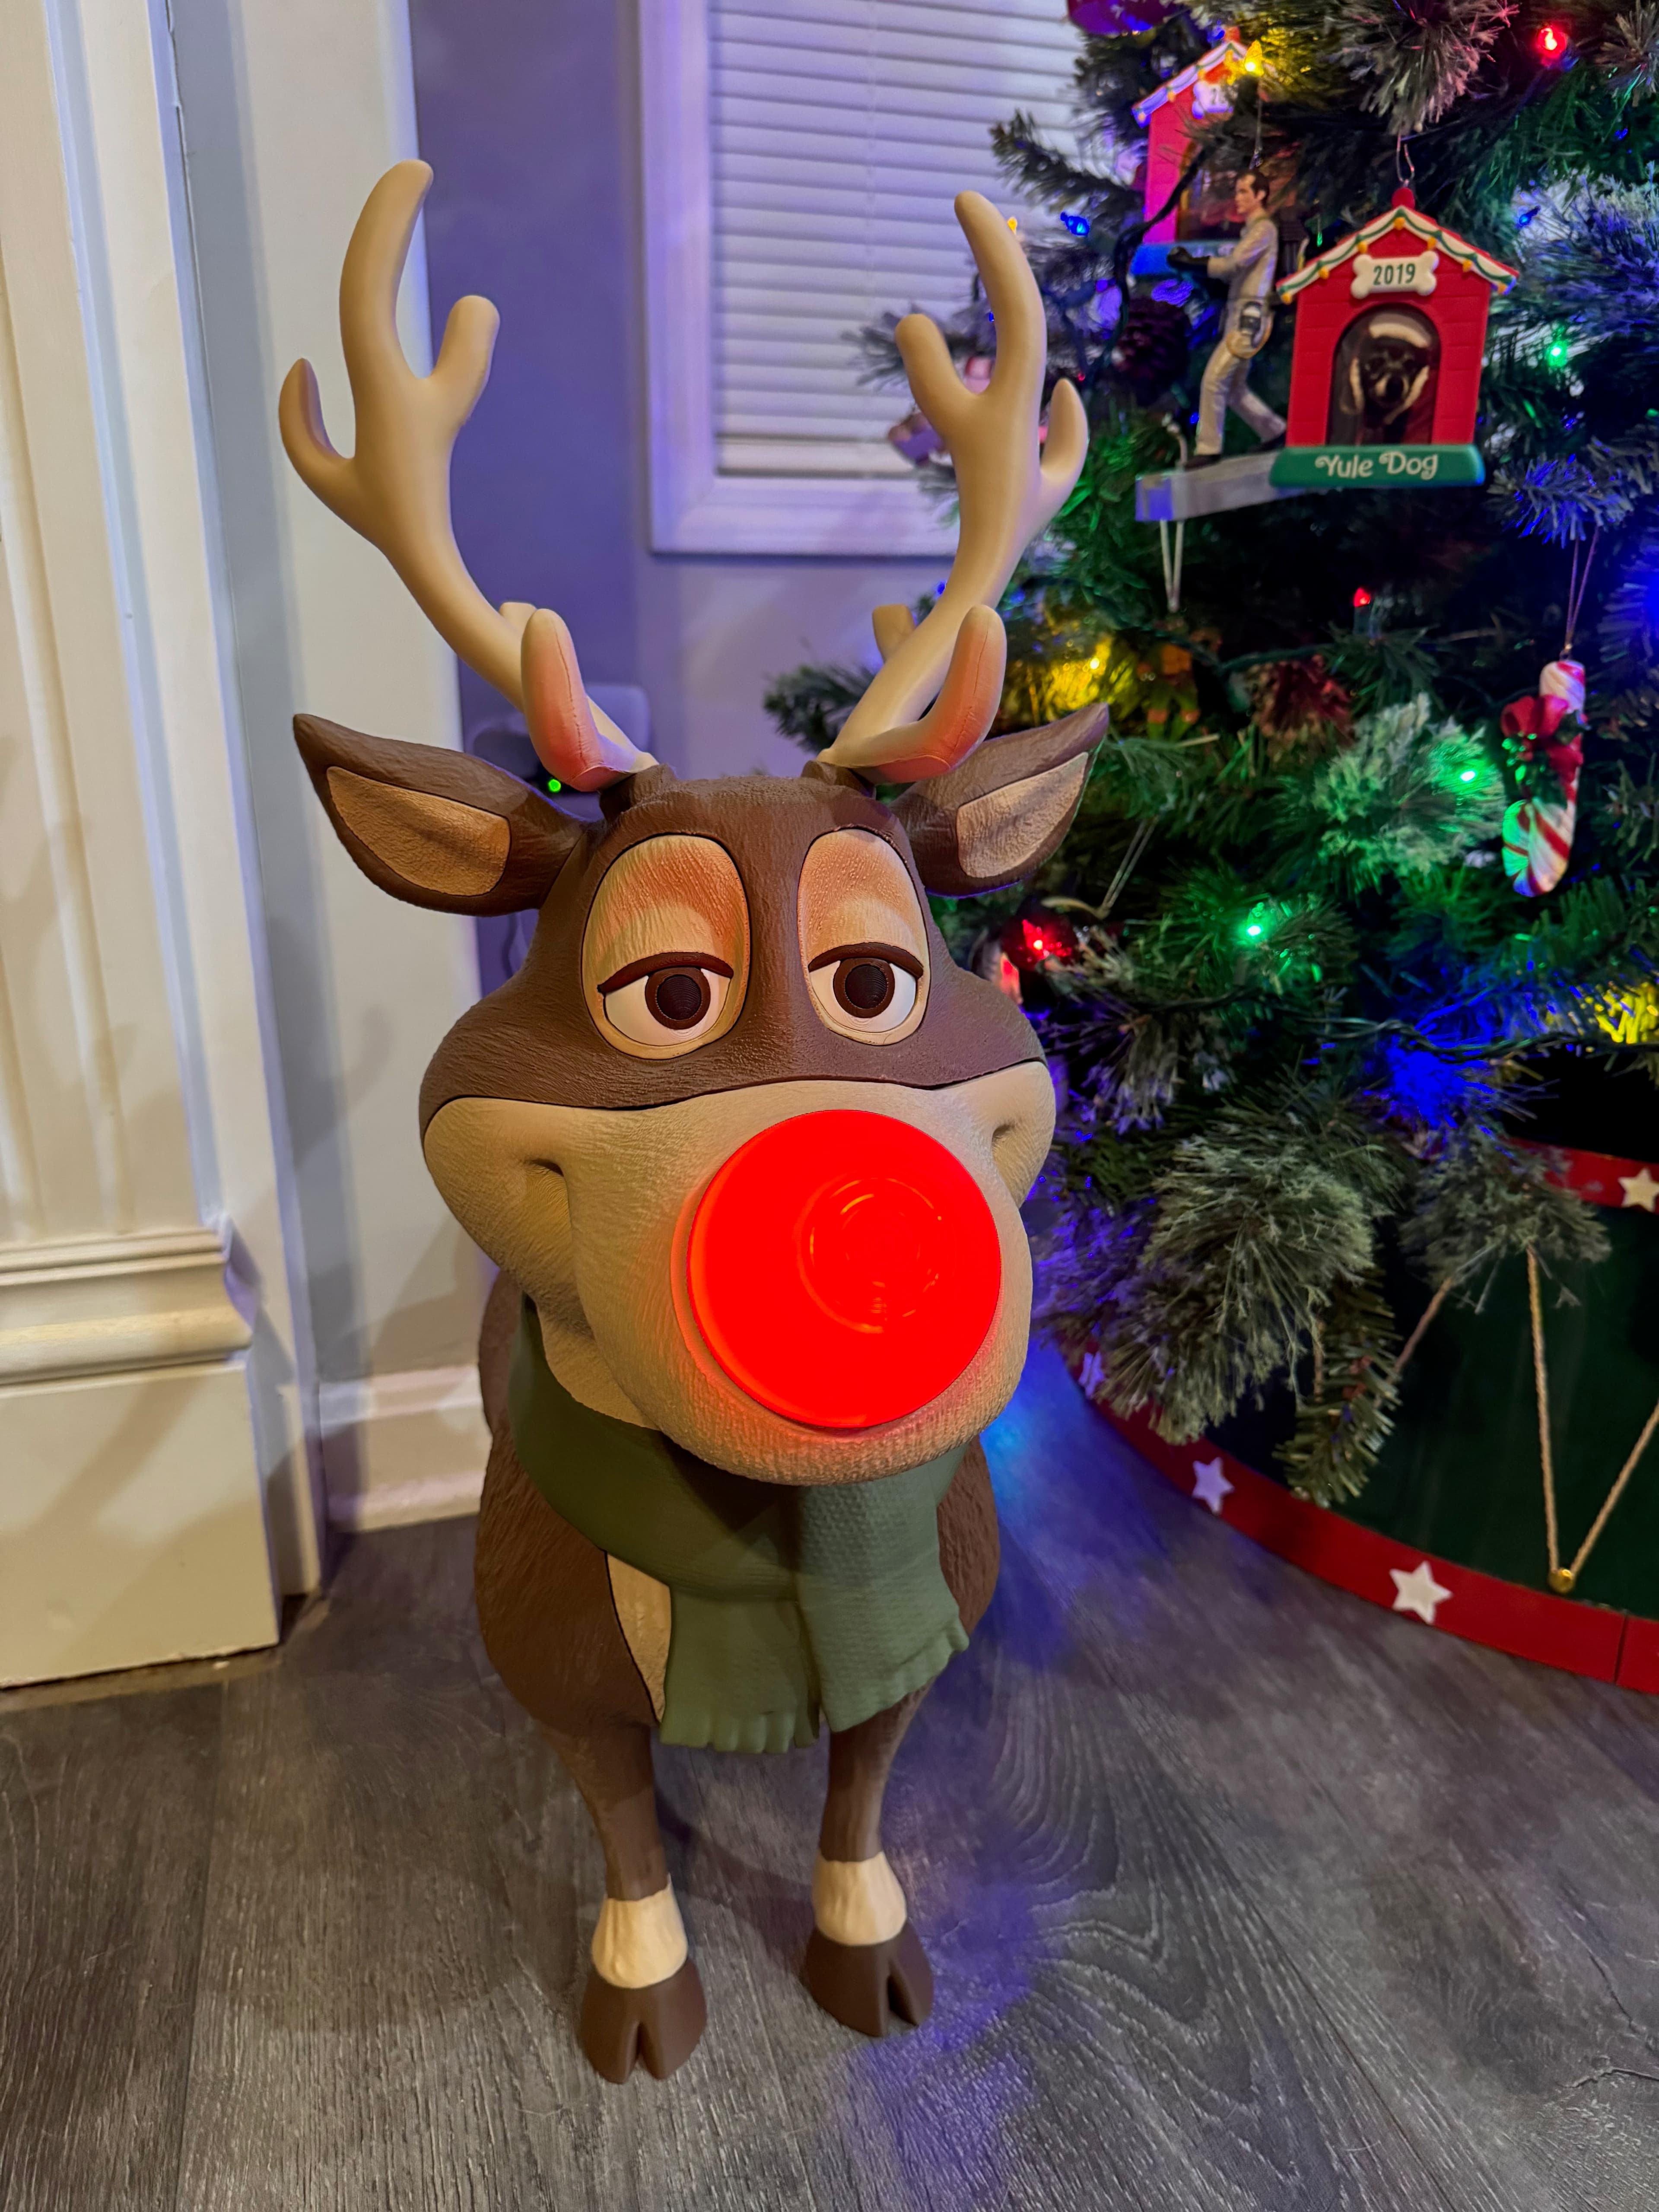
- Lighting Options for the Nose The nose can be illuminated using two methods:
- Option 1: A standard 38mm tea light.
- Option 2: An LED light puck up to 6cm in diameter.
- Filaments Used (Example)
- Bambu Matte: Dark Brown, Bone White, Dark Green, Dark Blue (for the scarf, dependent on your model choice).
- Bambu Basic: Dark Brown, White, Black.
- Bambu Transparent PLA: Red (for the illuminated nose). Step-by-Step Assembly A. Legs and Lower Body
- Start with the four feet and insert one leg connector into each.
- Slide the ankle part onto each assembly. Be organized: The named parts are similar but only fit one way (left/right).
- Slide on the leg tops. B. Body and Scarf
- Attach the front body main and back body sections together using four large connectors.
- Attach the four completed leg assemblies to the body using four more large connectors.
- Attach the chest piece to the front body using two large connectors.
- Attach the scarf using four large connectors. C. Head and Features
- Assemble the two head pieces (front and back) using two connectors.
- Attach the complete head to the scarf using four large connectors.
- Eyes: Assemble the eyes in four parts. The first three parts slot together without connectors. Keep track of left and right; they only fit one way. The complete eye assembly attaches to the head using one connector.
- Ears: Slot the ear inner into the ear outer using a connector. The completed ear then attaches to the head using a second connector.
- Antlers: Connect the antlers to the head using a small connector. D. The Nose (Final Step) The nose attaches to the head using a twist lock mechanism (regardless of whether you printed it in transparent or regular PLA).
- 38mm Tea Light Option: The tea light slots in snugly. provides a gentle flicker g glow. but not very bright.
- LED Light Puck Option: Secure the puck, typically using the sticky back provided with the light. a nice bright constant light. 🎉 Congratulations! You have successfully completed your XL Rudolph!
Not So XL Rudolph
140 downloads · 8 months ago in and
This model is restricted by licensing terms.
View license.

Not So XL Reaper

XL Reaper

Melted Round Pumpkin

Melted Long Pumpkin

Kevin the Snail

Double indent Pain sensory fidget

Witches Hand with Cauldron

Not So XL Scarecrow (for smaller build plates below 300x300x300)

XL Scarecrow (for larger build plates above 320x320x320)

Monsterpus

Zebra Pot

Contemporary Bird House

Wenwan, Fidget Walnuts

Heart Payment Wand End

Zombie Dragon Bust

Triple Clicker pain sensory fidget

Happy Planter

World Cup Trophy Replica

Plain Goose update pack

what color filament is it