
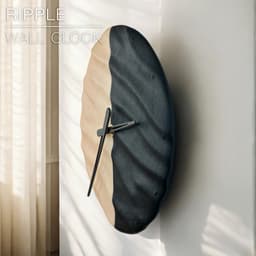
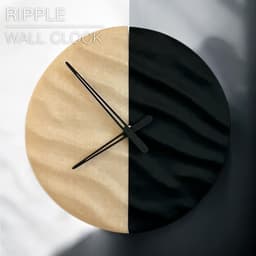


RIPPLE | Wall Clock
RIPPLE | Wall Clock
I live on the coast of Normandy, France, And I just love the effect of these sand ripples that I see walking on the beach everyday. So I decided to design a clock mimicking that ripple effect.
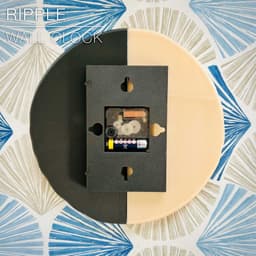
It works with the Bambu Lab clock component kit. You can get the kit here: For Europe: https://eu.store.bambulab.com/fr-fr/products/clock-components-kit-011?srsltid=AfmBOorrbUASumrEKti8oM6RF0oeaRubrHdPqrEL0nJlS-HAr-_ctC0l
You can fix the base to the wall with a screw. Or if you want a rental friendly solution, you can use 2 Large velcro adhesive strips.
You can get the 3M COMMAND adhesive strips from Amazon here: (Large size, velcro type) For Europe: https://amzn.to/41td4CI For America: https://amzn.to/4igRrfQ
Happy printing!
DIMENSIONS (Medium) | Ø 240 mm Print two half-clocks L240mm, thickness 15mm.
3D PRINT SETTINGS: All STL files are already oriented properly. You need to print 3 parts:
- 2 half-clock plates in the colour of your choice
- a base plate to fix on the wall and fix the two clock plates together.
- 2 dovetail locks, to secure the base to the clock plates
CLOCK PLATES: Go with normal print settings.
- set perimeter walls to 2
- set infill to about 15% That's it.
FUZZY SKIN: You can add a bit of fuzzy skin, to make the clock plates look a bit sandy.
- fuzzy skin point distance: 0.3mm
- fuzzy skin thickness: 0.1mm Don't go higher than 0.1mm for the fuzzy skin thickness, otherwise it will affect the tolerance between the base plate and the dovetails on the back of the clock plates.
BASE: No particular tricks for these two parts. I used 0.2mm per layer and 20% infill. No fuzzy skin.
CLOCK HANDS: Print with 0.2mm per layer. The fit should be just right, but it can vary depending of the brand of PLA you use. If it's too tight or too loose, try scaling the clock-hands up or down by 0.02% (so scale up with 1.02%, or scale down with 0.98%).
Happy printing!

SAKURA | Scalable Pencil Holder

SYZYGY | Heart Vase, scalable

ARYZ Plus | Pendant light E26/27

CARLA | Table Lamp E14 & E26/27

CAPA | Corner Soap Dish

MINKY | Desktop bin

GRANO | Desktop bin
CALIZ | Woven Table Lamp E14 & E26/27

ORIGAMI STILT | Table Lamp E14, E26, E27 print-in-place

MALLA MINI | Woven Table Lamp E14/26/27

MALLA | Woven Pendant light E26/27

FREYA | Standing Planter Pot

DOLCE | Indoor Planter Pot

NEST | Wicker Tissue Box
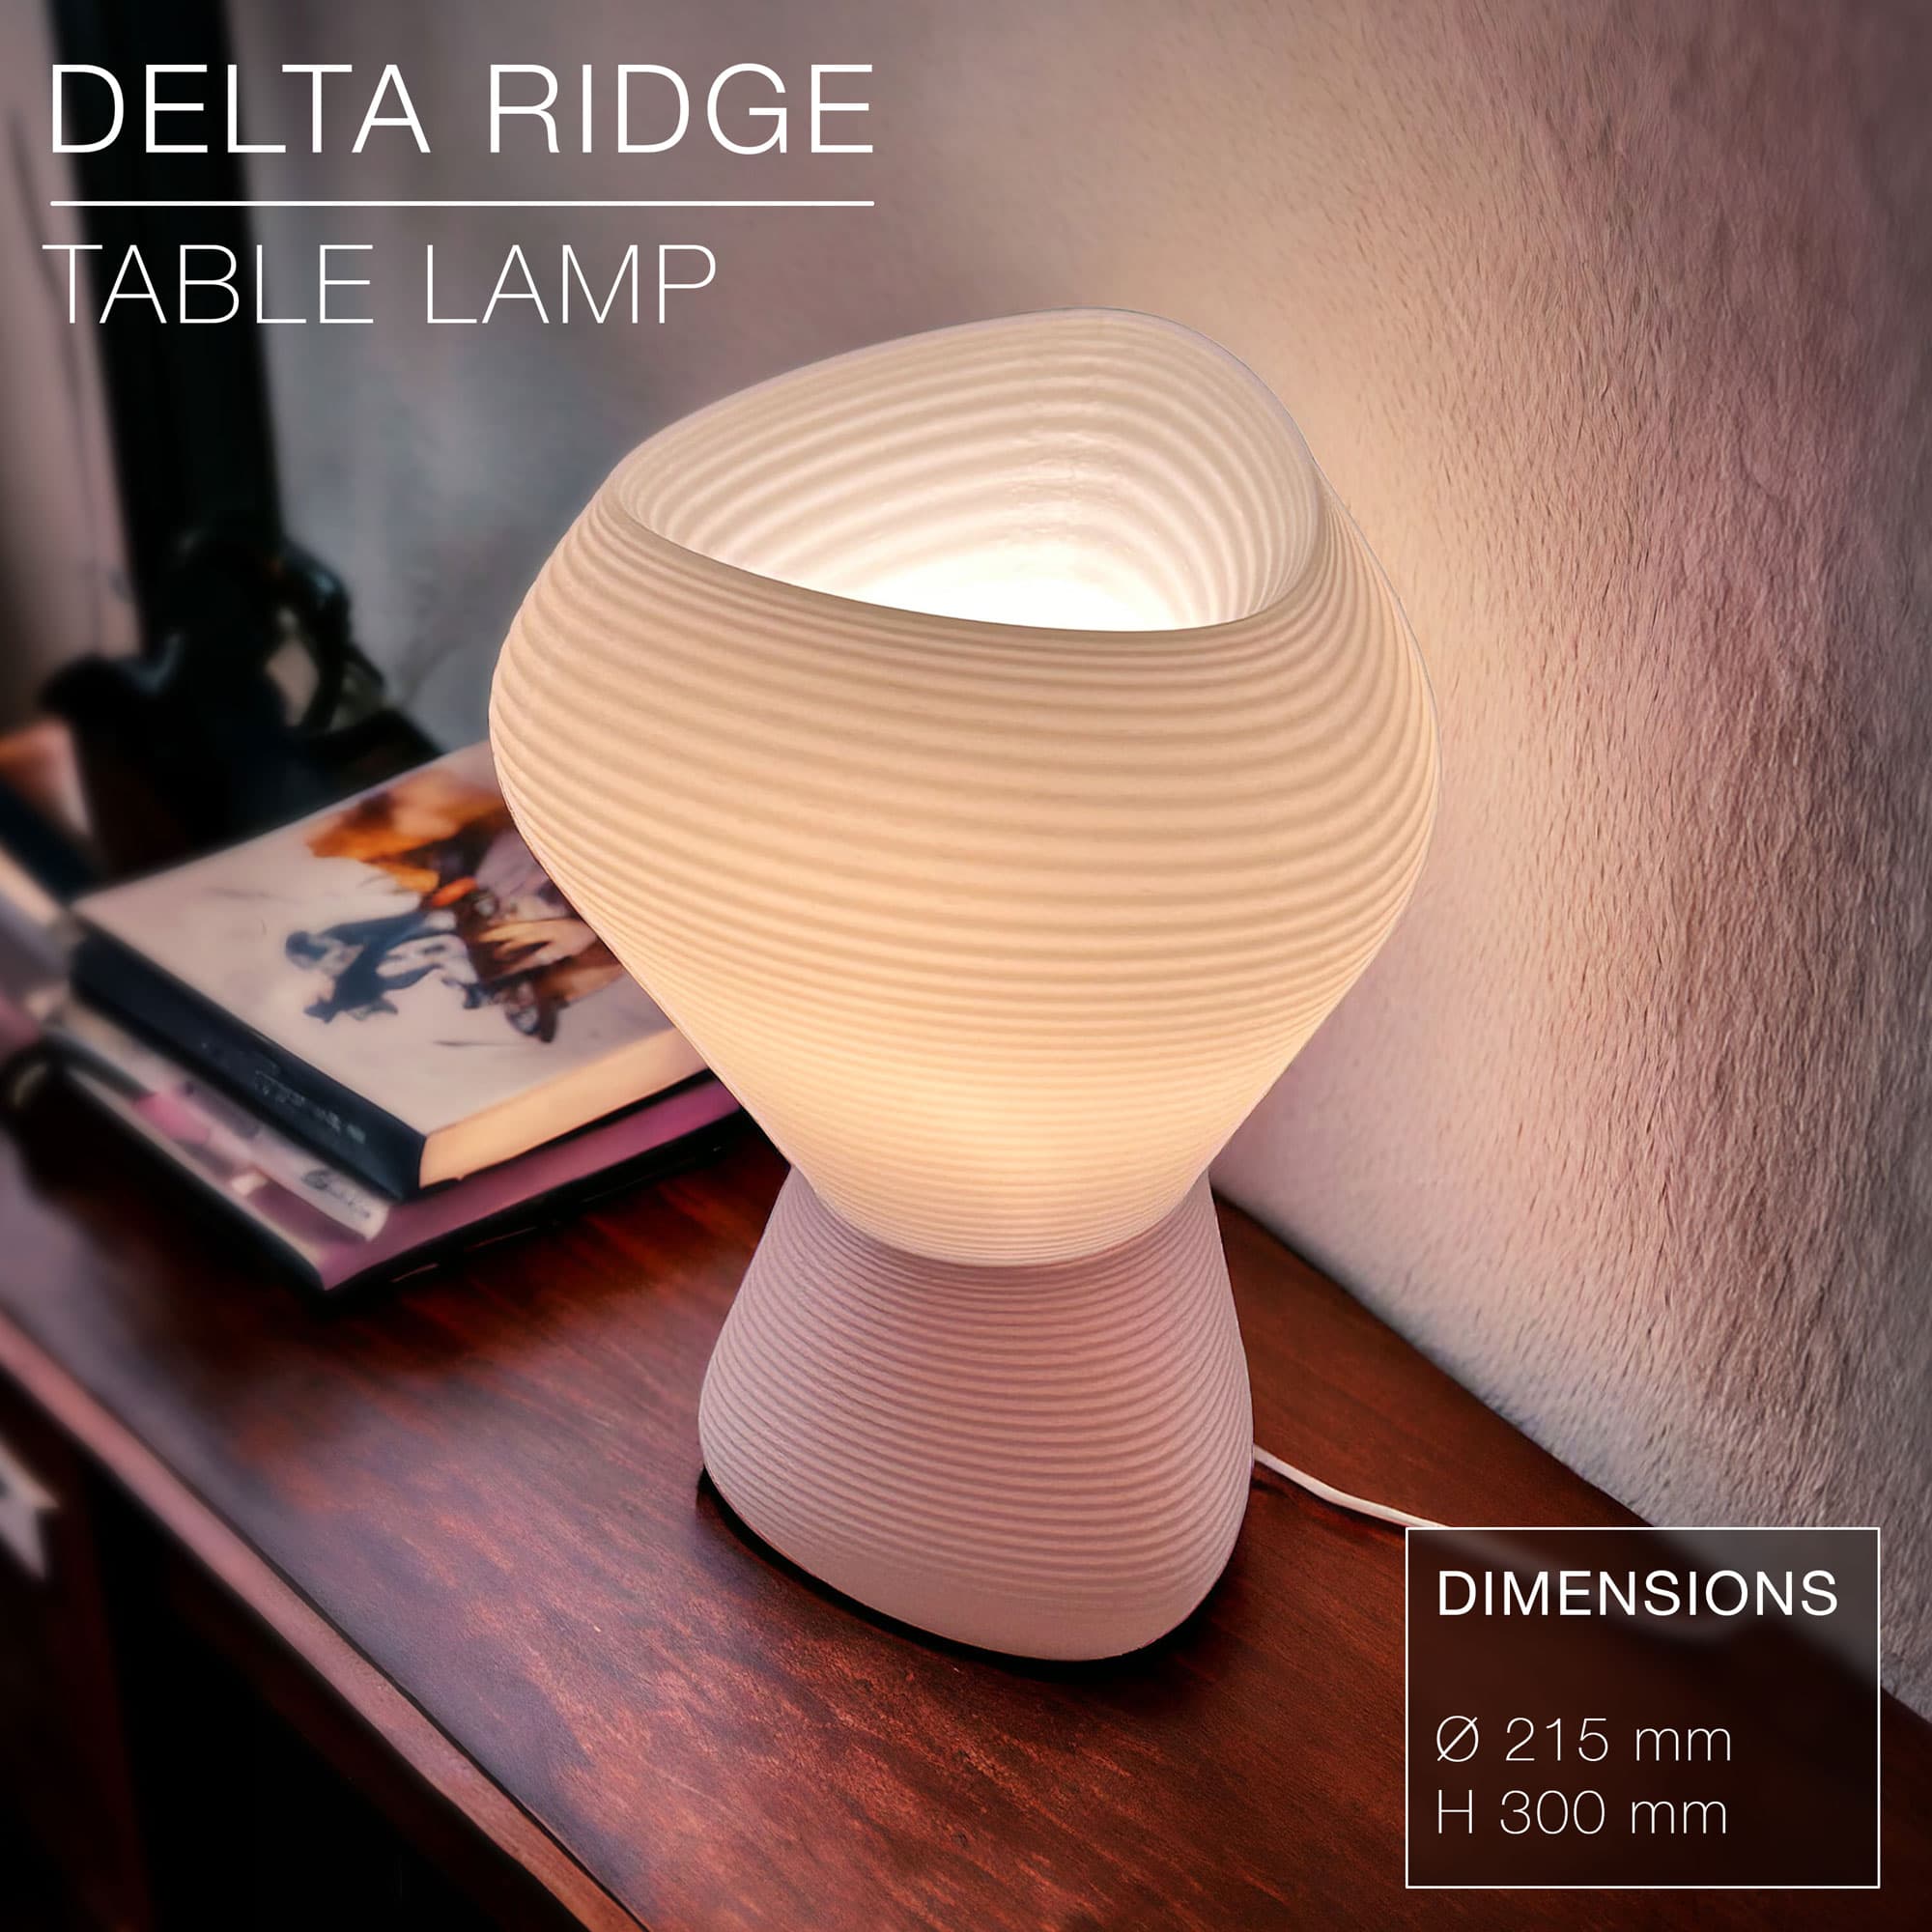
DELTA RIDGE | Table lamp E14 & E27 fast-print
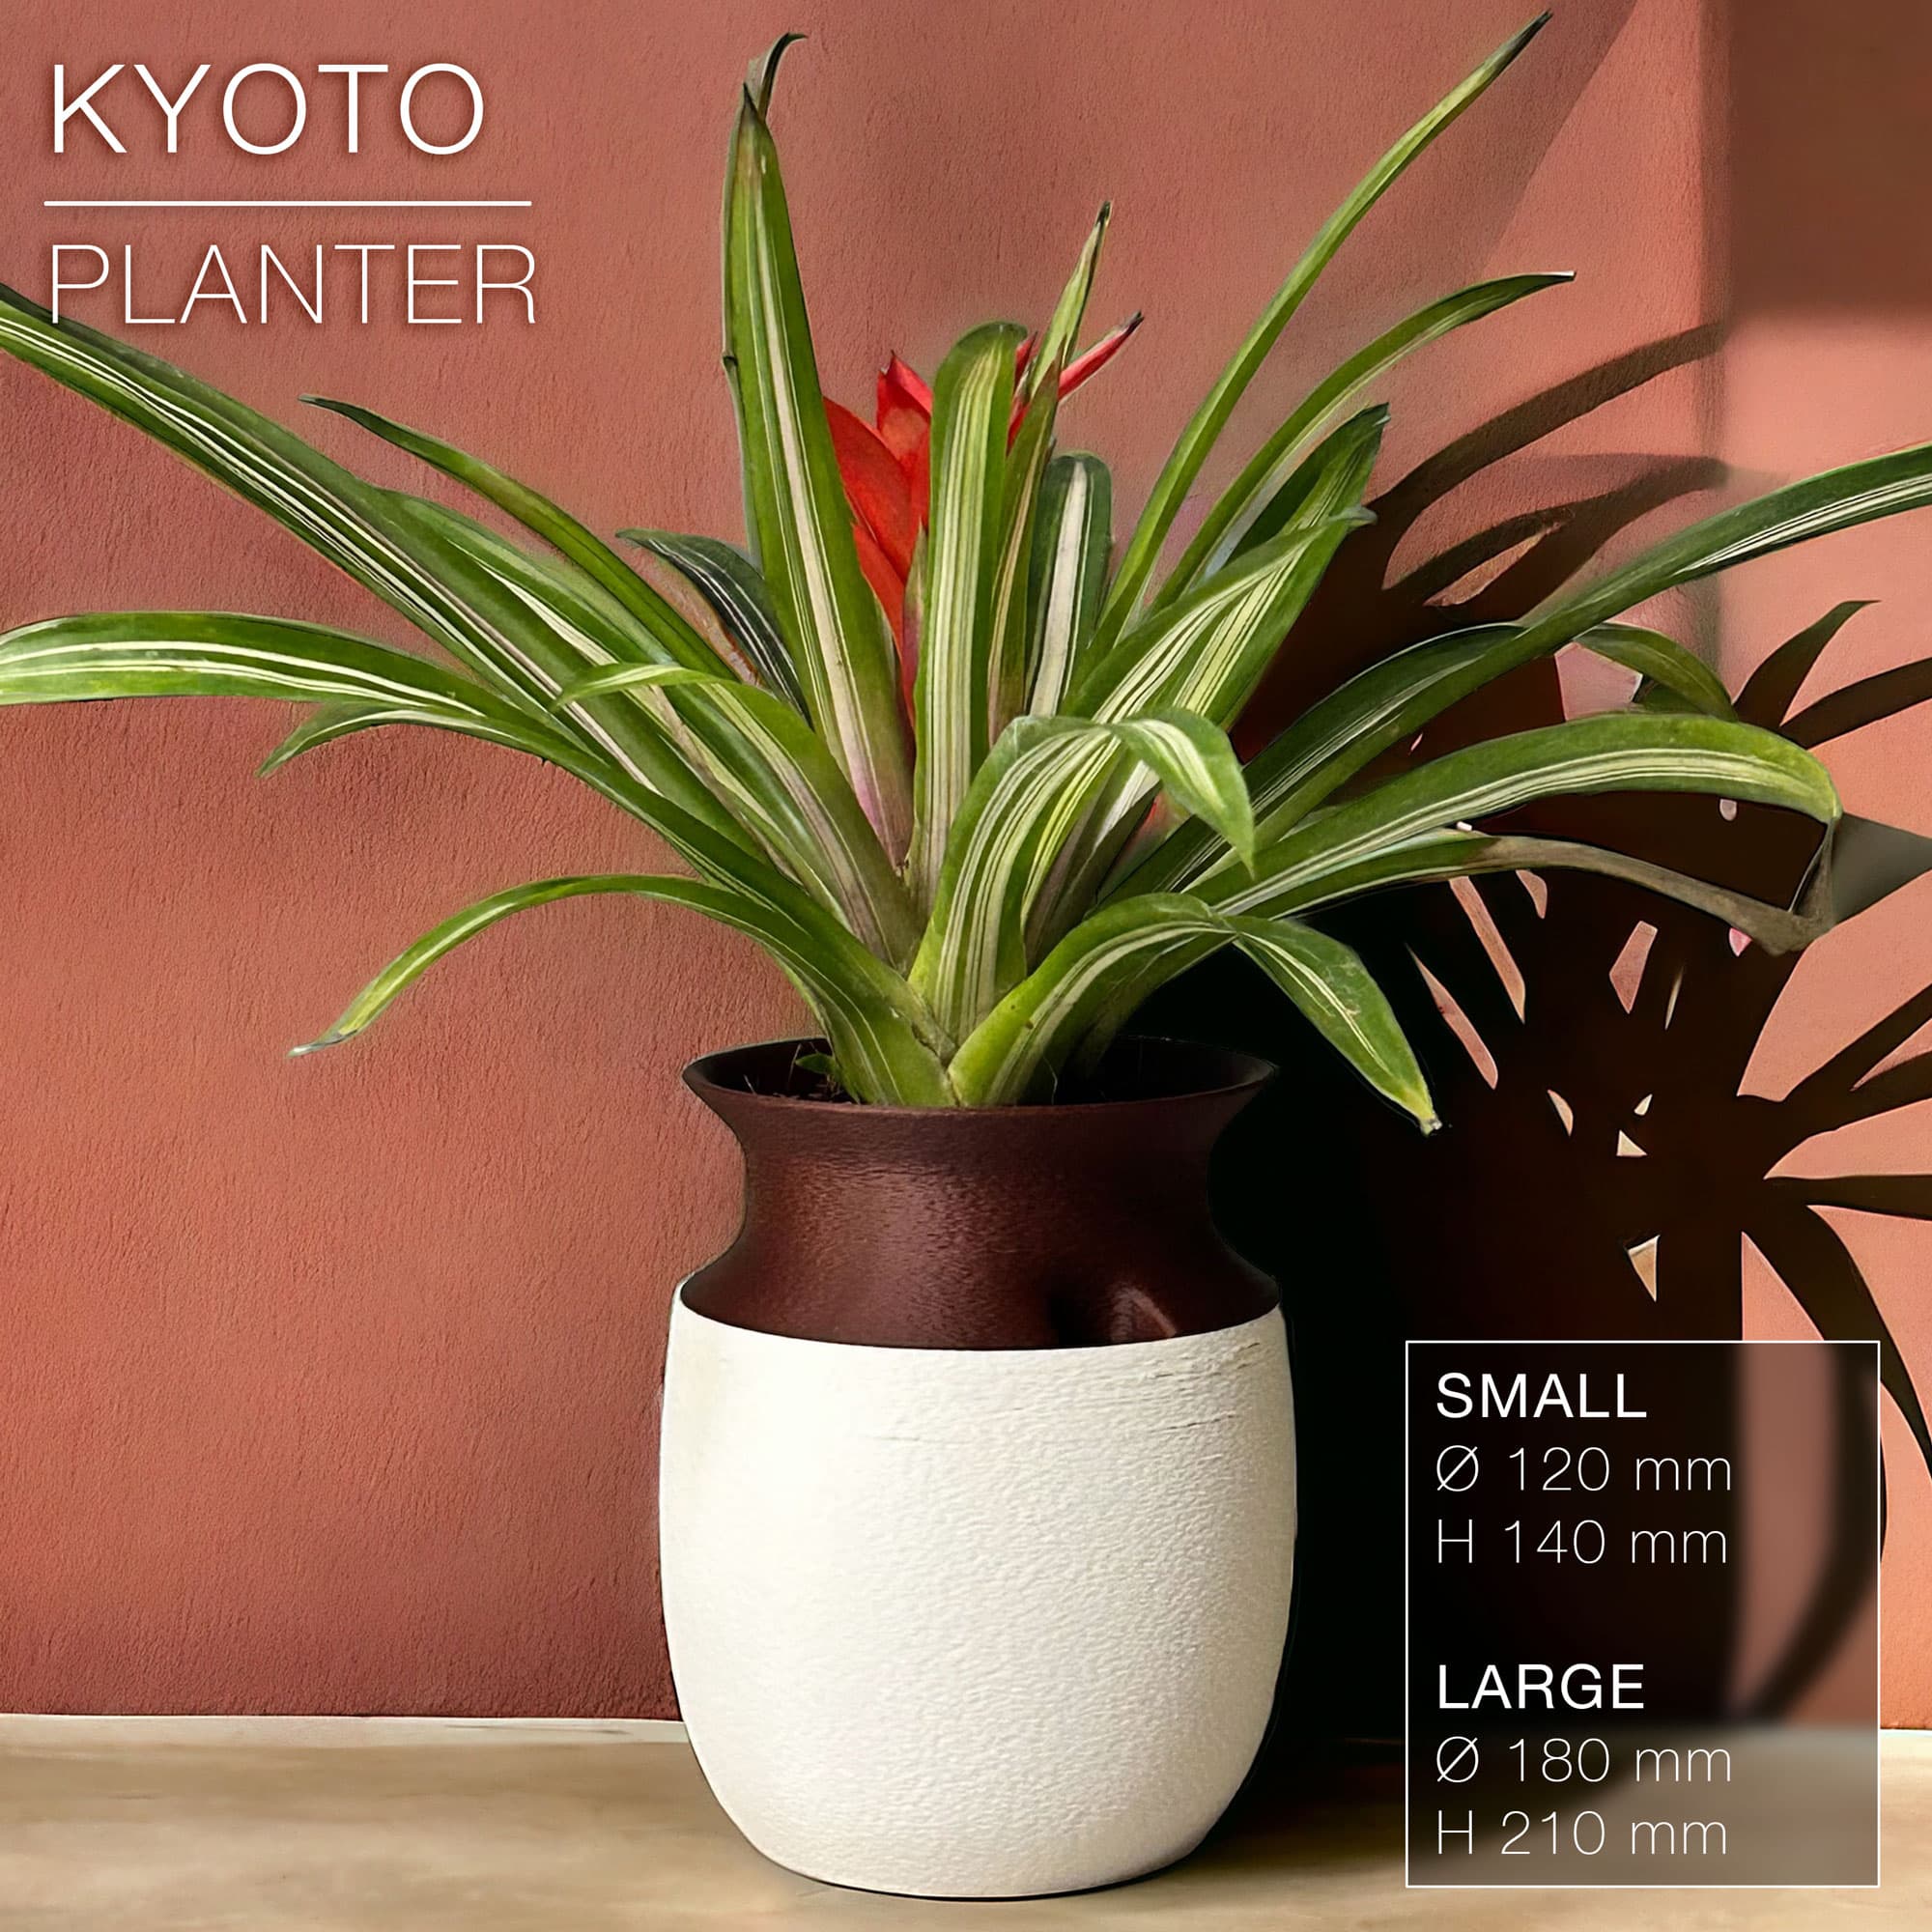
KYOTO | Self-Watering Planter
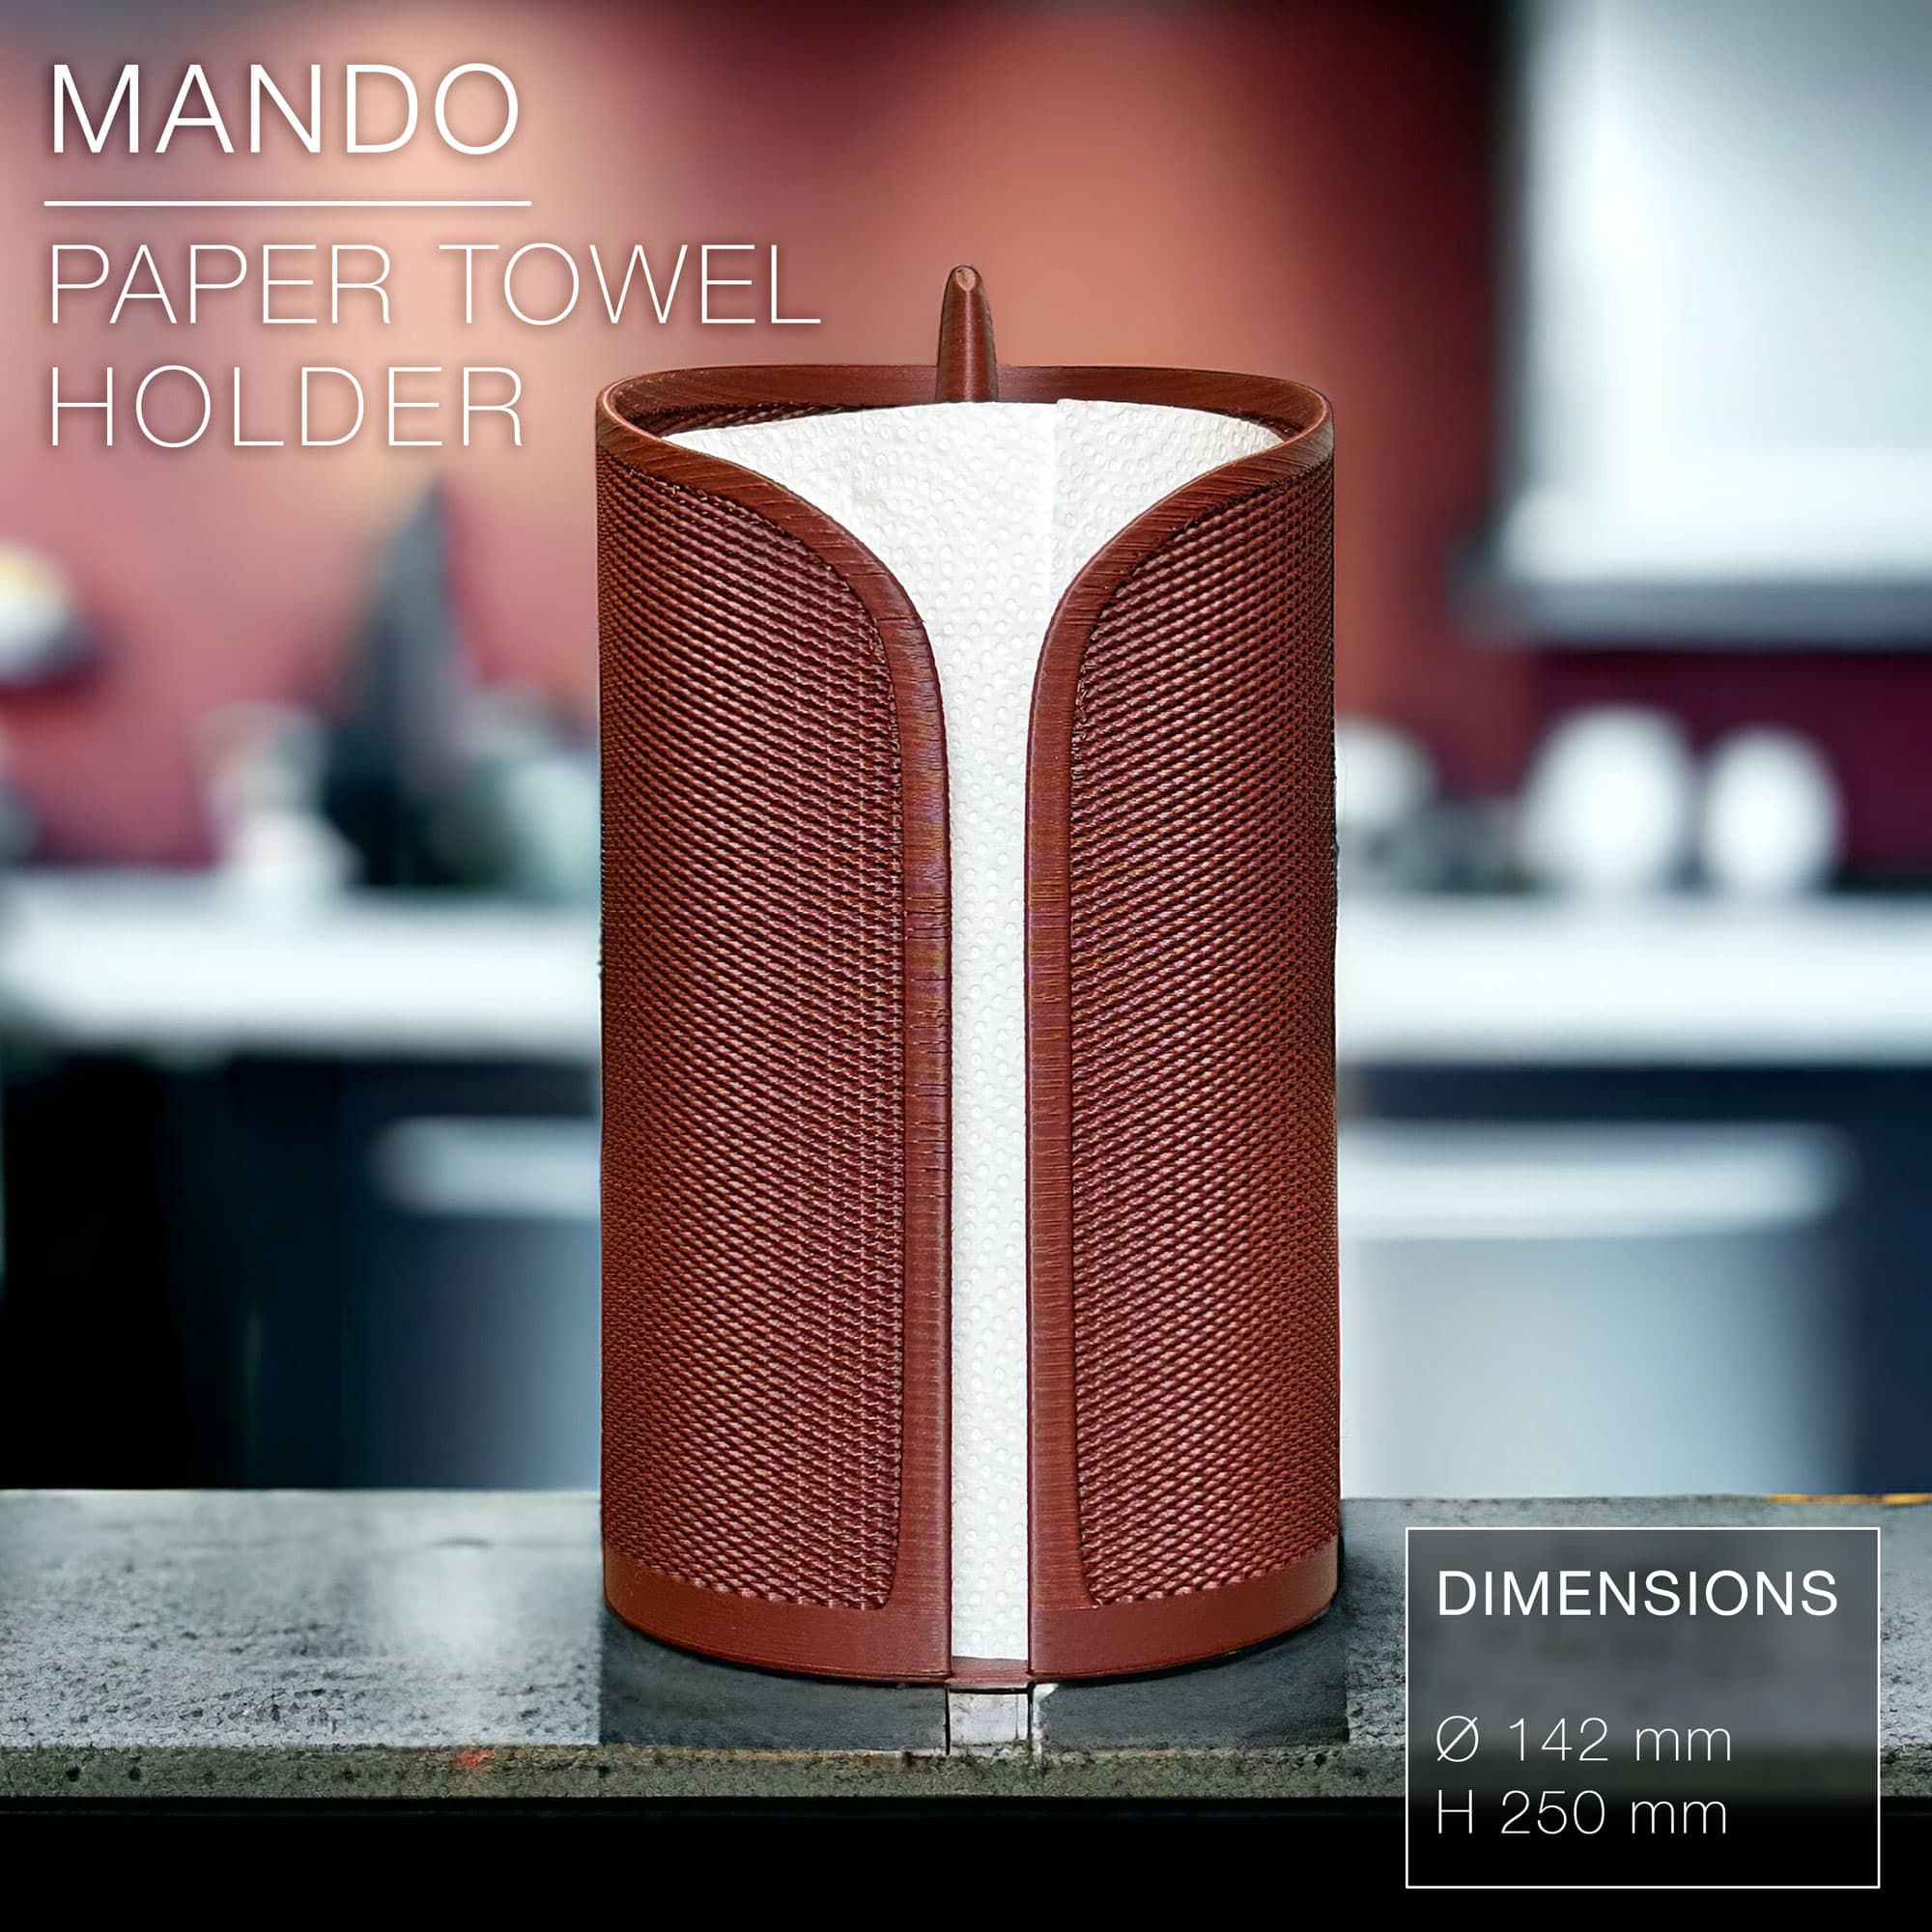
MANDO | paper towel roll holder
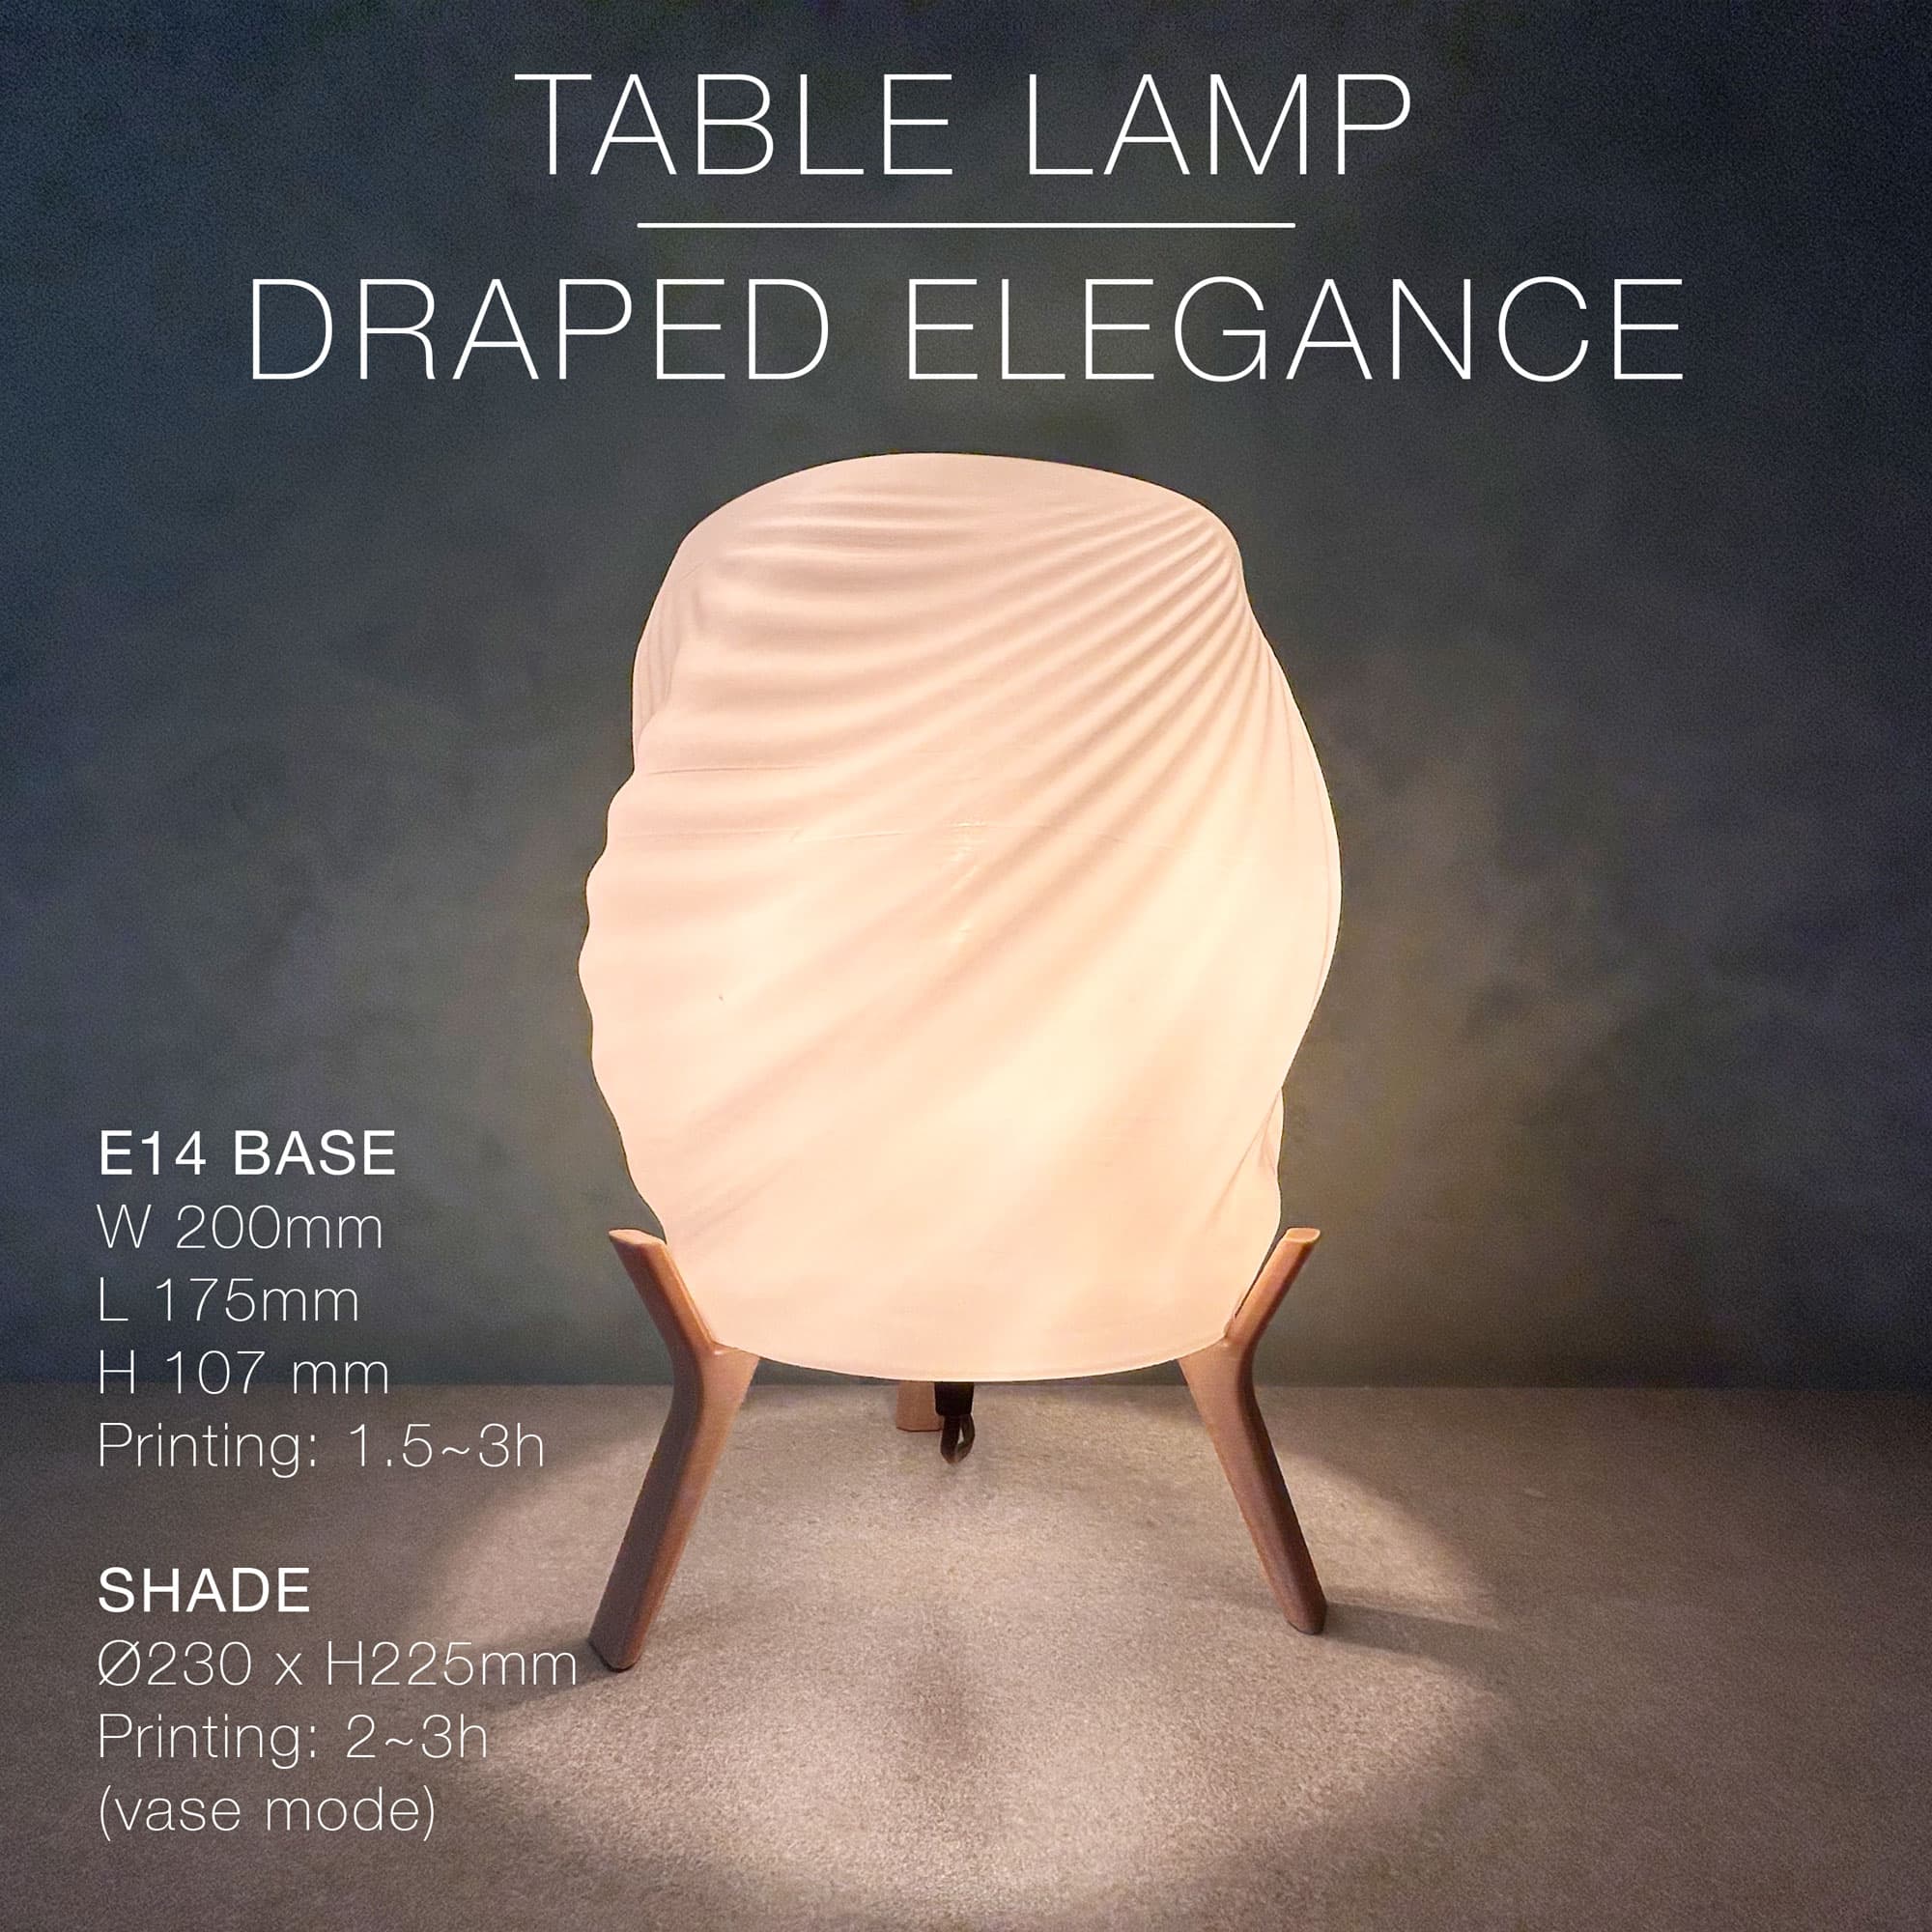
DRAPED ELEGANCE | Table Lamp
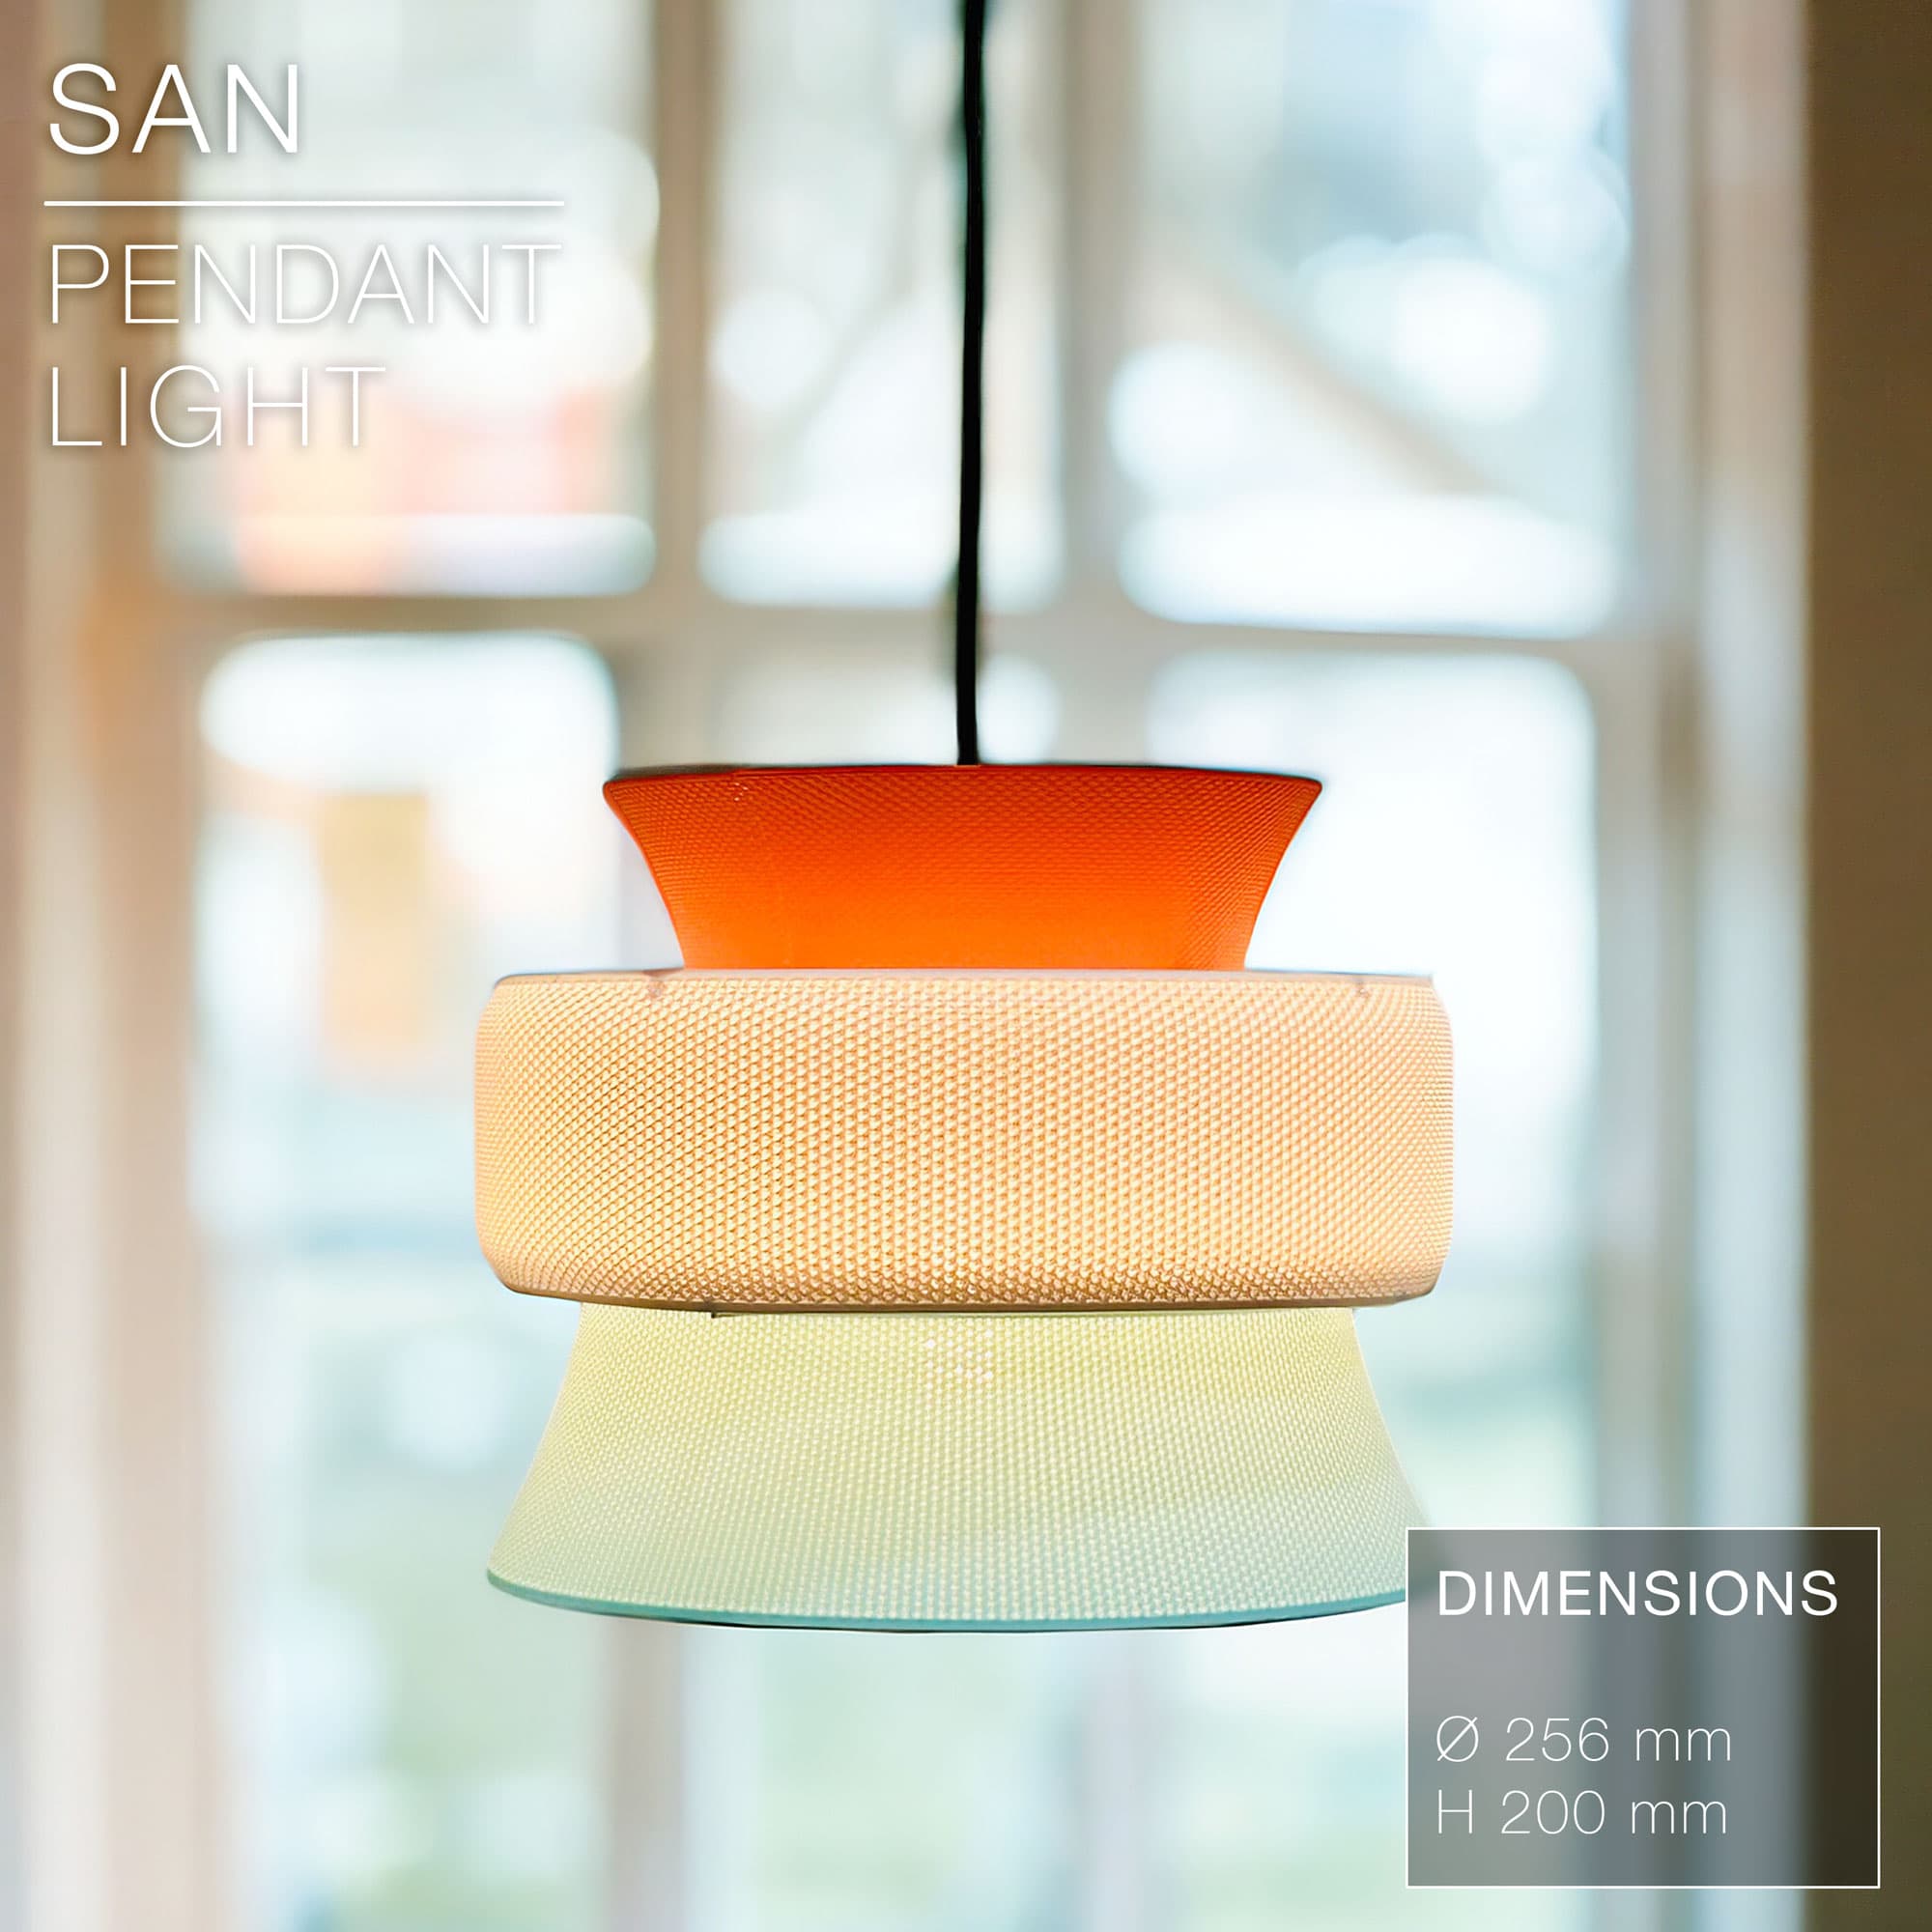
SAN | Pendant Light E27 & E26 fast print

I didn't find the base plate file, there is just 5 files: Clock hand hours Clock hand minutes Dovetail lock Left plate Right plate
I don't know if I missed something.
Damn, you're right! I just uploaded the base plate. Sorry about that! And let me know how the print goes!
It worked now and it's realy amazing, but the two parts is a little curved and get some "gap", do you know how i can fix this on next print?
I got little gaps too. I guess it's because when cooling down the material contracts differently the further you get from the center of the piece. You could add more bottom layers (6 intead of 3), some more infill (30%) and a brim to hold it in place when cooling down after the print is done.