


FREYA | Table Lamp E26/27
FREYA | Table Lamp E26/27
After I released the FREYA planter, some said it would make a great table lamp. So here it is!
This lamp works with E26/27 light bulb sockets.
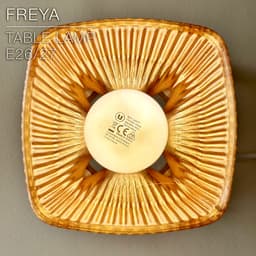
Also, you can pick between 5 variations of the shade texture: • one with vertical ridges • one with a fan texture • one with a rocky texture • one with a wood texture • and a plain one that you can print with some "fuzzy skin".
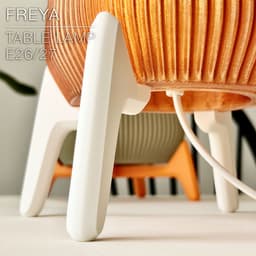
The main challenge was figuring out how to securely attach the feet to the shade. For the planter version, the pot simply rests on the feet, which works well because of its weight. However, for a table lamp, I felt it would be far better if the feet were firmly fixed to the shade — and I’m happy to say I’ve found an elegant solution for that.
You can get the power cords from Amazon here:
For Europe: E27 cord: https://amzn.to/3OVrZjK
For the US: E26/E27 cord: https://amzn.to/434c0qZ
Here are the dimensions:
DIMENSIONS (Shade) | L157mm x W157mm x H209mm DIMENSIONS (assembled) | L157mm x W157mm x H285mm
Happy printing!
3D PRINT SETTINGS: All STL files are already oriented properly. You need to print 3 parts:
- one shade
- one screw ring in the same material as the shade
- 4 feet No supports or adhesion brim needed.
THE SHADE: The shade prints upright. You can print it with 0.8mm nozzle, or with a 0.4mm nozzle. I printed mine with a 0.8mm nozzle, in translucent PETG by Bambu Lab.
Layer height: 0.2mm/layer for 0.4mm nozzle, 0.3 with 0.8mm nozzle Wall line count (perimeter walls): 2 Infill: 0% Seams: aligned Build adhesion type: None Supports: None
For Bambu Studio users, make sure to:
- turn OFF "ensure vertical shell thickness" in STRENGTH settings, or you'll get additional wall lines here and there adding thickness where it's not needed.
For the Plain version of the shade, you can use some fuzzy skin to add a rough texture to it:
- fuzzy skin point distance: 0.8mm
- fuzzy skin thickness: 0.3mm
SCREW RING: print the screw ring in regular mode, with some infill, and with the same nozzle and material as the shade, so it will fit properly.
FEET: No particular tricks for the feet. I used a 0.4mm nozzle, 0.2mm per layer and 15% infill. Printed in PLA.
Happy printing!
FREYA | Table Lamp E26/27

SAKURA | Scalable Pencil Holder

SYZYGY | Heart Vase, scalable

ARYZ Plus | Pendant light E26/27

CARLA | Table Lamp E14 & E26/27

CAPA | Corner Soap Dish

MINKY | Desktop bin

GRANO | Desktop bin
CALIZ | Woven Table Lamp E14 & E26/27

ORIGAMI STILT | Table Lamp E14, E26, E27 print-in-place

MALLA MINI | Woven Table Lamp E14/26/27

MALLA | Woven Pendant light E26/27

FREYA | Standing Planter Pot

DOLCE | Indoor Planter Pot

NEST | Wicker Tissue Box
DELTA RIDGE | Table lamp E14 & E27 fast-print
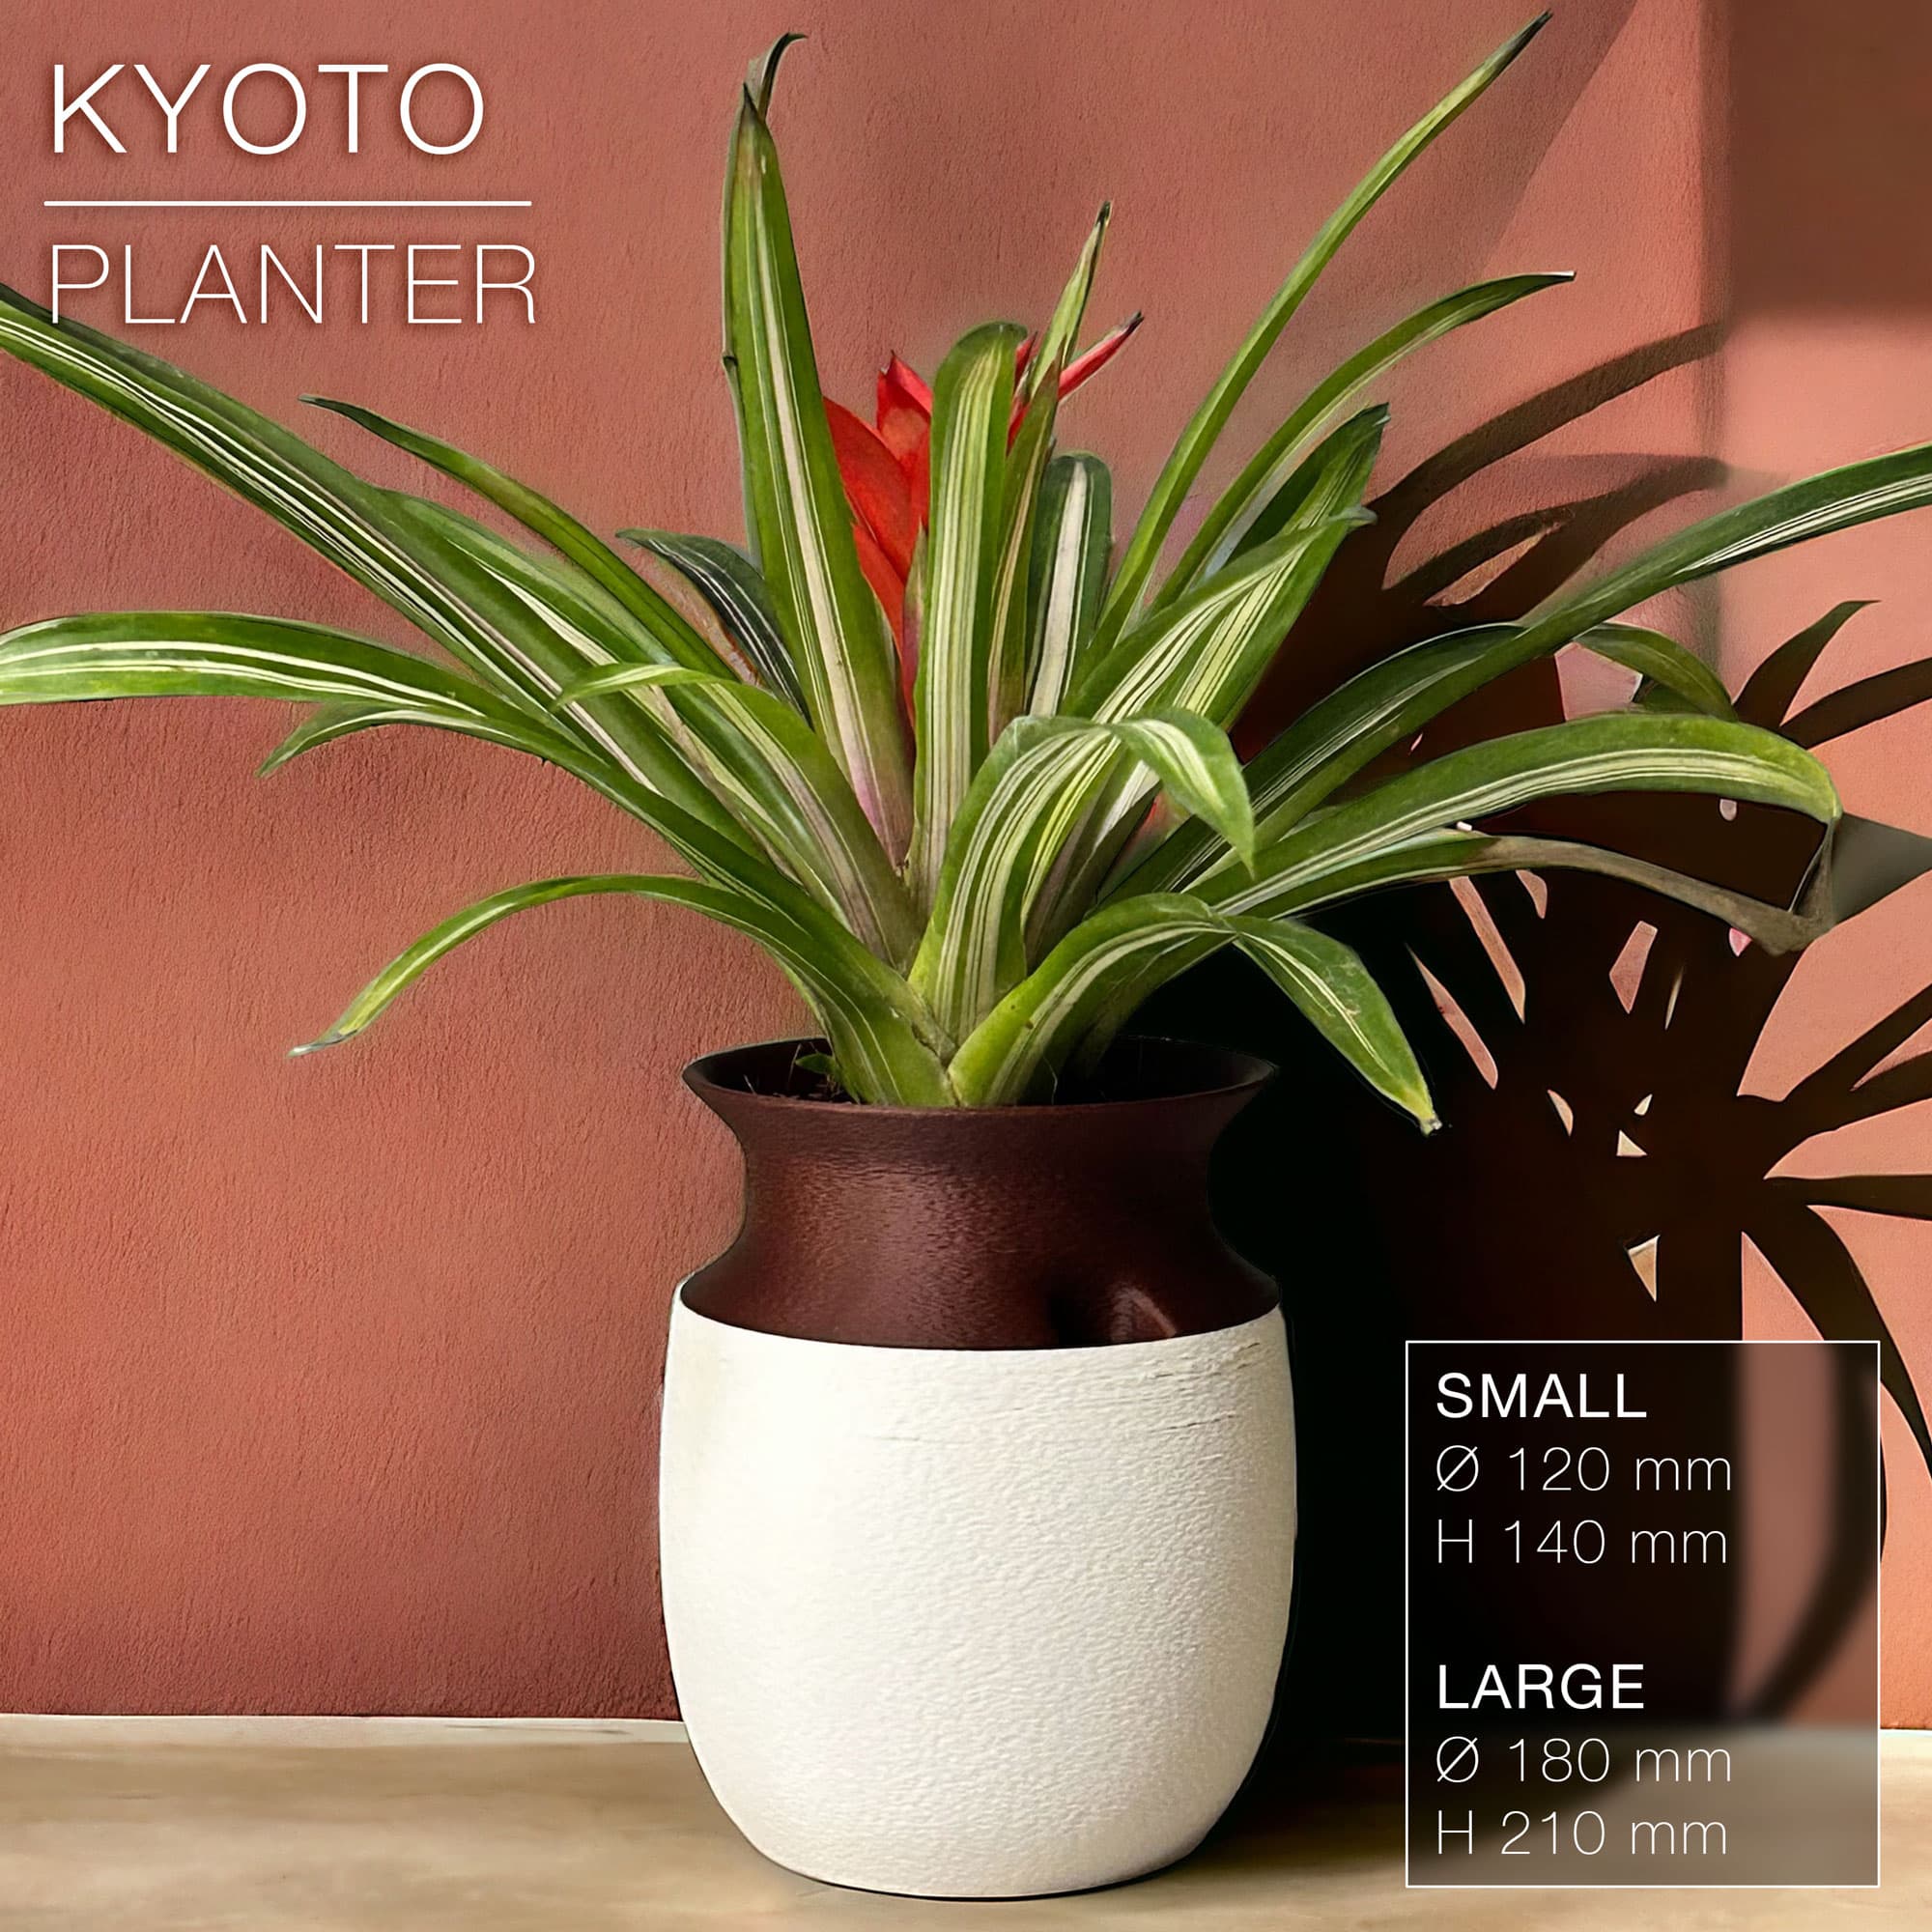
KYOTO | Self-Watering Planter
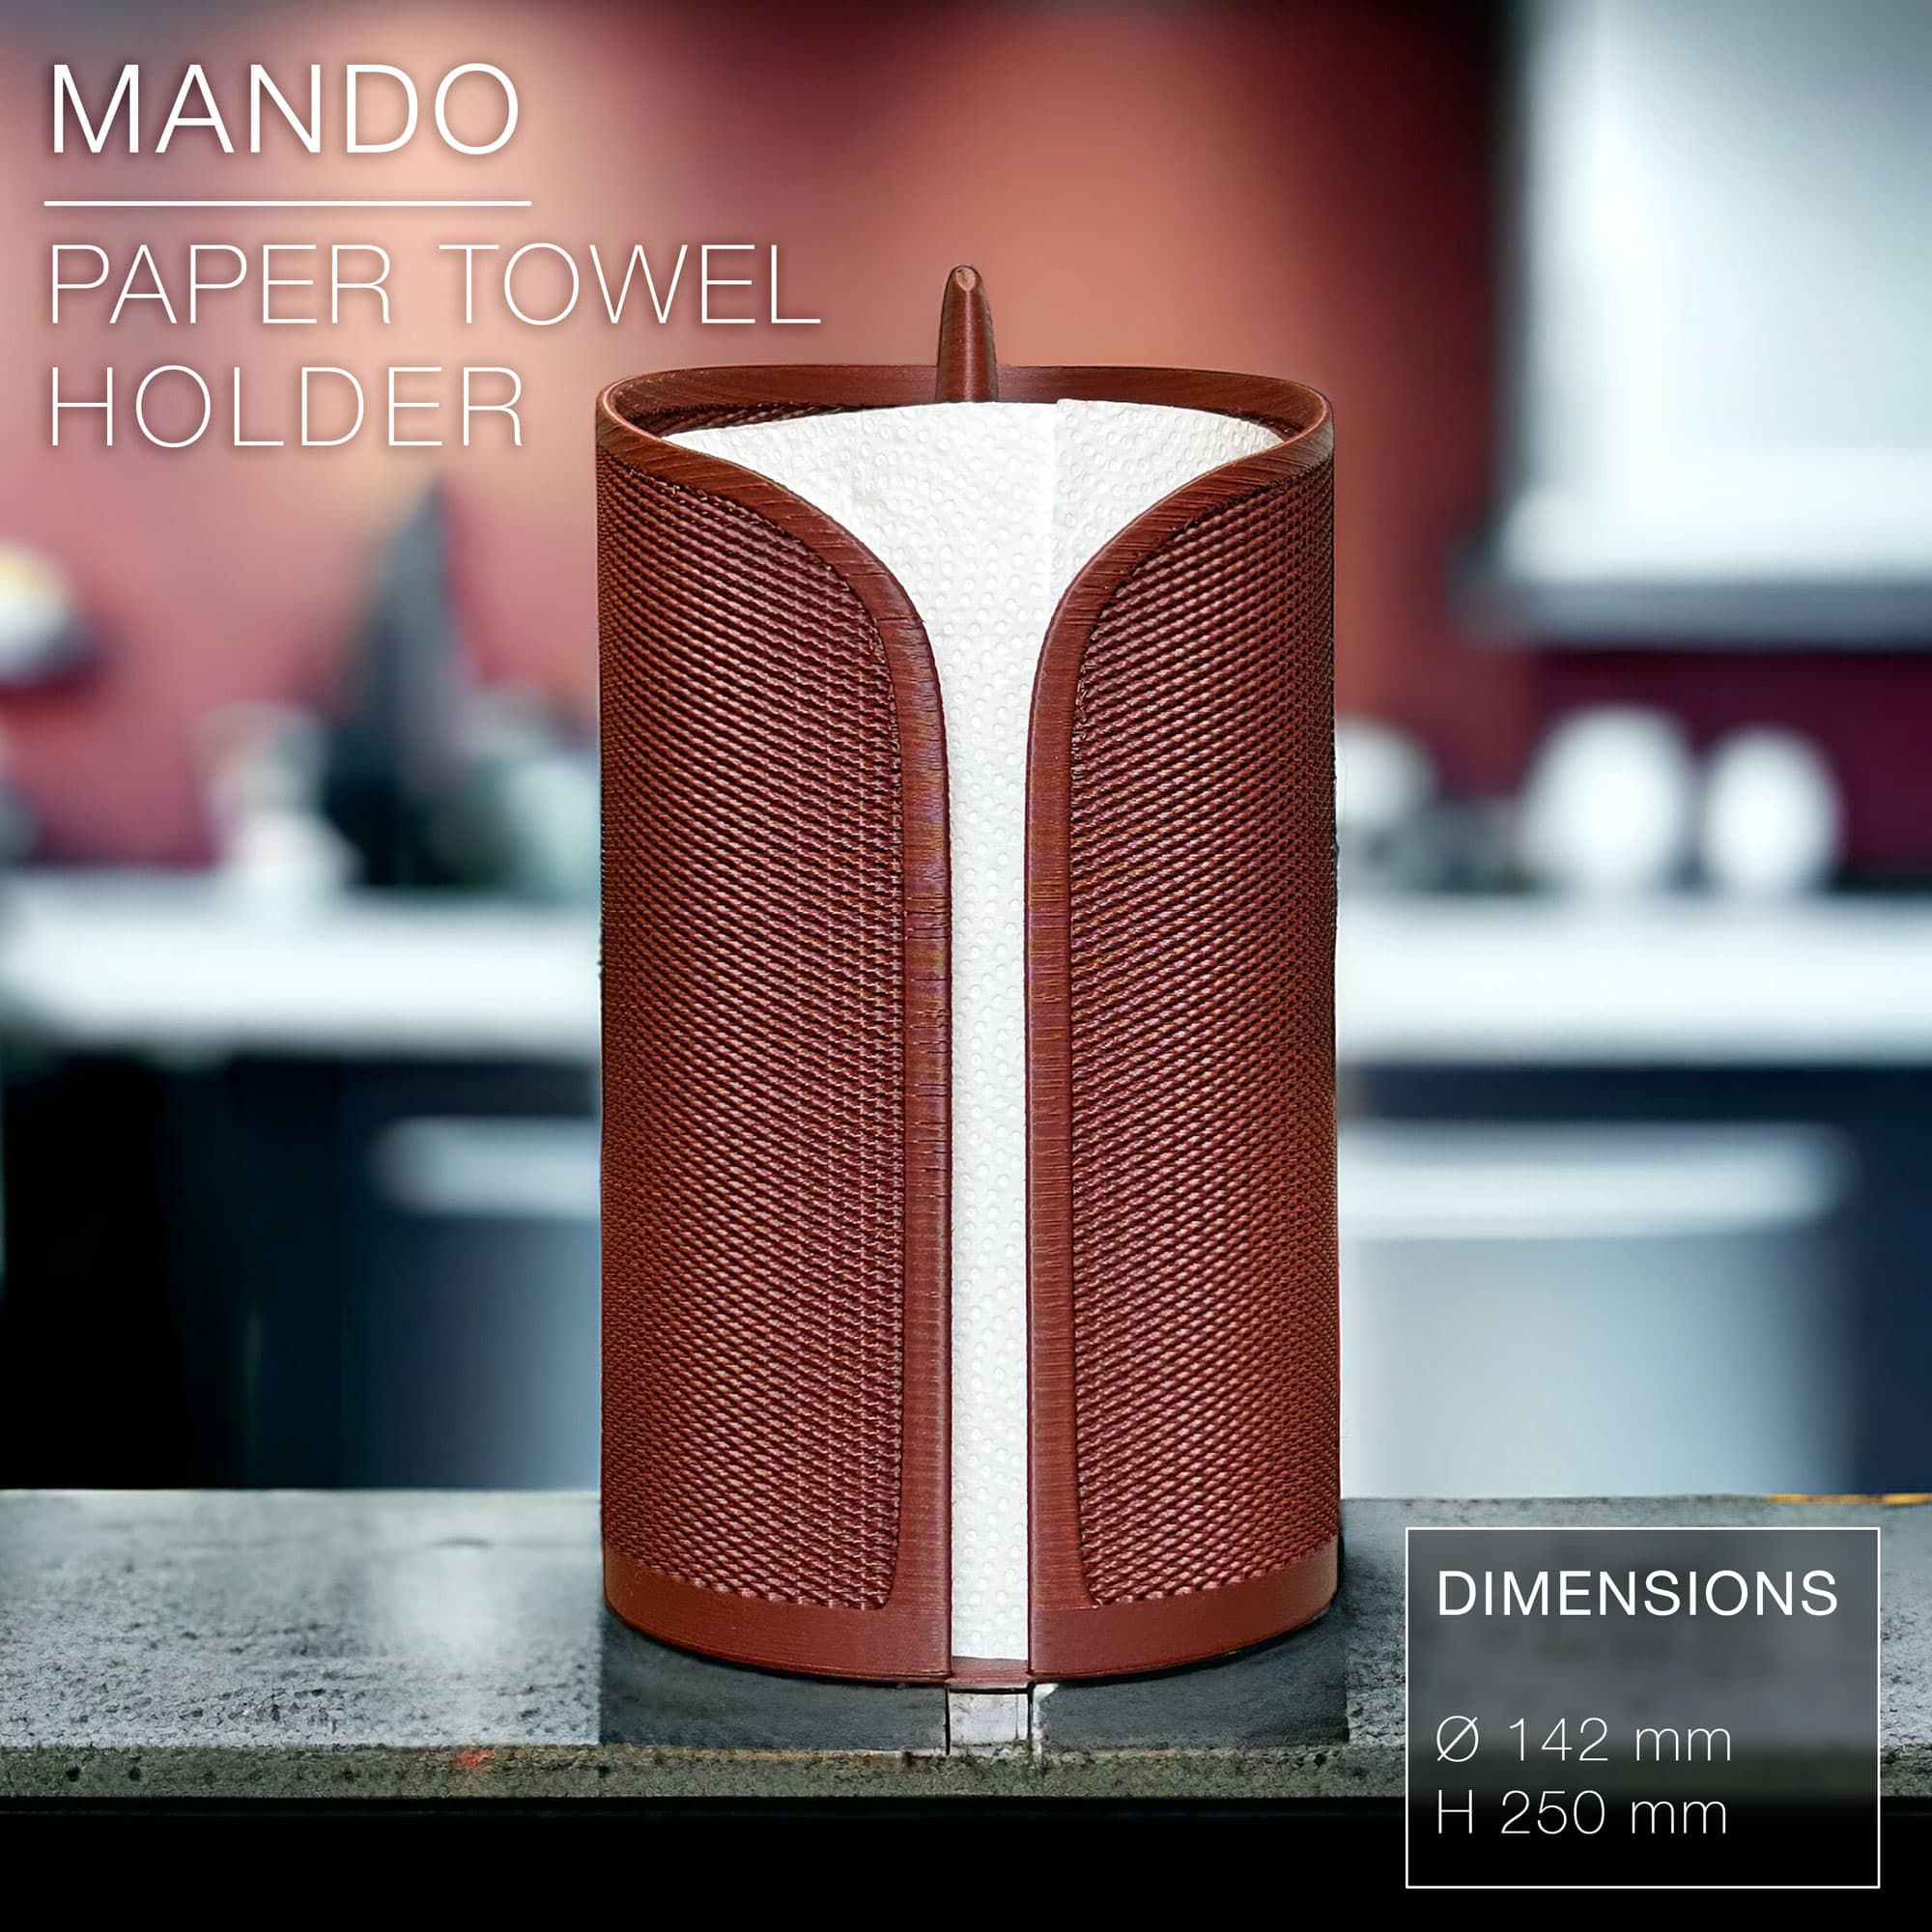
MANDO | paper towel roll holder
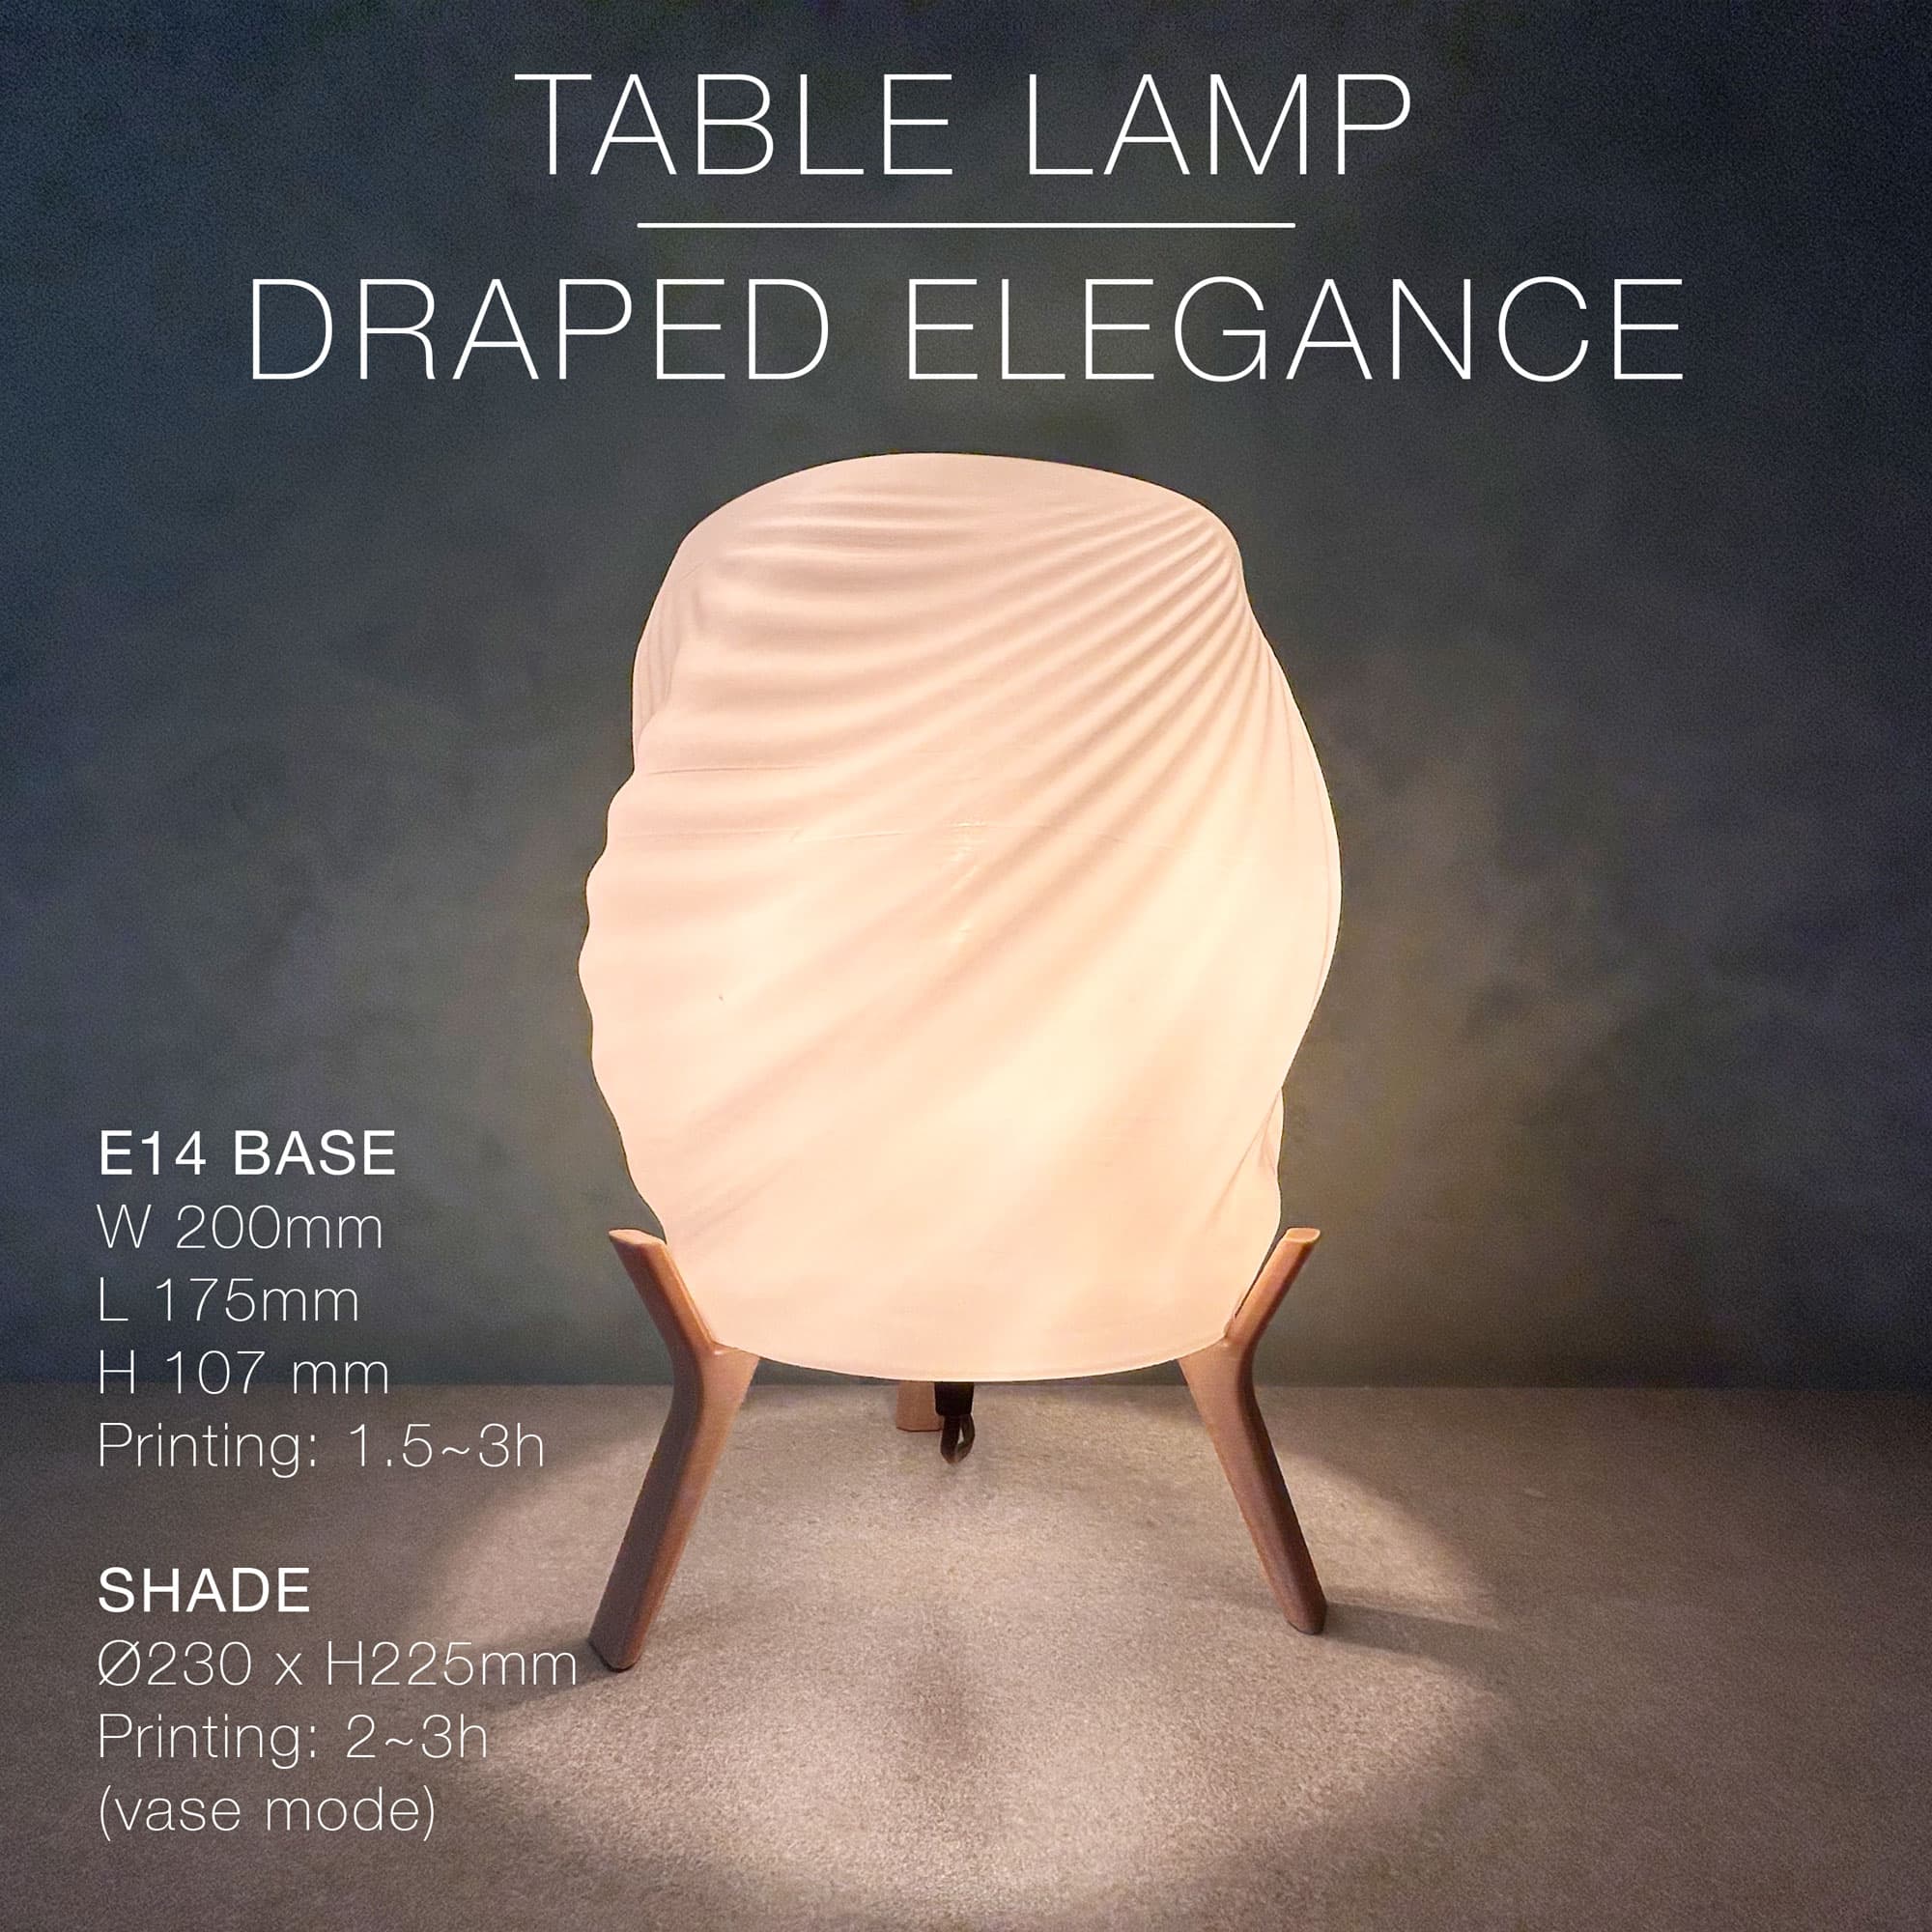
DRAPED ELEGANCE | Table Lamp
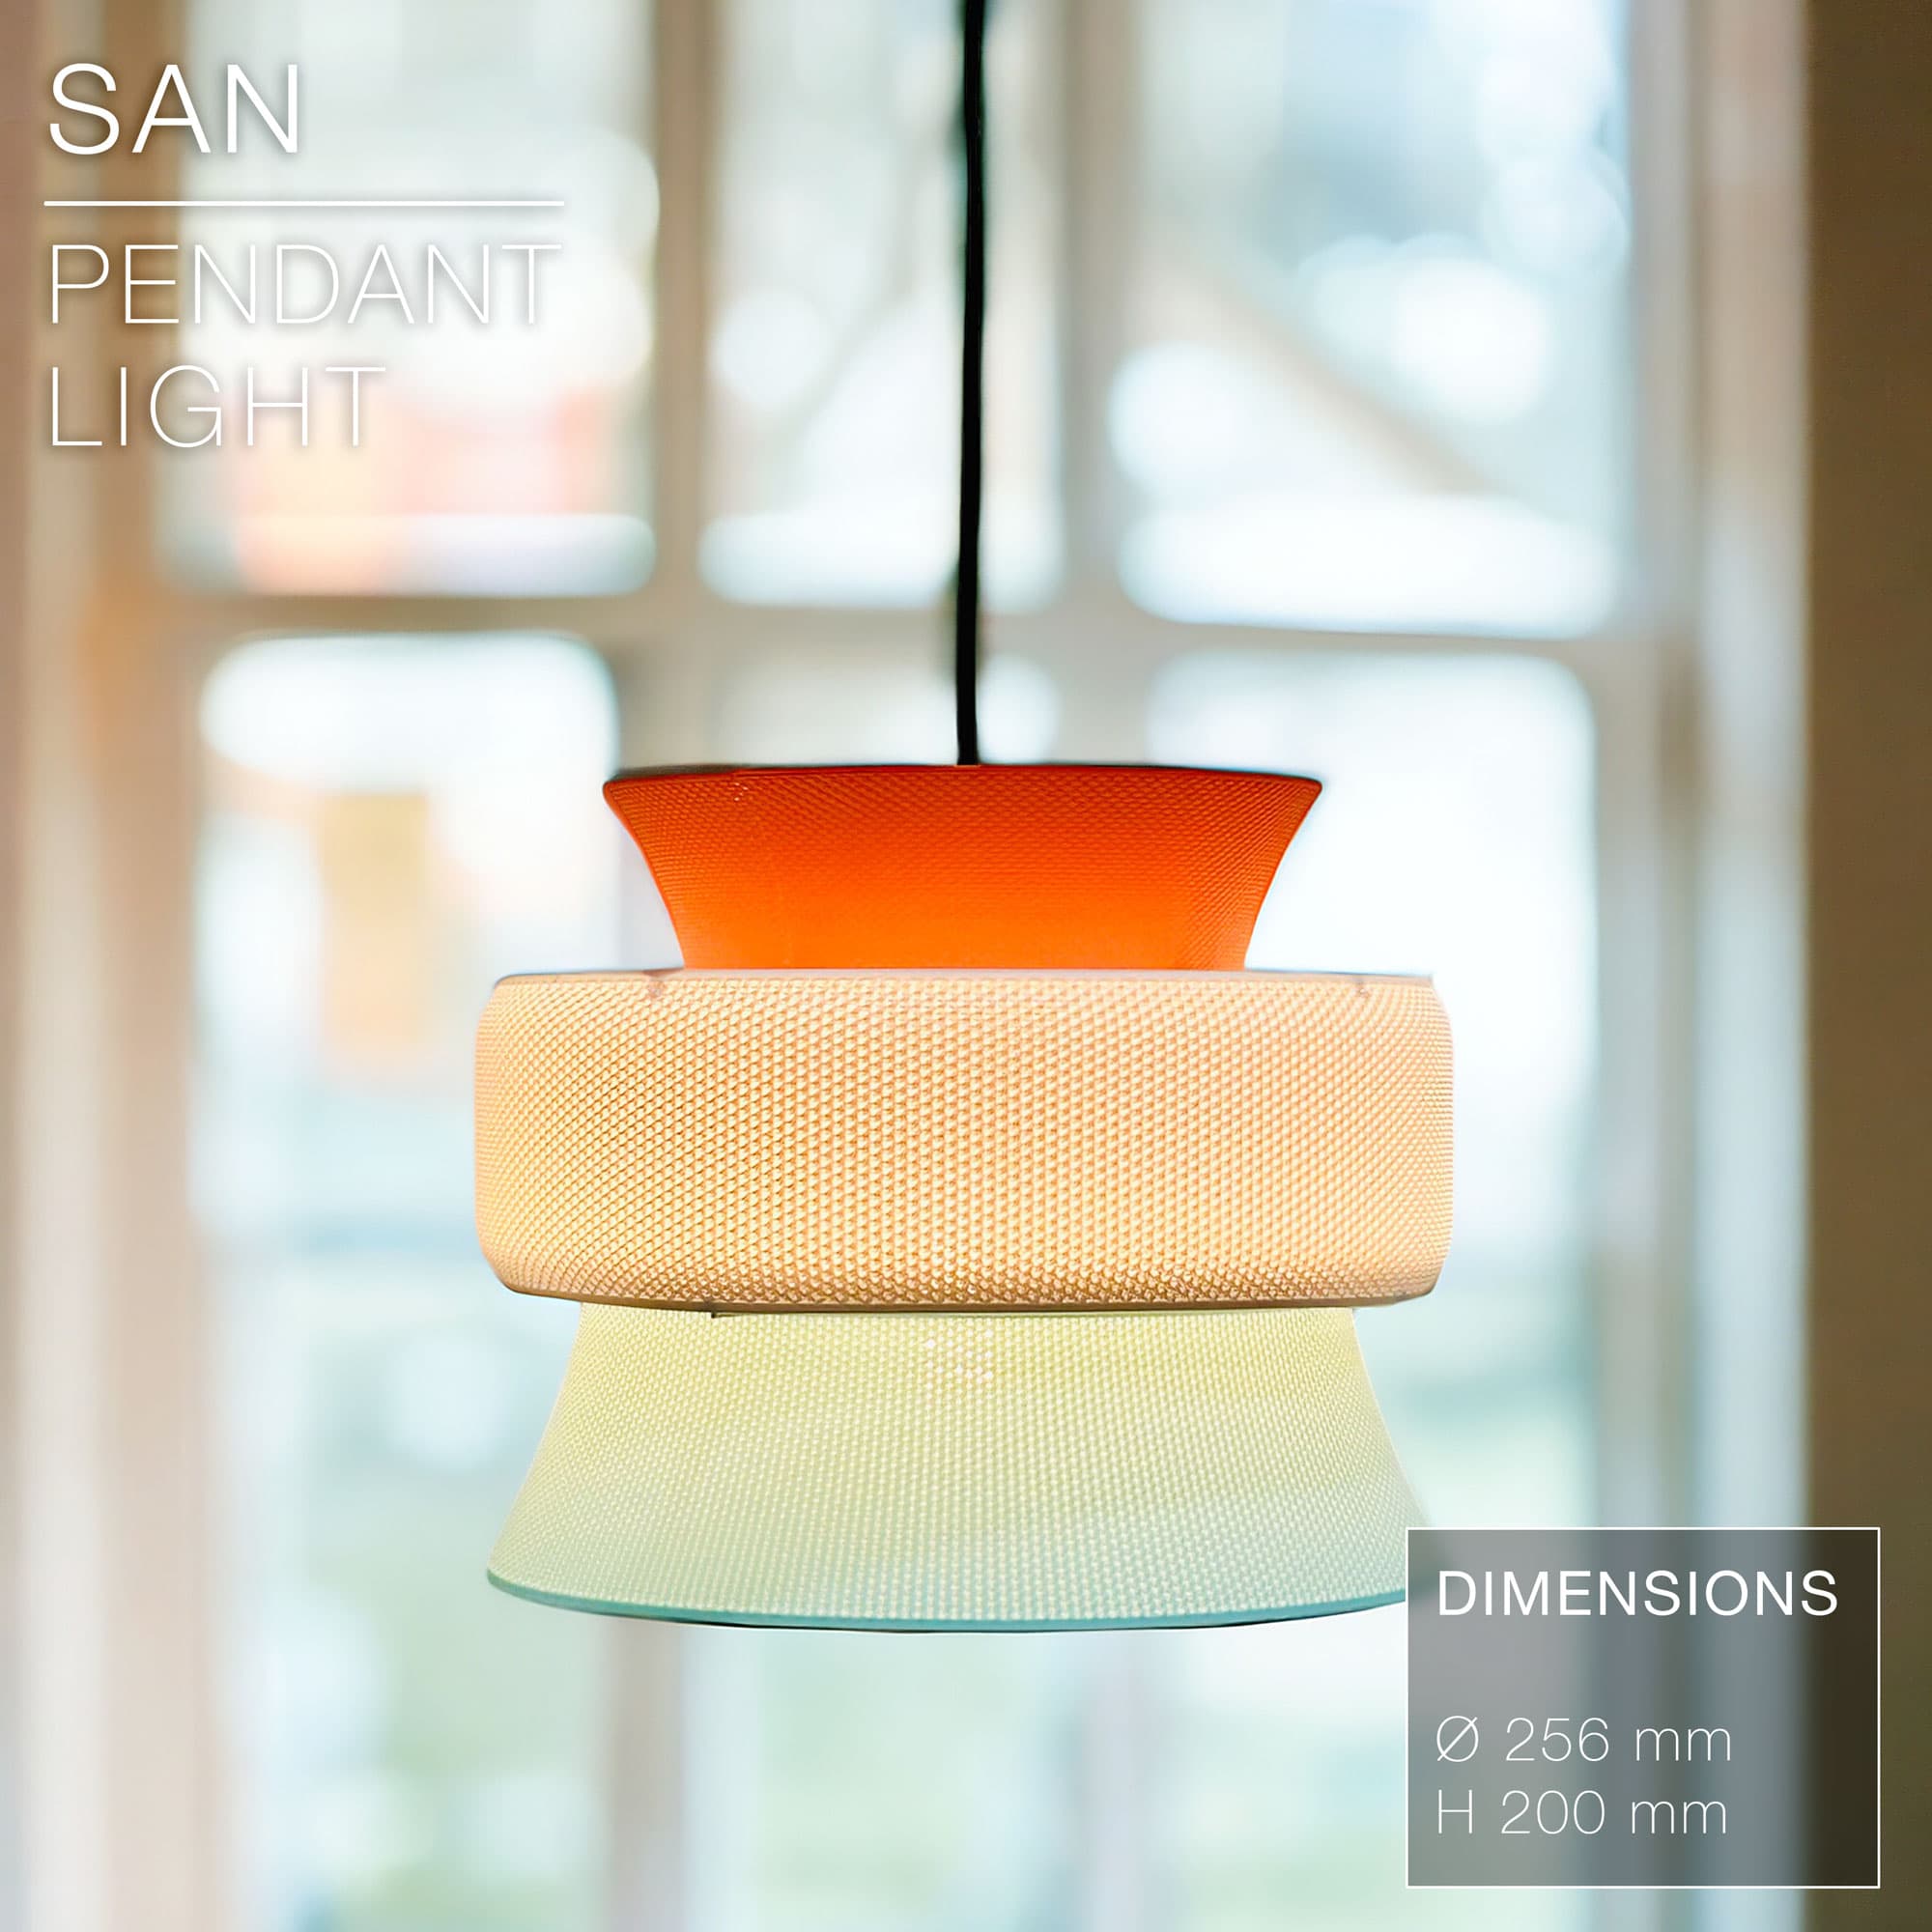
SAN | Pendant Light E27 & E26 fast print

Hi! What filament did you use here? thanks!
Hi! I used Bambu Lab translucent PETG for the shade, and matte PLA for the legs.
Commercial License member here! I am running into this issue on Bambu Studio. Kindly advise.
Error: 12 non-manifold edges. Tips: To repair the model, please use a third party tool before importing into Bambu Studio, such as https://www.formware.co/onlinestlrepair
I tried the suggested tool but the file is too big. Help please. I am new to 3D printing.
Hi! You should be able to slice it anyway in Bambu Studio, despite the non-manifold edges warning.
On a separate note I am trying to figure out how the light socket will fit into the design but I can't see a way for securing it. It looks like only the legs are secured by the screw ring. What am I missing?
Tha's right, the legs are secured by the ring. And the socket is secured directly on the shade, where it narrows into a mounting neck in the middle.
Okay will try.