


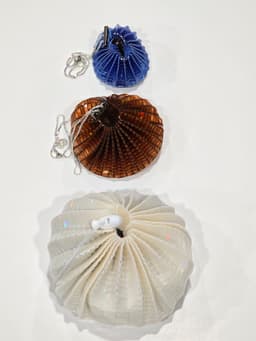


Enchanted drawstring bag
This model has to be on the top of my all time favorites list. This print on fabric model can be used for so many things - Dice bag/dice tray, bun cover/snood, crystal satchels, makeup bag, flow toy, decorative placemat/coaster, purse, applique, etc.
-There are three sizes for a variety of build plates - Small, Medium, and Large. -Each size can be scaled up or down by 25% without sacrificing the hole size to thread your choice of cordage. -Print in either PLA, PETG, or TPU. -I use both non stretch, and stretch fabric for these. -35mm/s first layer speed and adjacent layers to fabric -.24mm layer height unless using a thicker fabric. Layer height has to be equal to or greater than fabric thickness. -This has not been tested with sharp objects. These can be lined with a lightweight material, using a fabric glue on the outside edges.
These are three layers thick at .24mm layer height for a total of .72mm. If you find that you have excessive bunching, first verify that your fabric thickness is less than the layer height (digital micrometer). If you're using a thicker fabric, scale the z height up of the model to a 3x multiplier of your new layer height.
Place a pause command at layer two (3mf files included are using Orca/Bambu slicer). When the pause command has taken effect, place your fabric and magnets/tape down to secure it to the build plate and resume the print. When the print has finished, trim away the excess fabric with a rotary blade. I use a thread zapper / adjustable heat soldering iron to remove the fabric from within the 48 holes around the outside edge.
Once all fabric is removed, thread your choice of cording through the holes at the top. You can either use a variety of closure options to keep the cording in the closed position.
On the medium and large options, you can glue 3" or 4" round craft mirrors to turn it into more of a makeup bag.
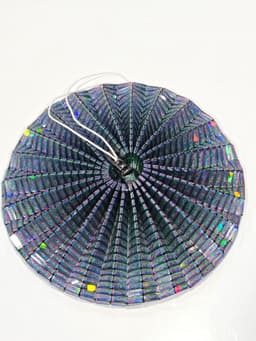
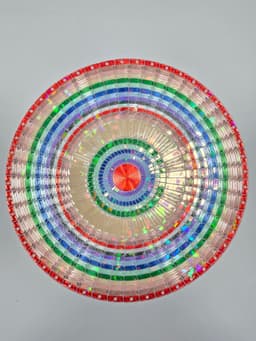
You can also replace the center disc with your own logo to further customize this model
Congratulations, you're done! If you have any questions, send me an email - Kaizen3DPrints@gmail.com
You can thread one long piece of cordage, or use two pieces and start from the center for a double closure. I also enjoy using 2mm-3mm chain instead of elastic/cord.


Enchanted drawstring bag

Abstract art #2

Hand sewn vertical wallet

256x256 PFLAT sheet holder

Massage Roller

Spinning gear fidget ring

Flat band fidget ring

Large TPU foldover bag

Adjustable Strap (48"/122cm max length)

Small Foldover Bag

Customizable Passport Wallet

Tall TPU Bifold Wallet for sewing

Vertical Wallet for Chicago Screws

Square Grid Negative Modifier

Hex Grid Fabric Modifier

Heart Pixel Pattern Textile and Modifiers

Vertical TPU wallet with rivets and grommets

Flippy heart textile and modifiers

Foldable TPU bag sized for Snapmaker U1

Crossed Basket Weave Textile / Modifier

I'm having some first layer issues on an effect plate. It will print a section, but it is not pretty, the infill is incomplete and there are raised sections from where the hot end moves to another section. Eventually it all starts to gather on the hot end and no longer lays anything down, it just continues to collect. I'm using the 3mf file on a P1S. Can you help me with this?
Happy to be of help! Youre welcome to send photos to kaizen3dprints@gmail.com for troubleshooting! Are you using a magnetic pflat sheets that I resell, or a stickered plate version? In either case verify your speeds are 35mm/s at .24mm first layer height. You'll need a fresh isopropyl alcohol wipe before every print.
Just an FYI: I'm trying to open the 225mm size 3mf using the newest Bambu Studio (2.7.1.62) and it opens set to the Bambu P1S. When I try to change the printer from the default to the X1C or P2S, it asks if I want to save changes made to P1S profile. Whether I choose Yes or No, it just hangs and never finishes. I'm not sure if there's anything you can do to make that work better? It could also be the Mac version. For Now, I'm going to copy the settings as best I can using STL