


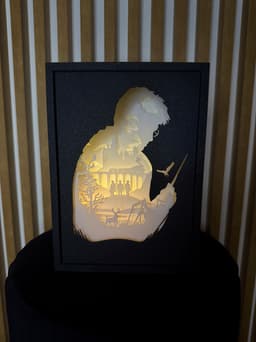


Harry Potter Shadow Box Lamp
Step into the wizarding world with this 3D shadow box lamp, inspired by Harry Potter.
🌟 Perfect for:
- Harry Potter fans & collectors
- Magical bedroom or gaming room decor
- Unique gifts for wizards and witches of all ages
🖨️ Print Requirements: ✅ Layers 4, 6, and the Patronus must be printed with a 0.2mm nozzle for fine detail (you can also print this way layer 7 with castle if you want the best possible print with more windows) ✅ Patronus must be glued underneath layer 2 for proper alignment and effect ✅ Can be customized with different LED colors, I used light blue LED strip from Temu Multi-layer shadow box lamp designed for LED backlighting. Layered construction creates depth and clear silhouette separation when illuminated.
Print & Build Notes: 🔧 Filament: PLA • Black PLA – OPTIONAL for outer box and first layer • White PLA with good transparency – light-diffusing layers
🔧 Print orientation: • Plates are uploaded upside down • Printing on a Textured PEI Plate in this orientation improves visible surface quality
Lighting: 🔧 Warm white LED strip recommended 🔧 Attach the LED strip horizontally to the lower half of the inner box back wall 🔧 Ensure even alignment for uniform light diffusion
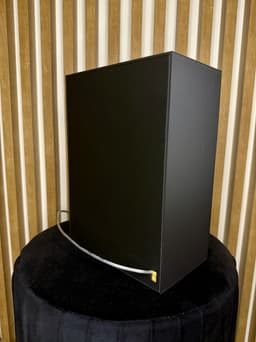
Assembly: 🔧 Insert the layers (Layer 1, Layer 2, Layer 3, etc.) into the inner box in the correct order 🔧 Place the top holder onto the inner box from above 🔧 Slide the outer box onto the assembly from the front

Harry Potter Shadow Box Lamp

The Lord of the Rings Light Box Book Nook Lamp

Arc Raiders Light Box Book Nook Lamp

Stranger Things Light Box Lamp

Easter Bunny with Hanging Egg Ornament

Easter Bunny Decoration

Easter Bunny Decoration

Easter Bunny Wreath

Jinx Arcane League of Legends Shadow Box LED Lamp Book Nook

The Legend of Zelda Nintendo Shadow Box

The Witcher Shadow Box 3d Lamp

Enchanted Forest Shadow Box Light Box Lamp

Star Wars Millennium Falcon Shadow Box Diorama

Fantasy Dragon Nightsky Shadow Box 3d Lamp

Red Dead Redemption 3D Shadow Box Lamp

Harry Potter Hogwarts Shadow Box 3d Lamp

Harry Potter and The Philosopher's Stone Shadow Box Lamp

The Game Of Thrones Targaryen Shadow Box Lamp

The Witcher Shadow Box Lamp

The Lord Of The Rings Shadow Box Lamp

Amazing work!
The patronus doesn't show up on layer 2 in the files.
because it's on the plate 9 and in description there's a note to glue it