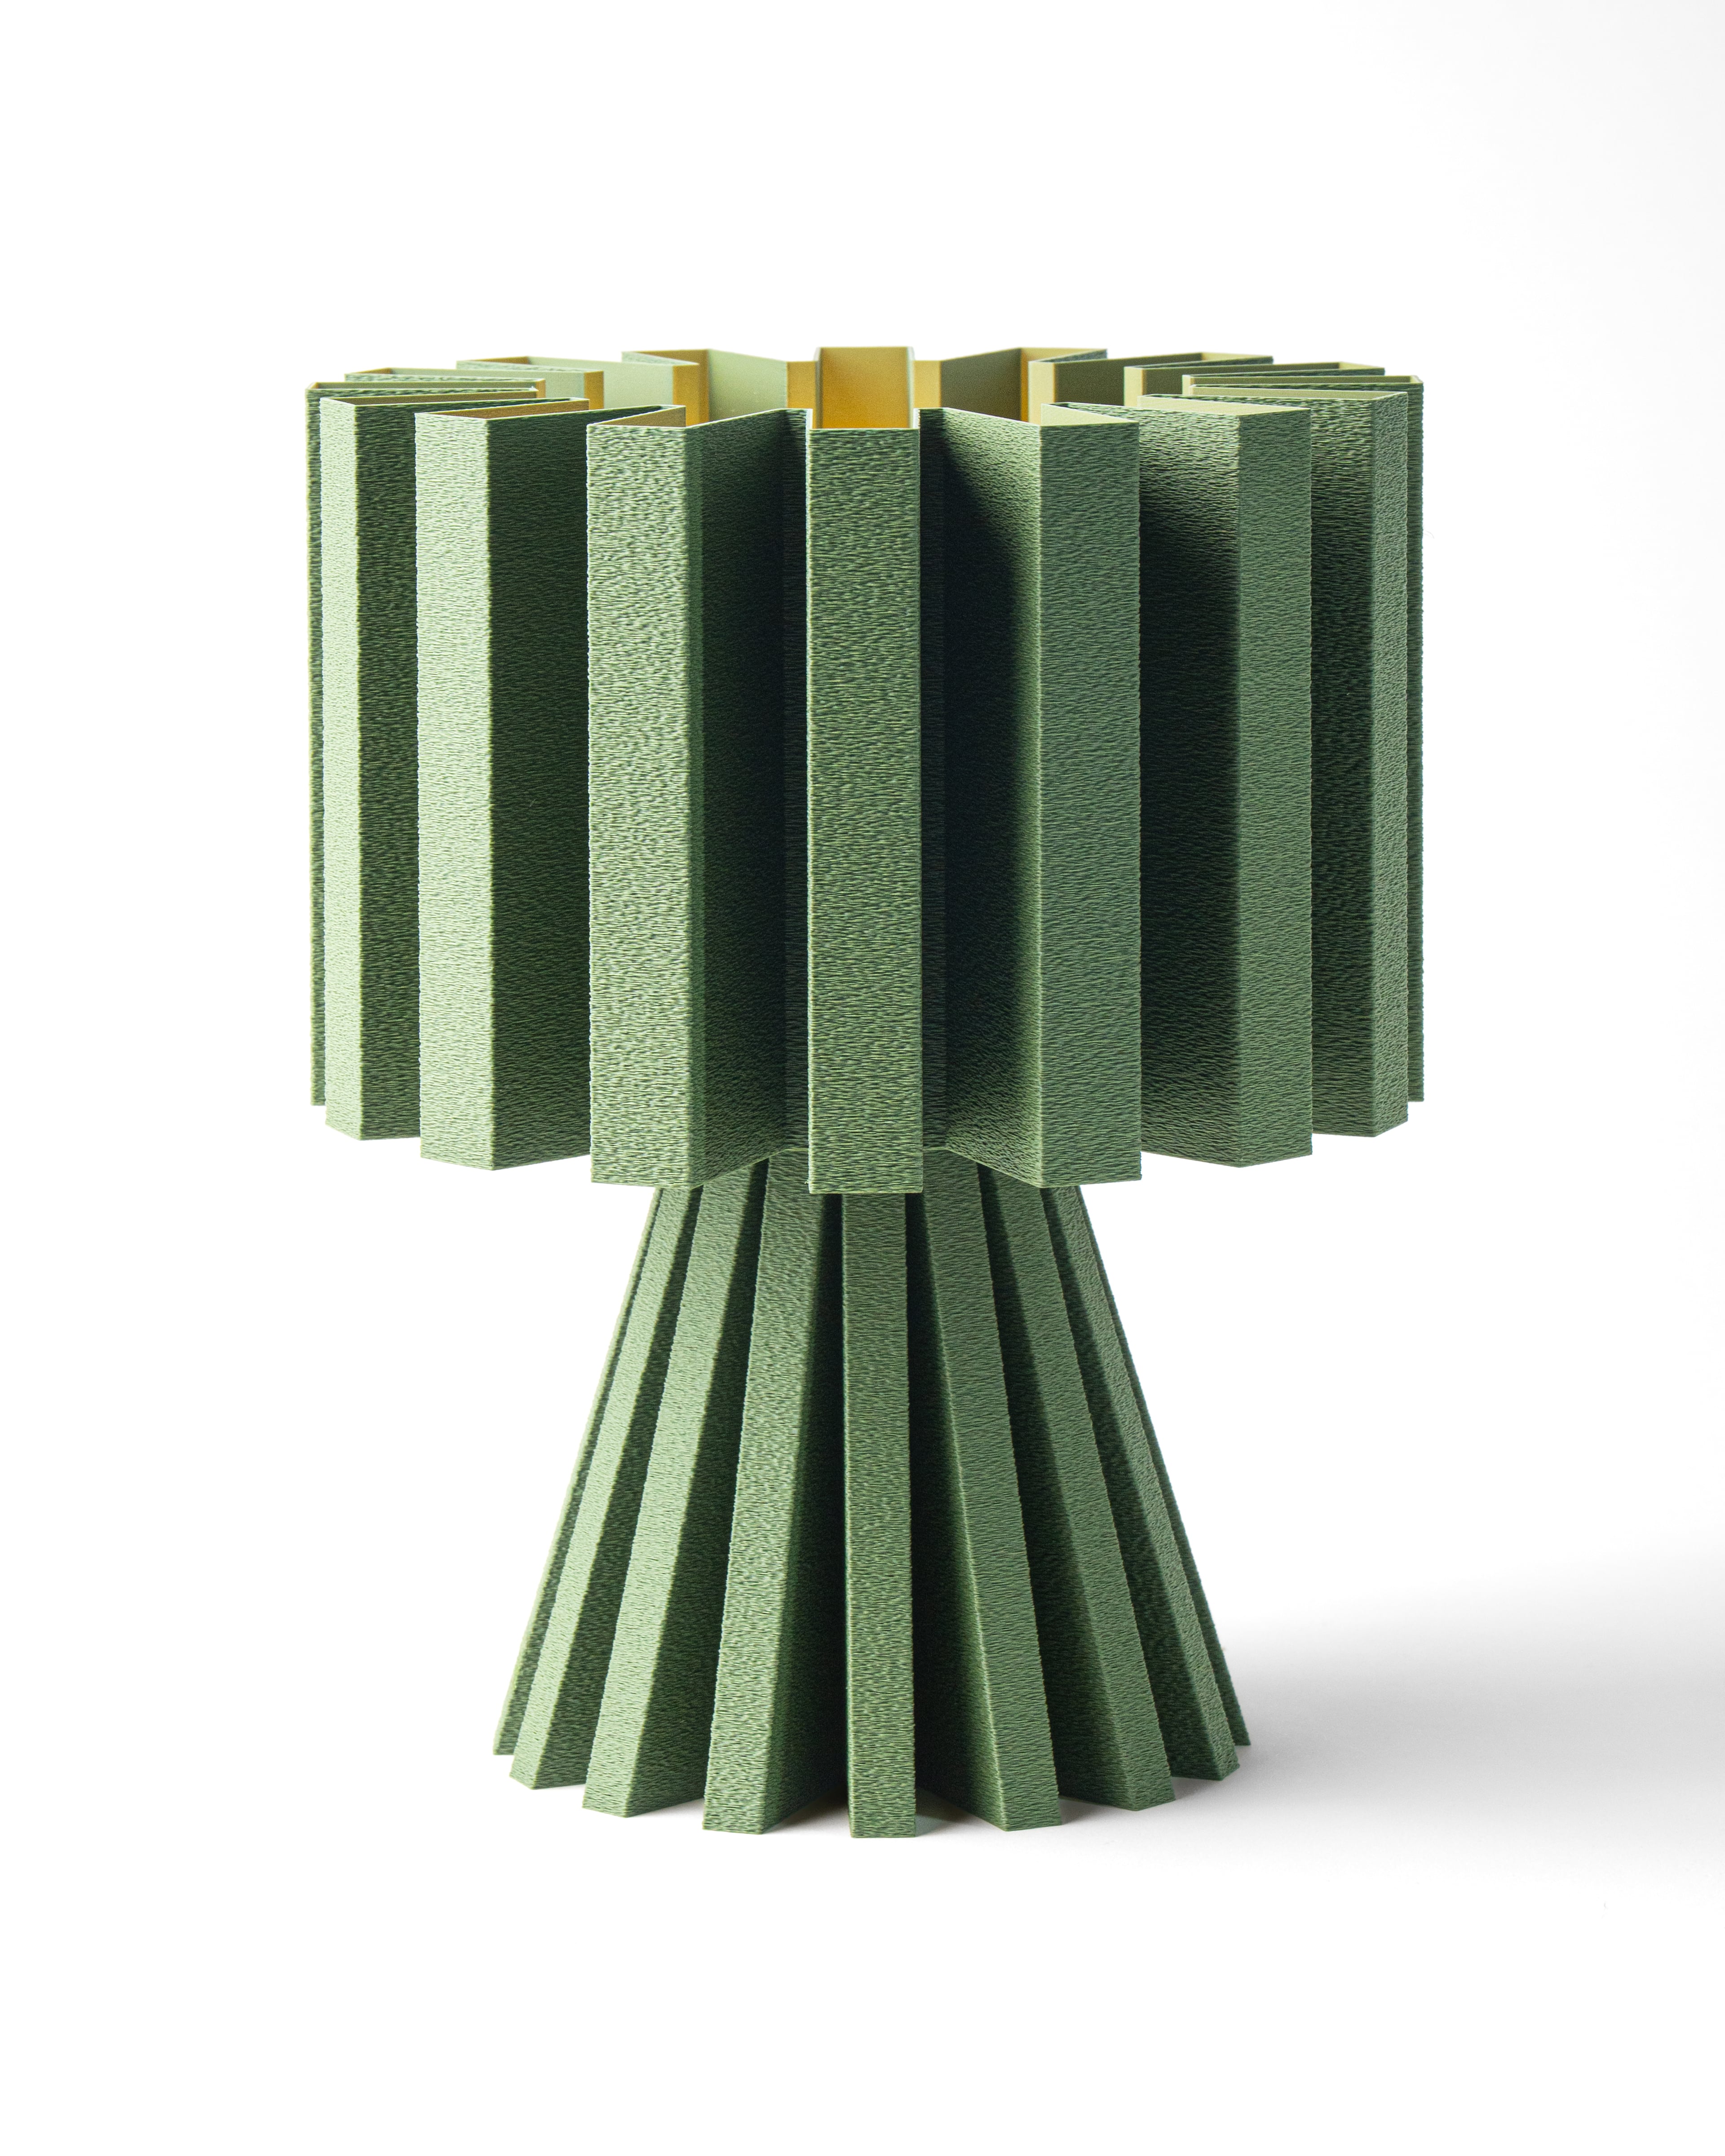

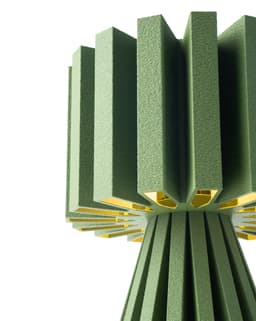


Table Lamp F022 by UMINO
COMMERCIAL LICENSE You require a pendant light cord with threaded rings. Enable fuzzy skin on shade and base. Don't print shade in vase mode if fuzzy skin is enabled. Cut base in two pieces from above cylinder and add fuzzy skin only to bottom part. Add bottom shell layers for sturdier shade. Fits E26/E27/E14 If you wish to use E14 print ATTE14.
Assemble shade on top of base. Insert attachment from the bottom of shade. If loose slightly scale down the attachment. If tight slightly scale up the attachment. Same instructions for the bottom cap. Insert pendant light kit from bottom of lamp. The threads from light kit should pop up above the attachment print. Thread the ring from light kit on top to tighten everything together. Insert mini led lightbulb from under the shade.
UMINO© STL files are strictly for personal use. Unauthorized resale of these digital files is illegal and subject to legal action. Respecting this copyright policy not only protects intellectual property but also supports the creators and the integrity of the 3D printing community.
Table Lamp F022 by UMINO

Table Lamp F039 by UMINO
Mini Lamp F038 by UMINO

Pendant Lamp F037 by UMINO

Table Lamp S011 by UMINO

Table Lamp F038 by UMINO
![Table Lamp 006 [ALT] by UMINO 3d model](/_next/image?url=https%3A%2F%2Fstorage.googleapis.com%2Fproduction-thangs-public%2Fuploads%2Fenhanced_images%2Fv1%2Ff85a9a13-d75e-491f-819d-00ece03c2f41%2FDSC00435.jpg&w=3840&q=75)
Table Lamp 006 [ALT] by UMINO

Mini Lamp F037 by UMINO

Planter Pot F036 by UMINO

Flower Vase F034 by UMINO

Mini Lamp F036 by UMINO

Storage Container F037 by UMINO

Table Lamp F037 by UMINO
![Table Lamp 011 [ALT] by UMINO 3d model](/_next/image?url=https%3A%2F%2Fstorage.googleapis.com%2Fproduction-thangs-public%2Fuploads%2Fenhanced_images%2Fv1%2F1f79d39e-3ef9-4dc3-a253-3f27d00e7f4e%2FDSC00302.jpg&w=3840&q=75)
Table Lamp 011 [ALT] by UMINO

Pendant Lamp F036 by UMINO

Flower Vase F009 by UMINO

Table Lamp F036 by UMINO

Planter Pot F034 by UMINO

Mini Lamp F035 by UMINO

Pendant Lamp F034 by UMINO

Hi, thanks for your reply!
I understand that the model is designed for the lamp kit with a single ring. However, that’s actually the part I’m struggling with. Using one ring, I still can’t see how the lamp kit is supposed to be securely attached to the base and the shade.
At the moment there’s nothing that really locks the kit in place, so the socket and bulb end up being quite wobbly. Am I missing a printed part or a specific assembly step that holds everything firmly? Thanks
Put all the printed pieces together including the attachment. You then insert the lamp kit from the bottom of the base and there is an inner edge on the inside of the base that keeps it from going all the way through. The threads will be the only thing sticking out from the top of base. You then put the lamp kit ring on from the top and tighten it. It will tighten everything together super firm. If your lamp kit goes all the way through it’s missing a stop edge.
Thanks, I understand now that the model was designed specifically around THAT particular lamp kit ONLY... The kit linked in the description appears to be a US product, and it’s not available where I live (Germany). It might be helpful to mention this in the description or provide an alternative version of the base that works with more common lamp kits. Thank you.
These lamps work with several standard lamp kits that aren't specifically the one linked. It's an example so you can find one that has the stop with one ring. The stop in particular is a simple feature that is available in all types of lamp kits including E14 which should be standard in Germany. If you check this link the E14 Model B is what you're looking for when purchasing a lamp kit: https://www.aliexpress.us/item/2251832773588195.html
Hey, I can't seem to figure out how the light kit is supposed to be tightened or secured to the base... I’m using a standard lamp kit with two threaded rings, but I can’t figure out how the kit is supposed to be secured. There doesn’t seem to be anything to screw the bottom ring onto, so I can’t tighten the kit and lock everything in place, resulting in something that’s very wobbly.
Hello! These models are designed more for the lamp kit linked in the description. It’s only one ring instead of two. The two ring would require a larger base and different all around design.