


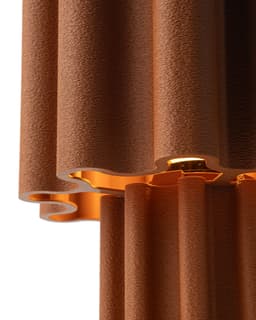


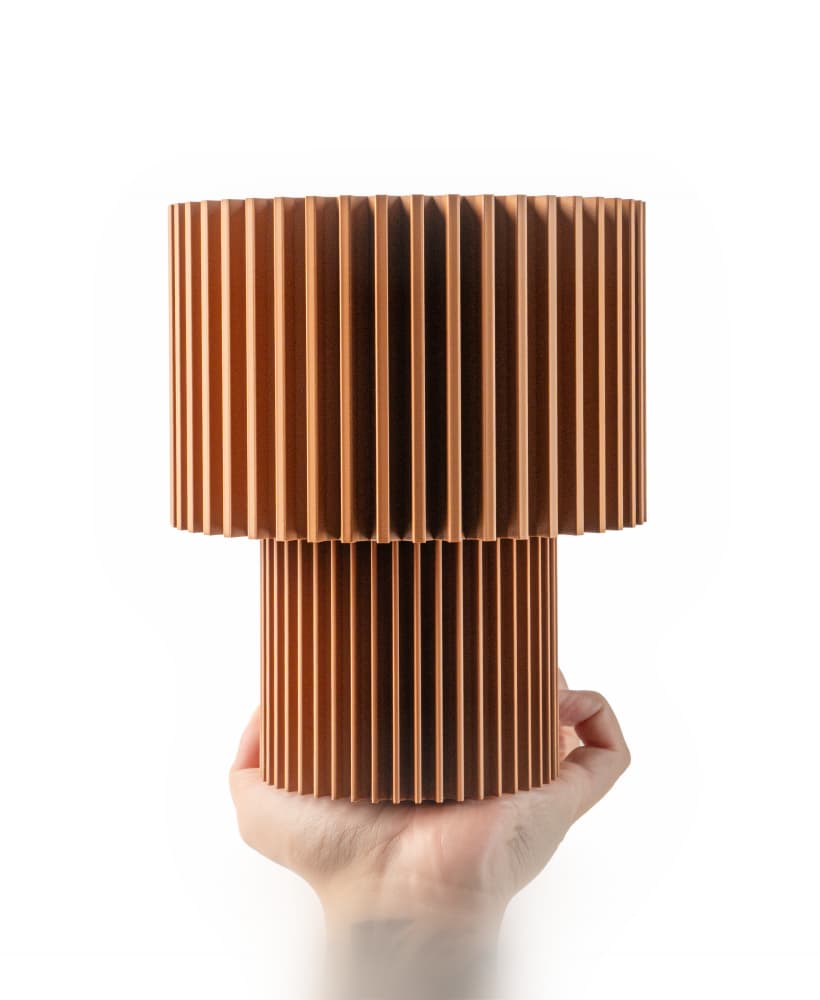
Table Lamp F019 by UMINO
COMMERCIAL LICENSE You require a pendant light cord with threaded rings. Enable fuzzy skin on shade and base. Don't print shade in vase mode if fuzzy skin is enabled. Cut base in two pieces from above cylinder and add fuzzy skin only to bottom part. Add bottom shell layers for sturdier shade. Fits E26/E27/E14 If you wish to use E14 print ATTE14.
Assemble shade on top of base. Insert attachment from the bottom of shade. If loose slightly scale down the attachment. If tight slightly scale up the attachment. Same instructions for the bottom cap. Insert pendant light kit from bottom of lamp. The threads from light kit should pop up above the attachment print. Thread the ring from light kit on top to tighten everything together. Insert mini led lightbulb from under the shade.
UMINO© STL files are strictly for personal use. Unauthorized resale of these digital files is illegal and subject to legal action. Respecting this copyright policy not only protects intellectual property but also supports the creators and the integrity of the 3D printing community.
Table Lamp F019 by UMINO

Table Lamp F039 by UMINO
Mini Lamp F038 by UMINO

Pendant Lamp F037 by UMINO

Table Lamp S011 by UMINO

Table Lamp F038 by UMINO
![Table Lamp 006 [ALT] by UMINO 3d model](/_next/image?url=https%3A%2F%2Fstorage.googleapis.com%2Fproduction-thangs-public%2Fuploads%2Fenhanced_images%2Fv1%2Ff85a9a13-d75e-491f-819d-00ece03c2f41%2FDSC00435.jpg&w=3840&q=75)
Table Lamp 006 [ALT] by UMINO

Mini Lamp F037 by UMINO

Planter Pot F036 by UMINO

Flower Vase F034 by UMINO

Mini Lamp F036 by UMINO

Storage Container F037 by UMINO

Table Lamp F037 by UMINO
![Table Lamp 011 [ALT] by UMINO 3d model](/_next/image?url=https%3A%2F%2Fstorage.googleapis.com%2Fproduction-thangs-public%2Fuploads%2Fenhanced_images%2Fv1%2F1f79d39e-3ef9-4dc3-a253-3f27d00e7f4e%2FDSC00302.jpg&w=3840&q=75)
Table Lamp 011 [ALT] by UMINO

Pendant Lamp F036 by UMINO

Flower Vase F009 by UMINO

Table Lamp F036 by UMINO

Planter Pot F034 by UMINO

Mini Lamp F035 by UMINO

Pendant Lamp F034 by UMINO

What fuzzy skin settings were used for this print?
Hello! Apologies didn't add it but I didn't print the model in vase mode so it had more than one wall. I printed with the standard 0.42mm outer wall. I then enabled fuzzy skin on it.