


Hextraction Shock Jockey Tile
Zap other tiles to deactivate their effects with the Shock Jockey Tile for Hextraction!
I've designed a series of tiles representing Vigors from BioShock Infinite - tonics the player consumes to gain a myriad of powers. Each tile is designed to look like the unique Vigor bottles, with their powers captured as game effects.
This tile takes inspiration from the Shock Jockey ‘stun’ effect when you electrify opponents in game. In Hextraction, this works as ‘stunning’ a tile, turning off its effect.
Rules Text Ongoing: Disable all effects of the first tile in-line with the arrow.
Printing & Assembly Instructions - Read Before Printing I've provided various options to help those who don't have multi material systems, or to minimize filament waste if you do. I also included 3mf files for reference. Consider the following:
For the icon: Print shock_jockey_icon_frame. You can use smaller width/height for a better finish, but the detail is so small you could just print it as is. You only need 1 frame per tile. Options:
- Standard Option
- Drag shock_jockey_icon_base, shock_jockey_icon_background, and shock_jockey_icon_details into your slicer to make it a multipart model. I suggest reducing line width for better detail. Assign filament colors and print.
- Single color top layer (single color printer support) Option
- Drag shock_jockey_icon_base and shock_jockey_icon_top into your slicer to make it a multipart model. This only requires one color change so it is compatible for those without multi-material systems.
Assembly Align the icon with the frame and glue them together. They should only fit one way. If printing the card, you'll want a second icon. I have included the 3mf, but this should not be printed as is. If you want the most granular control, and are comfortable with moving pieces of it around, go for it! But for the sake of minimizing printer poop production, don't do it. Note this 3mf has the frame.
For the tile: No notes, print away! Print the base and the bolt, no supports needed. I had fun with a multi color filament to try and get a crystal-like look as in the game. If you have a translucent purple filament, that would be the most faithful!
Assembly The slot in the bolt for the base should only allow it to go on one way. Glue the bolt to the base. Glue the frame (with icon in it from previous steps) into the tile. Please make sure you align the frame properly before gluing!
For the card:
- A single part option
- Use shock_jockey_card_single, and do what you would like with slicer painting/cutting, or single color printing.
- Standard
- Drag shock_jockey_card_base and shock_jockey_card_details together into your slicer so it makes a multipart model. Assign filament colors and print.
- Taller bolt variants
- In case you don't care about really flat cards and instead want the same bolt from the tile. For this, repeat the steps from above, but the models you want are shock_jockey_card_base and either: shock_jockey_card_details_tall_bolt for a single detail body with the bolt included OR shock_jockey_card_details_no_bolt for, as you may guess, no bolt - so you can glue on a copy of the bolt in any color you desire.
Assembly If you opted for the no-bolt variant with the external bolt, glue that on. For all variants, glue on your second copy of the icon.
Hextraction Shock Jockey Tile

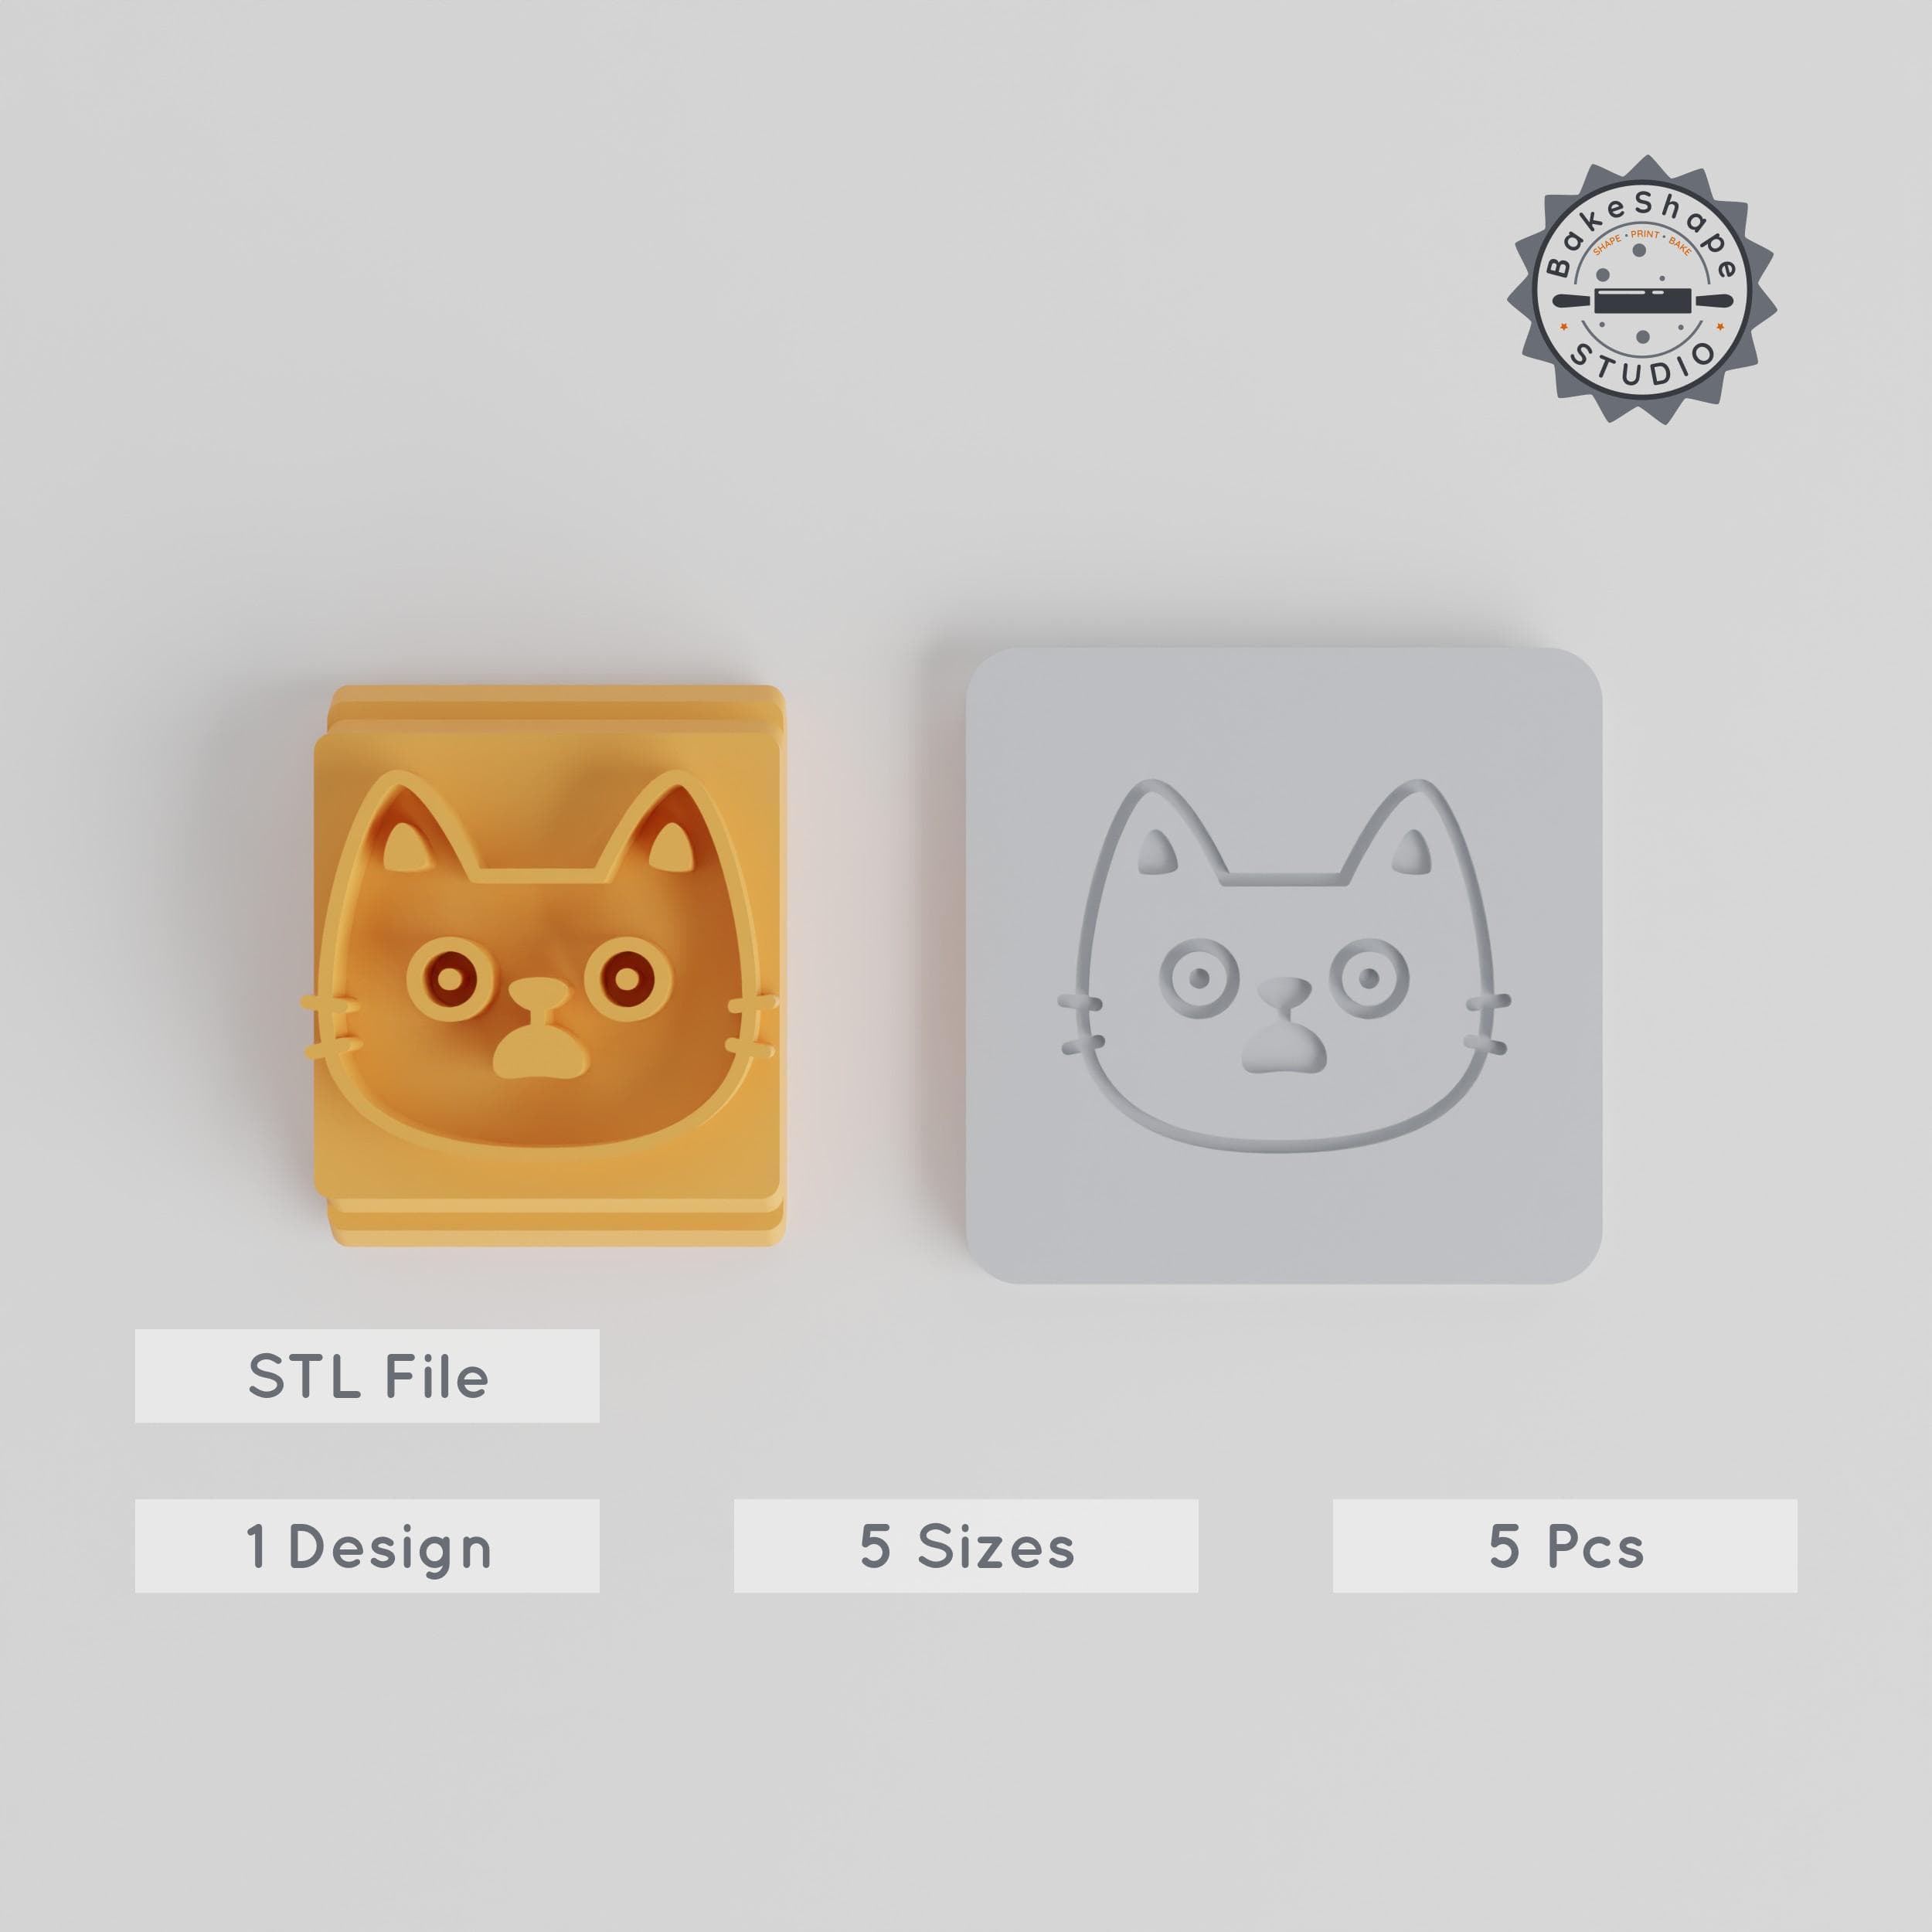
Shocked Dog Stamp Tile Set, Animal Cookie & Fondant Cutter, 5 Sizes, Clay & Soft Materials Use PRODUCT_2634
Surprised Face Stamp Tile Set, 5 Sizes, Perfect for Clay, Cookies & Fondant, Shocked Emotion Motif PRODUCT_2605

Surprised Poop Emoji Stamp Tile Set, 5 Sizes for Clay, Cookies & Fondant, Shock Face Motif Decor PRODUCT_2376

Scared Emoji Stamp Tile Set, 5 Sizes, Perfect for Clay & Cookies, Shocked and Spooky Expressions PRODUCT_2472

Flushed Stamp Tile Set, 5 Sizes, Perfect for Clay, Cookies & Fondant, Emoji Face Design PRODUCT_2474

Astonished Face Stamp Tile, Set of 5 Sizes, Perfect for Clay, Cookies & Fondant PRODUCT_2455

Fearful Face Stamp Tile Collection, 5 Sizes, Perfect for Clay, Cookies & Fondant, Emoji & Expression Motifs PRODUCT_2463

GEN2 Tilt Drawer Pro - 115
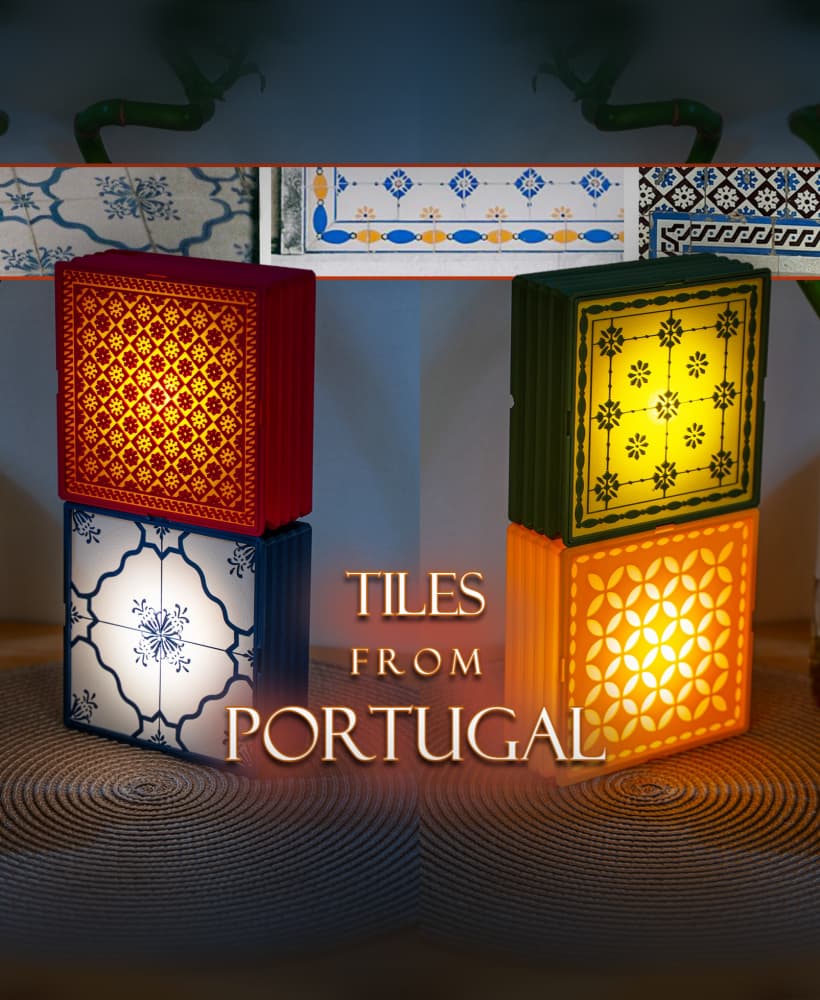
Tiles from Portugal (Wall, Desk or Stackable Lamp)

Toaster Bath Clicker

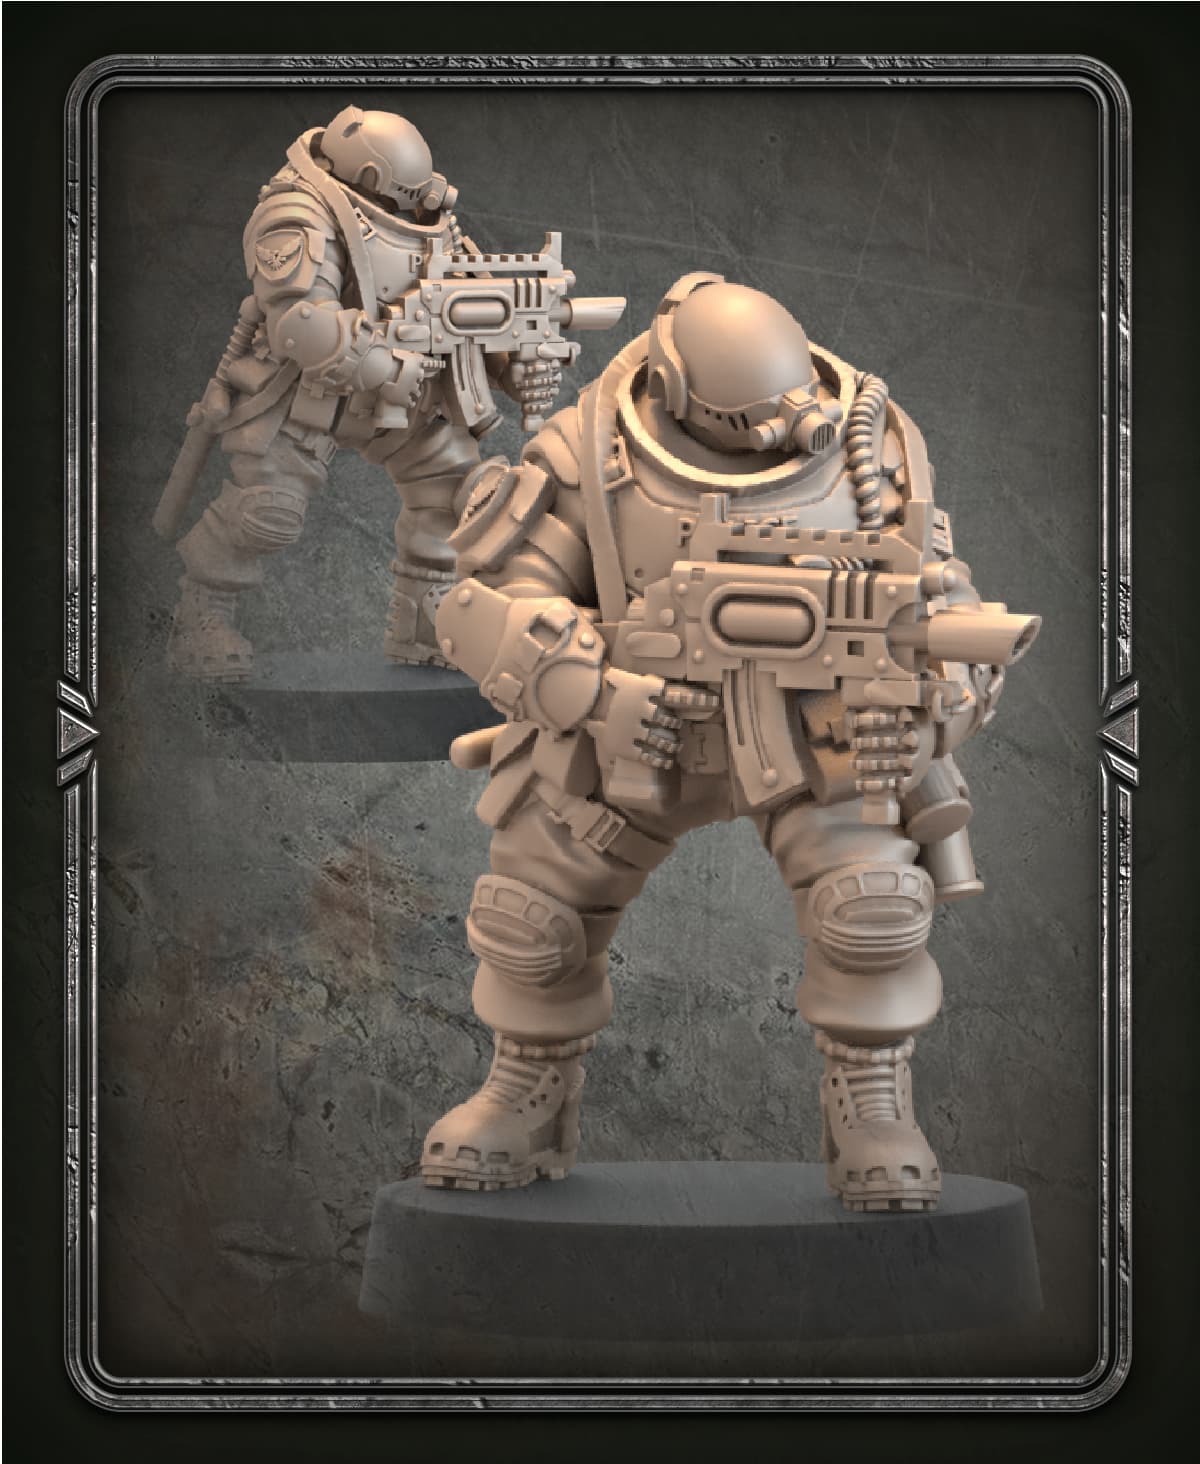
ModBots – Series 1 Starter Pack

Algarve Tray – Portuguese-Style Decorative Serving Tray

Lisbon Holder — Geometric Desk Holder

Tile Lamp - Wall, Desk, or Stackable Lamp

Sh-elf Elf, Male Head Collection

Tiles from India (Wall, Desk or Stackable Lamp)

Gridfinity Tabletop RPG Grass Terrain Tiles

Sh-Elf Female Heads
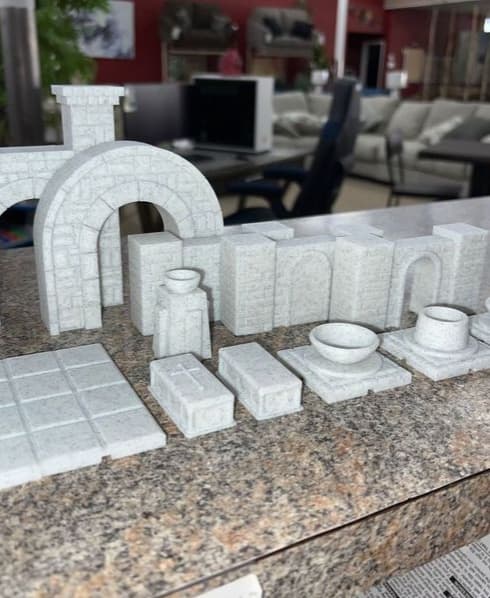
D&D Structures Pack 1 - Print in place
Stunning colors. Could you please share which filaments/brands you used for the left tile? You’d win hands down the Prettiest and Most Inspired Hextraction tile awards. 🏆
Did my best to find out which ones are which, some I've lost the info for.