


Frame Lamp - in Multiple Options
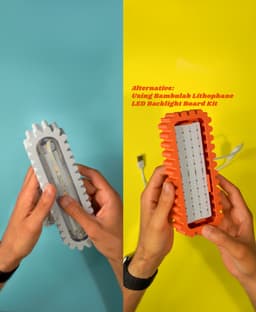
Options: Power source: You can use a power bank to power the lamp. Or You can connect directly to a wall power source. Make sure the cable is long enough to reach the power source (Or buy a usb extender). Light source: You can use LED light strip like the IKEA VATTENSTEN 1m that I used. Or You can use the Bambulab Lithophane LED Backlight Board Kit 96x144 mm (This is brighter, however it may use more power and require larger power bank or a usb extender to plug directly to wall.) Wall hanging: You can hang on the wall with a screw like you hang clocks and frames on the wall. Or you can use a strong double sided tape like the 3M Command Adhesive Strips 3.4 kg Instructions: An assembly instructions video is available in my social media accounts, here is a link to it: On Instagram: https://www.instagram.com/reel/DMlCoFUt4Qq/?igsh=MWZmenpjNTF1MDlvYw== On Tiktok: https://vm.tiktok.com/ZNduTuYdP/ On Youtube: https://youtube.com/shorts/qya0q2ZfGQo?si=4IS1lvQAot5um9Ab Print Setting: A sliced Bambu Studio file is available with different plates, I divided the parts across the plates. Most parts have default 0.2 Standard profile, with Gyroid infill at 15%. Most parts don’t require support. Part specific settings if you want to reslice the parts:
- Back, Middle, and Front Arcs: Support enabled, 40 degrees threshold.
- Front Part - Bambu Panel: No support needed, Adaptive layer height will provide better transition in the overhangs.
- Mesh: First layer may require thicker lines to avoid gaps. 0.9 mm line width is what I used with a height modifier (0-0.2 mm).
- Wall Mount: 3 Walls to increase strength, even though it might not be needed. License: Personal use only. for commercial use contact me.
Frame Lamp - in Multiple Options

Tiles from Sicily (Wall, Desk or Stackable Lamp)

Organizing Plates - Multiple Shapes and Sizes

Tiles from India (Wall, Desk or Stackable Lamp)
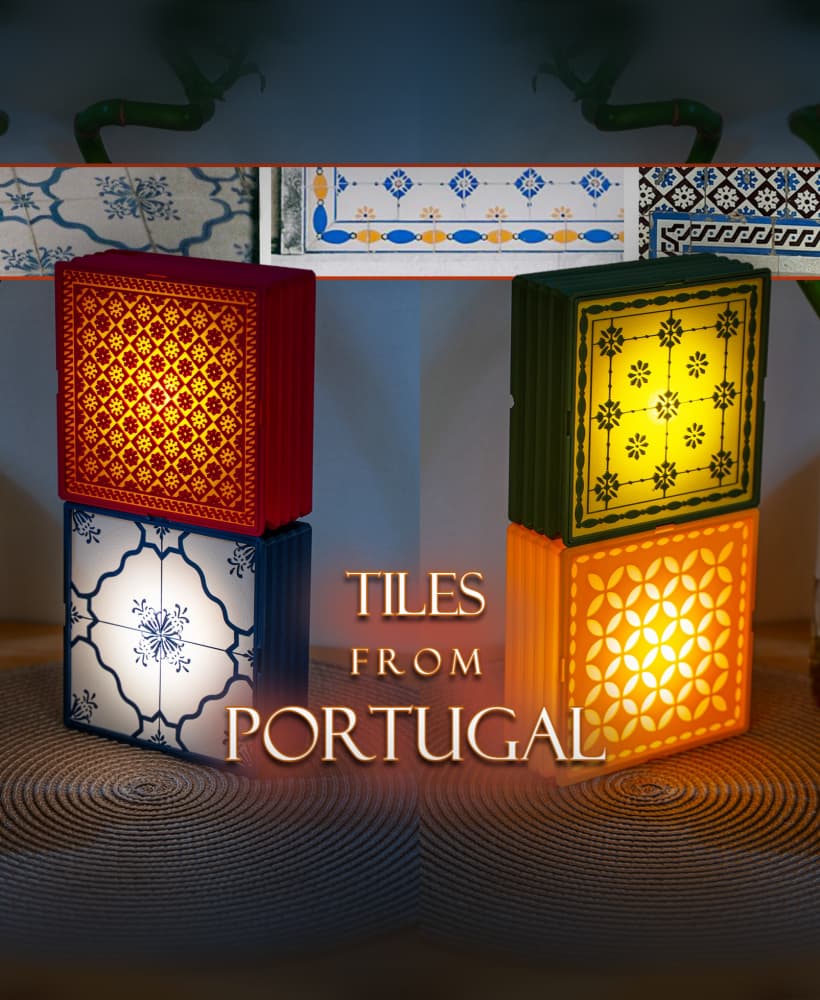
Tiles from Portugal (Wall, Desk or Stackable Lamp)

Silphium - The Ancient Plant/Vase

Tile Lamp - Wall, Desk, or Stackable Lamp

Sorting Hat Lamp

Spooky Eye Jar Cookie Cutter & Stamp Set, Halloween Cookie Decor, Multiple Size Options, 6-Piece Cutter & Stamp for Cookies & Fondant PRODUCT_3421
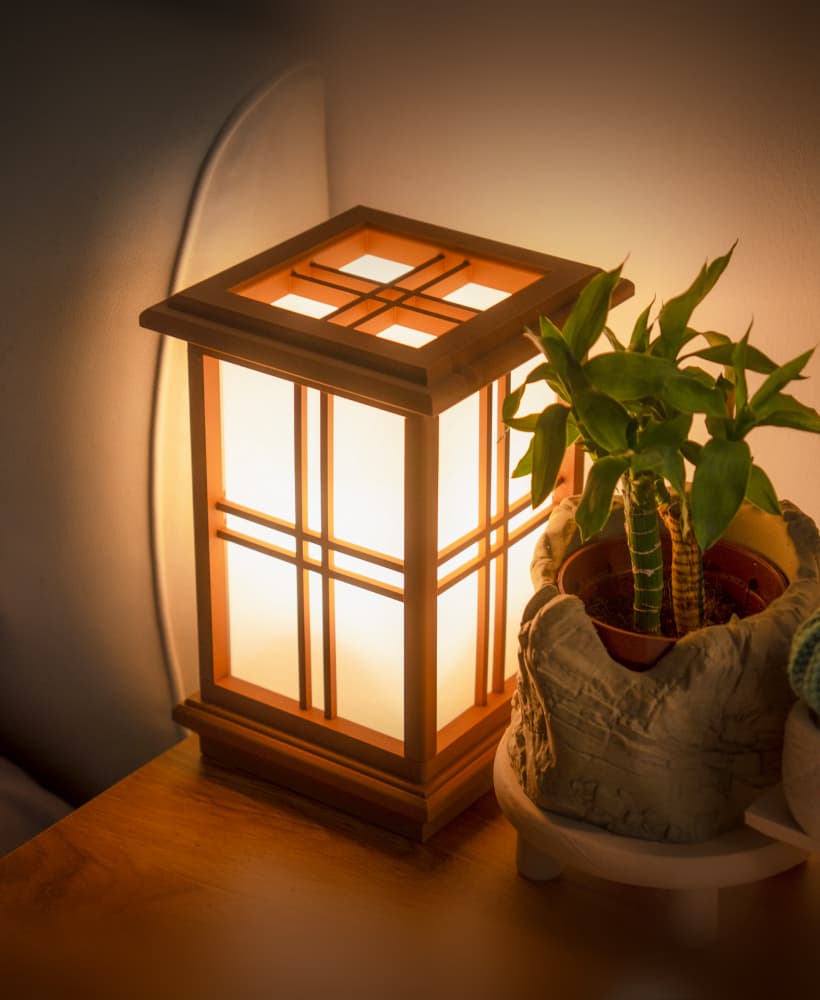
Shoji Lamp 2

MCS - Modular Collectibles System

Mushroom Planter

Strawberry Keychain Pill Container

Quadruple 7x7 Photo Frame with Keyholes

Dual Horizontal 7x7 Photo Frame With Keyhole

Easy Print Photo Frame Kumo for 50x70mm Images

Swirl Wave (A)

Zen Garden Coasters - 12 Styles

Petal Pendant Light

SETIM & SETAM ORGANIZER (MULTIPURPOSE & MODULAR INSERTS) / KITCHEN ORGANIZER / OFFICE ORGANIZER
