


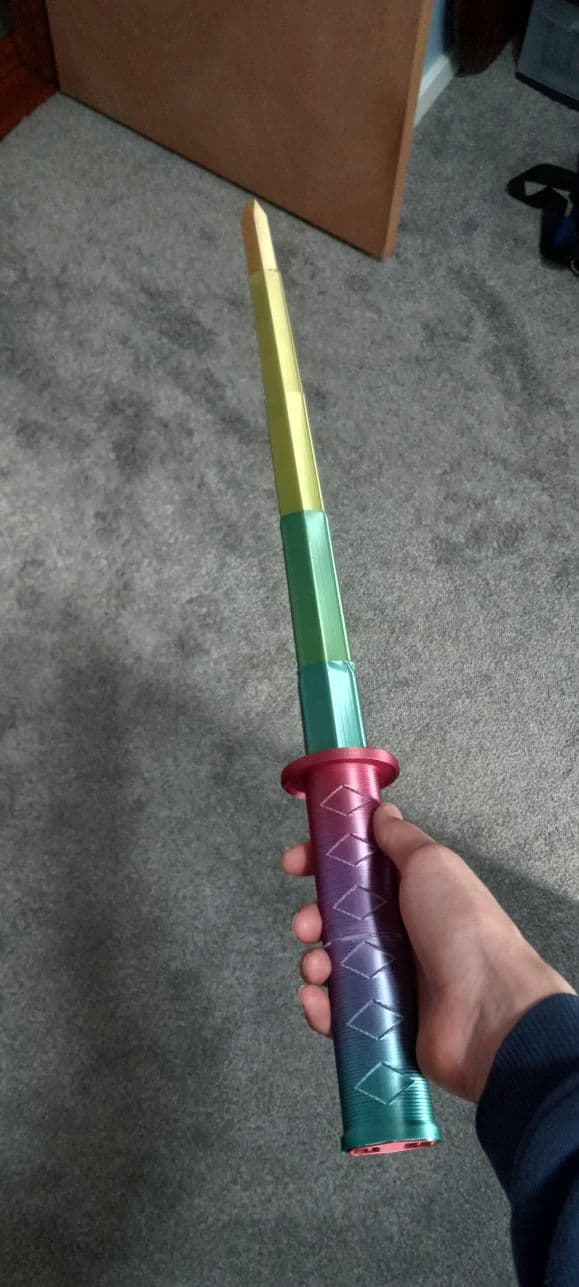
Collapsing Katana with Removable Blade
Collapsing Katana with Removable Blade
This collapsing Kantana is similar to the original version in appearance but its modified so the cap on the pommel can be removed so the blade can be printed separately then assembled.
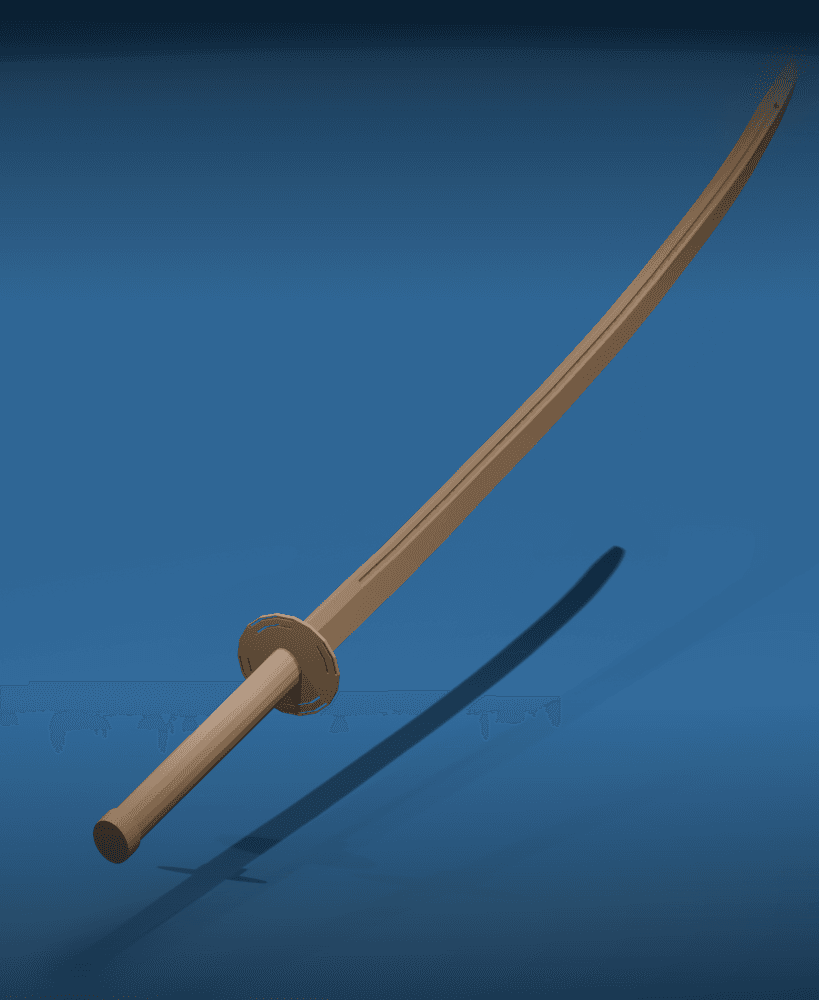
I also made an alterative version of this that has single edged curved blade.
Printing None of the parts require supports. The blades can be printed concentrically as an assembly or individually in vase mode. If you plan to print concentrically, a single stl contains all the blades. If printing in vase mode, there is a stl for each blade. Note the vase mode stl’s are supposed to be solid so the slicer knows not to make an internal perimeter.
Vase Mode I prefer printing the blades in vase mode as the result is a much cleaner and easier print that can easily be scaled. If you print sequentially, it’s faster too. If printing at 100% scale, set the line width to .9mm. If you plan to print it smaller, scale the line width down by the same about. If printing in vase mode you can scale down to a minimum of 55% with a .4mm nozzle. For vase mode turn top and bottom layers on for the first blade, but turn it off for segments 2-5. You will notice that the vase mode files are solid, this is so your slicer knows not to try to build a inner perimeter.
Top and Bottom layers Turn only the bottom layers off when printing the first blade segment, and turn both top and bottom layers off when printing the rest.
Print two blade segments and test. If the blades don't catch, bump your line width up .2mm or so. If they catch too soon, reduce line width.
Concentric When printing the blades concentrically use a .4mm nozzle and set the line width to .43 so the blades are two shell thick. If you would like to scale it down try printing the vase mode version instead. Before printing the blade assembly make sure perform the test print found here This print is sensitive to the layer seam and extruder calibration, it’s a good idea to make sure your setting are tuned so the blades don’t fuse.
Test Print The test print is a total of 24mm high so I change retraction settings every 8mm. Then I compare the changes until I achieve the best result. Each printer is going to be different but in my case I used a negative “extra restart” distance to reduce the size of the layer seam.
Detailed printing instructions can be found on my website
Printed with Filament One Glint Silver and [Glint Gold PLA
Printed on the Muldex rep-rap IDEX printer.
Other Collapsing Swords Master Sword Katana Jian Broad Sword Dagger
Note: Assembly model for reference only.
Having troubles printing or want to show off your prints? Join our Facebook Group.
Collapsing Katana with Removable Blade

Assembly Lightsaber - Jedi Survivor

Patience Lightsaber - Jedi Survivor

Game Wallmount Nintendo SNES Video Game Organizer

Game-Wallmount_N64.stl
Katana v2

Oriental Display Stand for Sword – Wall Hangable Decorative Katana Holder

Rain barrel Downspout Diverter Kit
(1).PNG&w=3840&q=75)
Simple Spline Jig

Honedge Replica - Full Size Pokemon Prop

Travis Touchdowns Blood Berry Beam Katana - No More Heroes

BICSaber – Write with the Power of the Force!

Prusa MUTANT Upgrade Kit (for MK2.5S, MK3S, MK3S+)

Prusa MUTANT Upgrade Kit (for MK2.5S, MK3S, MK3S+)

Organization-Ship
.png&w=3840&q=75)
Knitted Grim Reaper Figurine / Candle Holder

Post-It Sticky Note Sharpie Marker Holder

Kitty Cutter v2 - Cardboard Cutter for Cat Scratchers

Modular ToolBox Dual-Slot Organizer Vertical
Catapult Crush !

For anyone having issues using vase mode with the top layer or the BLADE 1, just flip it over.
Good advice!
Just got a question about the cap for the hilt. what settings or infill do you run on the cap. it printed great but your spring mechanism wants to stay pulled in. so the blades end up popping it off when I retract them into the handle. great print otherwise! everything printed amazing.
Hey man, i'm using cura but i don't want to reprint the whole blade. None of the blades are hollow though? How do i enable vase mode on cura?
If its not called "Vase mode" then its "spiralize Outer Contours" I'm have not used it in a looooong time.
hi i dont know how to remove the first layers i use snapmaker luban not cura can you help me out?
Can you not set them to zero?
I turned on top layers. However, the tip isn't filled in when using vase mode. I set Top/Bottom Thickness to .8, Top Thickness to .8, Top Layers to 4 and made sure Bottom Thickness and Bottom Layers are zero. This might be due to Vase mode not allowing you to fill in the top of your print. I'm wondering why it won't fill in the top (tip of the katana blade in this case).
I dont know the answer to this, but you could just flip it over and use a brim.
Printing pointed blade (1) in vase mode leaves the top open, not closed even though Top/Bottom thickness is .8, Top Thickness .8, Top Layers 4 and Bottom Thickness/Layers is zero.
I'm not sure I understand the question. Don't you want top layers then?
How do I change the line width in Prusa Slicer in vase mode?
Its just a numerical valve that you change. It could be called extrusion width in PS, not for sure. If using standard settings for a .4mm nozzle the default is probably .45mm.
Hey brutha, love the swords. So I think Im getting close. I can get them strong and silky smooth in vase mode, but I still cant get them to slide together, they just slide through. When you say increase your line width, is that the same as saying nozel size? So in cura, line width is suppose to reflect your nozel size. It can be manually increased, but Im not sure how it can increase the line width without a bigger nozel.
Ok I nailed it and got the settings for you CURA peeps.
Whatever your best print settings are start there. FOR THE BLADES: Then, search for spiralize in the search, there will be two settings, check both. Then, under quality, there is a line width setting. Check that.
This is where the calibration begins. Set it to .9 to start. Print blades 5 and 4. If they fit, YOU WIN, too tight go to .8 to thin, increase it. Thats it. Mine worked perfect with these settings and .9 line width. In vase mode or spiralize mode, things like wipe and seam hide and things that 3dprintworld has suggested before are basically disabled. They are there, but they dont function in spiralize mode. Try it and see. Again, this is for CURA users. Cant help on other users.
Ill take a look at it. I know you use something other than Cura so I just need to remind myself where the line width is. Thanks Ill update later.
Nope, nozzle diameter and line width are different. Keep the .4mm nozzle but change the line with, if printing in vase mode. You can print larger than your nozzle, I forget how much. I think 2.5x's.
I have been working on putting more detailed print instructions on my web site.
My Blade broke, the reprintable blades all are not hollow... Don't want to reprint the whole blade :(
They are not hollow because they are meant to be printed in vase mode. Its the superior way of printing one at a time.
What slicer do you use? Because I can not figure out how to turn layers to 0 in Cura. People in the videos I watch use Cura or Fusion 360 and fusion 360 cost money so I use Cura. I'm very new to this I have only had my Ender 3 V2 for less than 2 weeks and it is my first 3D Printer. Also sometimes when I print things they fall over or move how can I prevent that? Also sometimes I have to like start my print 5 times until it gets the first layer correct and then it does it from there on out, did I do something wrong? Thanks!
You can also try Prusa Slicer for free. You probably cant find the setting in cura to set the layers to zero because you have to make that option visible. For bed adhesion, I would need to know what kind of bed surface you are using. If your bed is level and at the correct height, it should print correctly the first time. This is kind of a hard print. I would suggest printing some simple parts and circling back to this once you get more experience.