Pelvis Model with Adjustable Ball and Socket Acetabular Joint
byDaveMakesStuff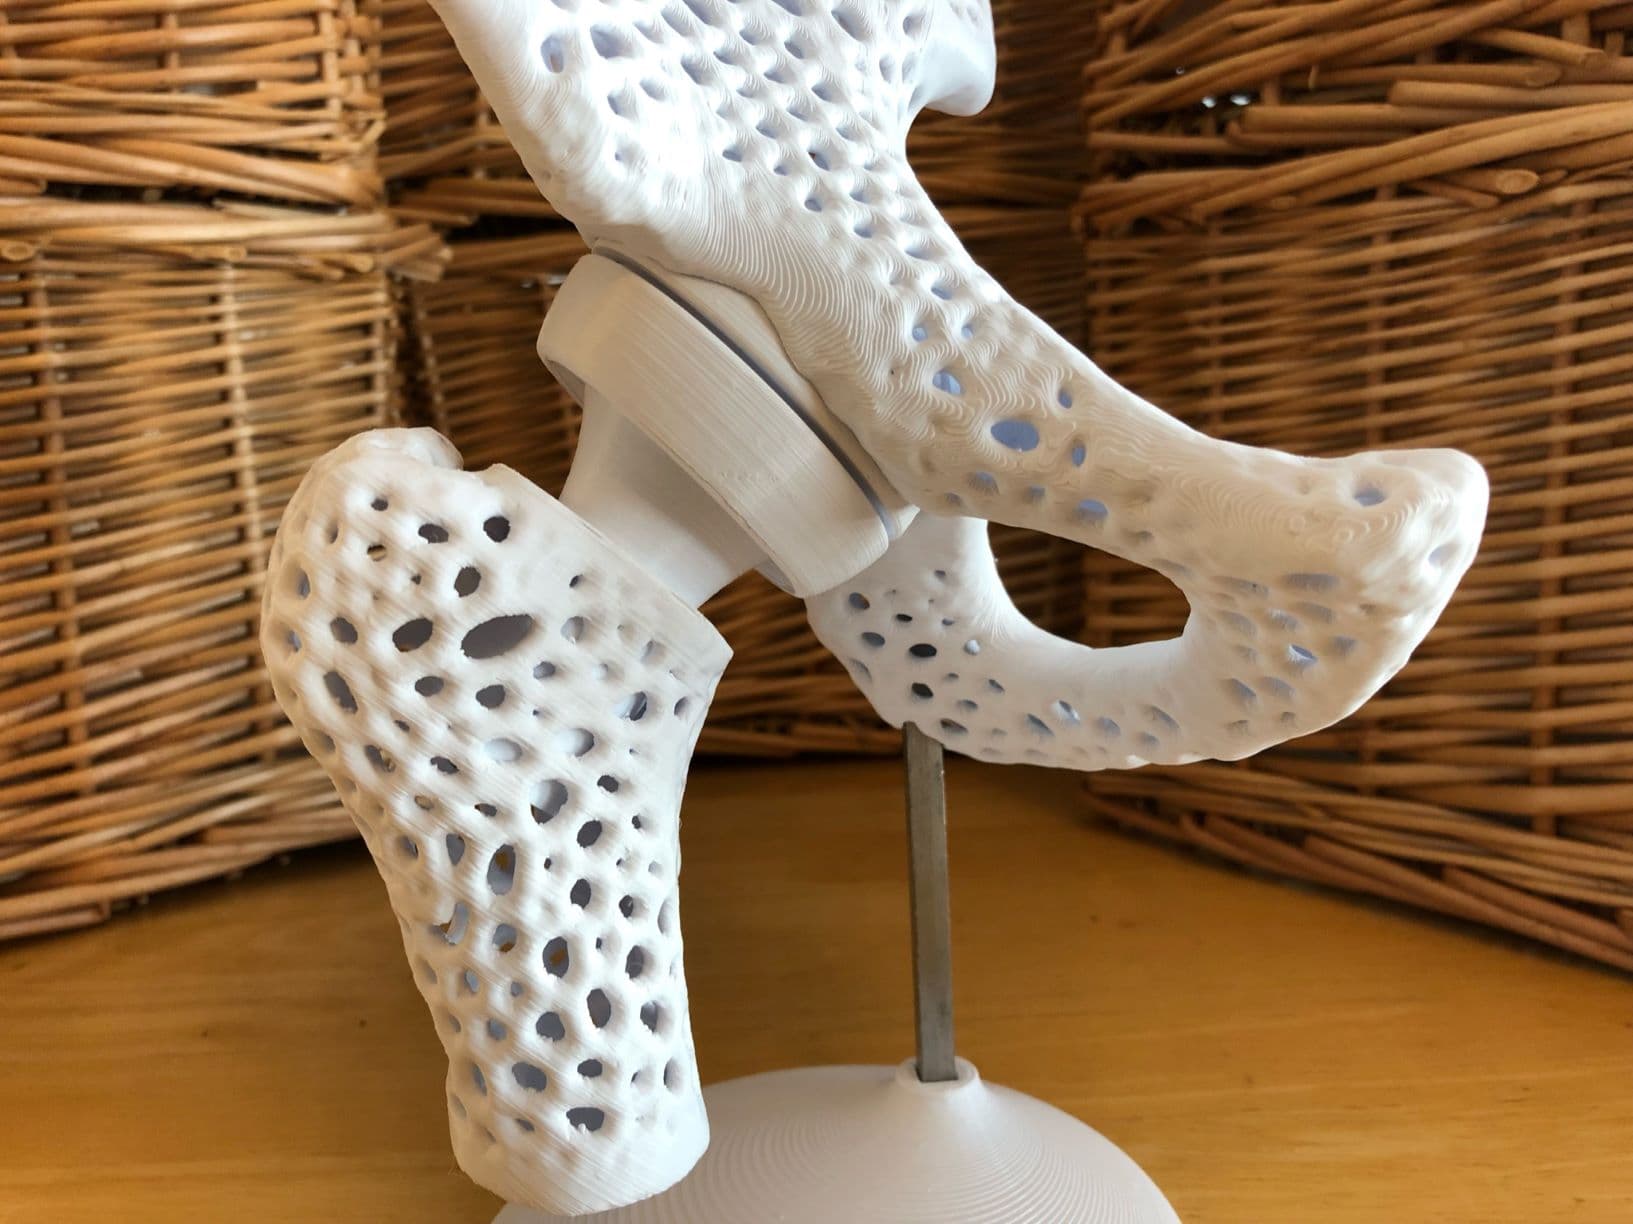


This display model of the right hemipelvis and femur uses an adjustable ball and socket joint to allow for movement and repositioning of the femoral head in the acetabulum. The model could be used to demonstrate hip replacement prosthesis, or just as an interesting conversation piece! See here for assembly video: https://youtu.be/LXJVoEX21ZA The model is supported on the stand using a 6” long section of ¼” square keystock. The keystock inserts through the ischial tuberosity and is held in place with an anchor inside the pelvis. The anchor is designed as a separate shell and so could be removed digitally before printing if not needed. Printing: Print the “Acetabular Cup” and “Collar” as provided so that the threads are oriented upwards. Changing the orientation may result in malformed threads. The “Femoral Head” and “Proximal Femur” should also be oriented as provided to ensure that the connecting surfaces print properly with the correct tolerance. The “Right Hemipelvis” is oriented to minimize amount of support needed, but you might find an orientation that works better for your setup. The “Right Hemipelvis” and “Proximal Femur” will need supports. The “Stand” is a standard print. Assembly: If using the stand, ensure that the keystock inserts cleanly through the hole in the ischial tuberosity and is properly seated in the inner anchor. Clean up right surfaces as needed. Glue the “Acetabular Cup” into the large hole in the “Right Hemipelvis”. Ensure that it is seated securely and evenly. CA glue works well. Thread the “Collar” over the “Femoral Head” and insert the “Femoral Head” into the “Proximal Femur.” That tolerance is tight enough here that it will hold on its own, but you can add a bit of glue for a permanent connection. Insert the “Femoral Head” into the “Acetabular Cup” and tighten the “Collar” into place. The collar can be loosened and retightened to move and hold the femur in different positions. If using the stand, insert the keystock and place on the stand and you’re done!