
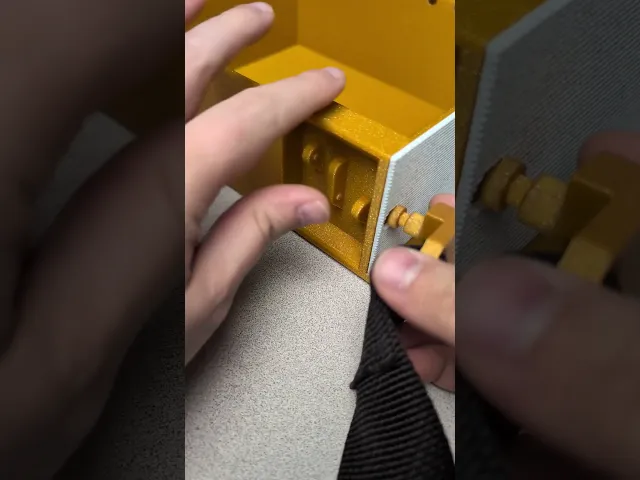
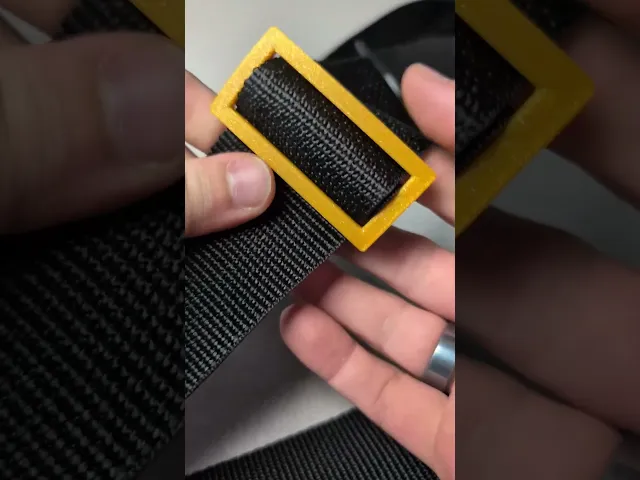


Strap for Dungeon Master Tome - BOOK BAG
120 downloads · 1 year ago · Introducing a way to turn your Dungeon Master Tome into a "book bag"!
Looky here! You now have a wa
This model is restricted by licensing terms.
View license.
Introducing a way to turn your Dungeon Master Tome into a "book bag"!
Looky here! You now have a way to carry your dungeon master tome hands free!
Disclaimer: The only files provided are to be able to create the strap for my Dungeon Master Tome. The files to print the tome are not included here.
I used almost 2 meters of 2" Nylon strap to assemble it (Not included)
Files to print the Dungeon Master Tome are found here.
Printing Instructions: Files with a "_x2" or "_x4" indicate you need to print 2 or 4 copies respectively.
- Wall loops: 4
- Infill: 40%
- Layer height: 0.2mm
If you choose to print the shoulder "pad", I recommend printing that in TPU or similar material.
Assembly Instructions: Feel free to watch video instructions or look at the attached PDF guide for assembly.
Strap for Dungeon Master Tome - BOOK BAG
120 downloads · 1 year ago in and
This model is restricted by licensing terms.
View license.

TerraMesh Crossbody Bag | 3D-Printed Wearable Bag | Fashion Accessory | 3A Creates

Golf Bag Name Keychain

Heart-Shaped Bag – Chic & Charming Statement Accessory

Soccer Bag Tag Keychain - 2x3"

FLEXI Sea Turtle (no supports) +Bambu 3mf

Tsugite Cube 3x3 Puzzle (Version A)

Universal Lip Balm Keychain Holder
.webp&w=3840&q=75)
Loveling Penguin Desktop and Keychain

Intellect Devourer - Tabletop Miniature
.png&w=3840&q=75)
Mesh Mayhem Rock Dragon

Demon head pen & tool holder

Cute duck charm, keychain - Puffy

Moo Deng Splash -Baby Hippo (+MMU & Keychain/Ornament Files)

Snowdragon 2025

Quilted Tufted Storage Basket Planter | Soft Cushion Style Decor Bowl Organizer

Floating Eye Tealight Stand or Wall Mount
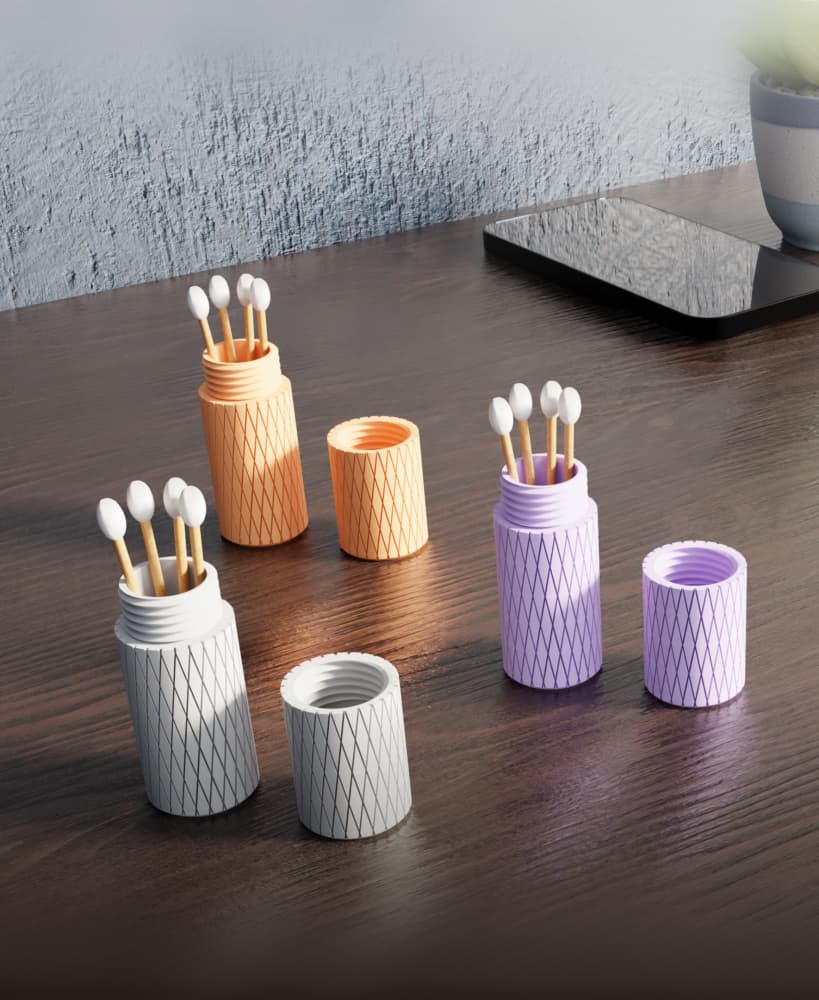
Q-Tip Travel Container, Elegant case

Tooth Skull Key Ring
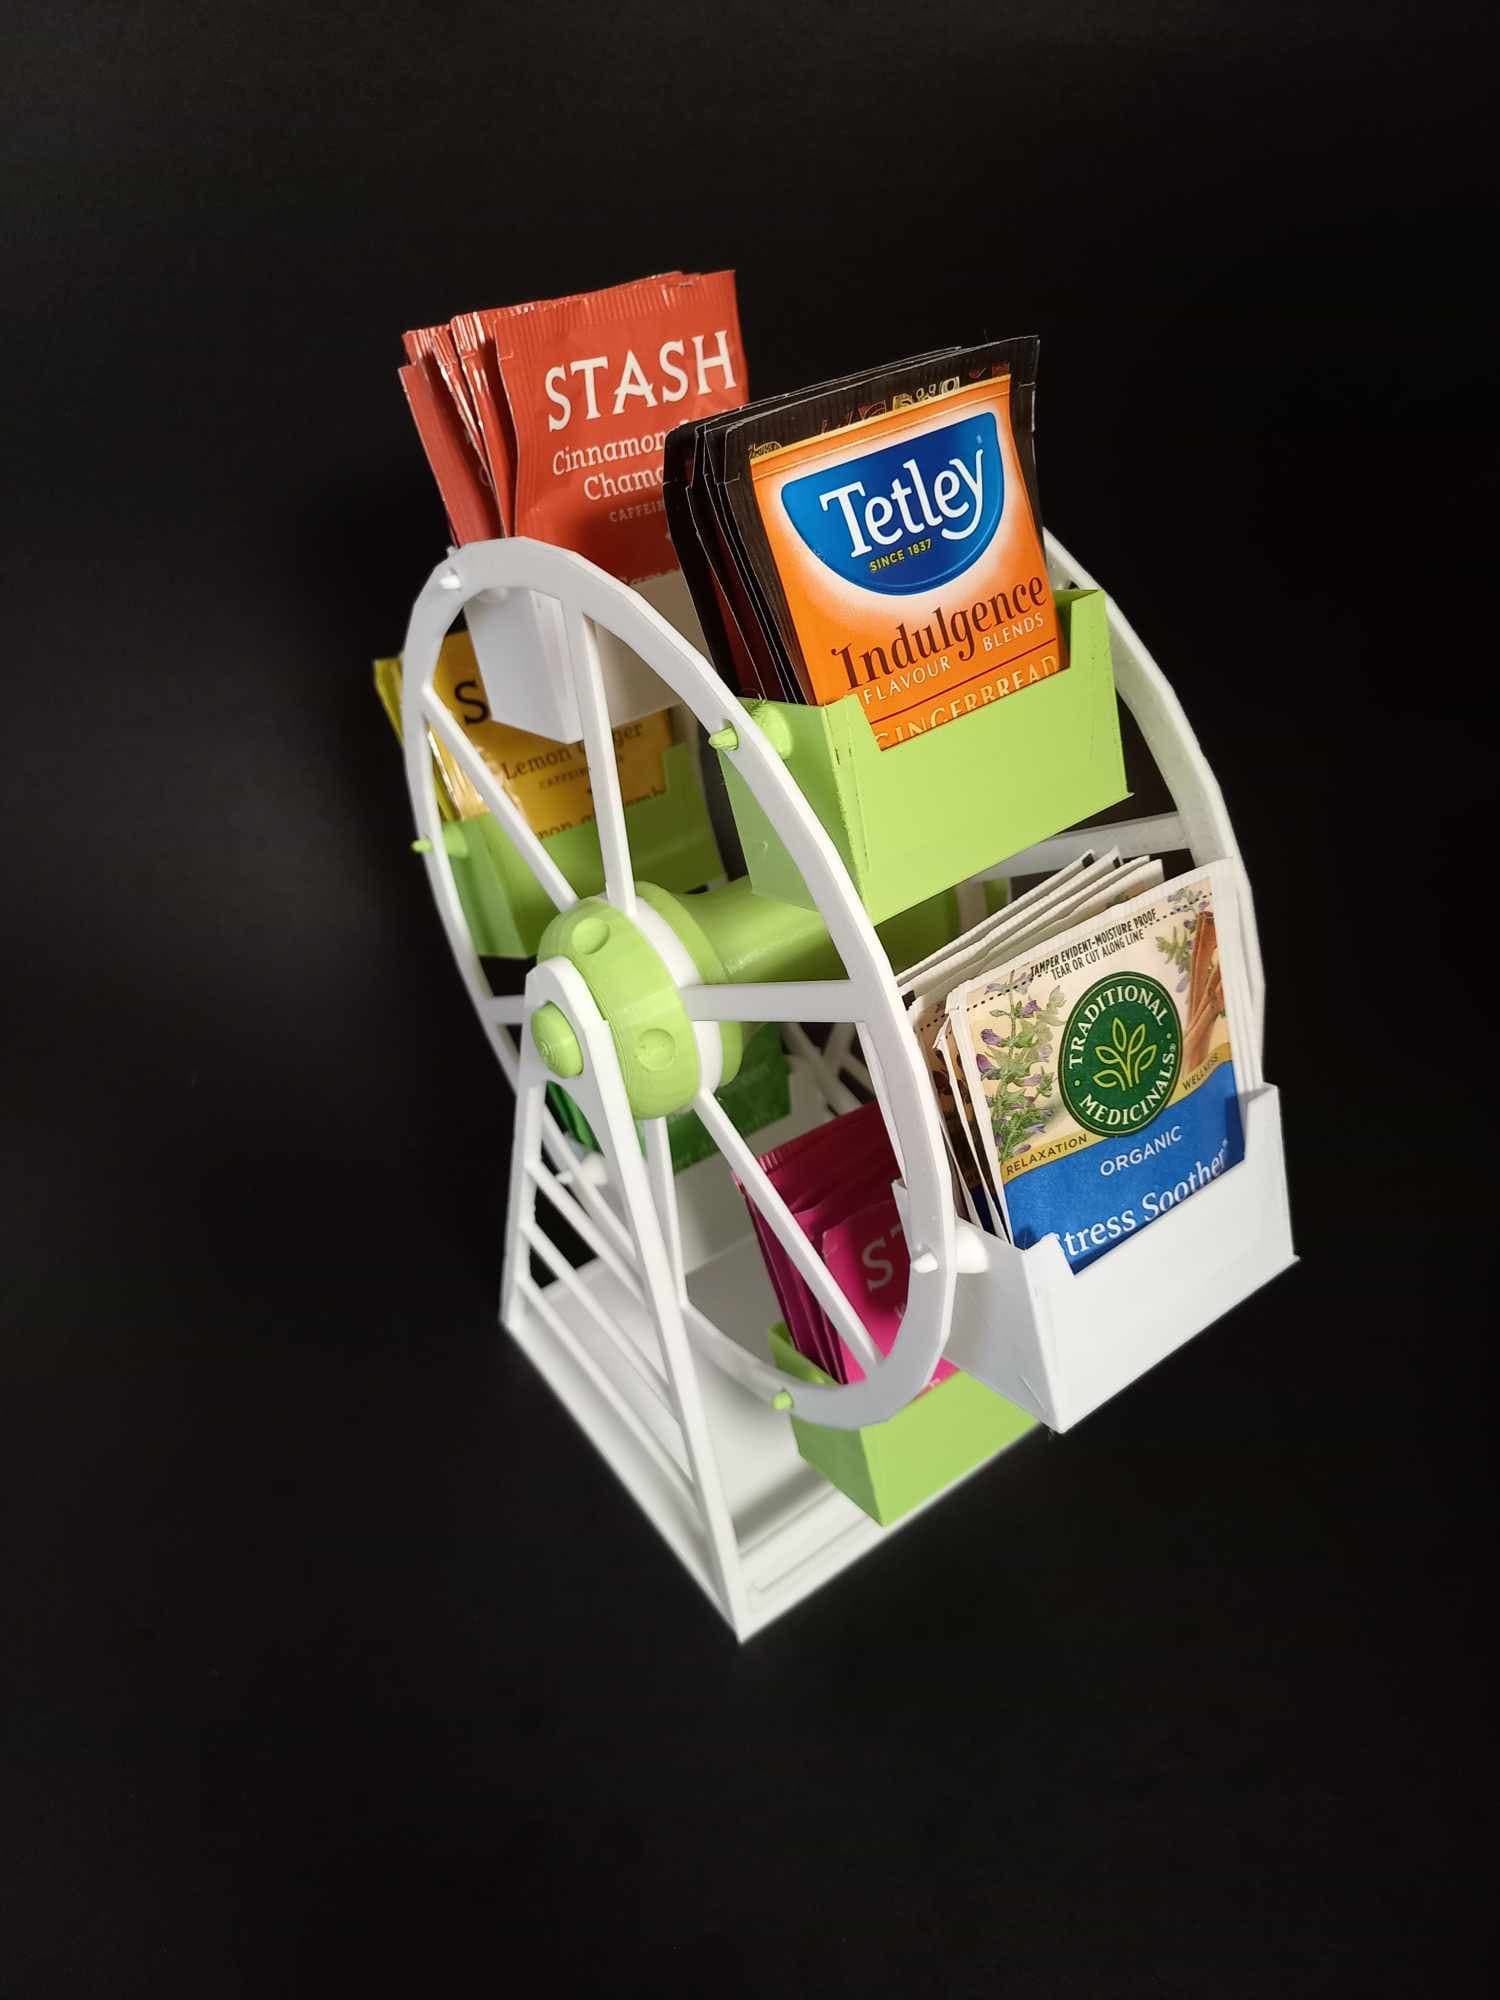
Teabag Ferris Wheel (The Teabagger) - Easy to print - Easy to assemble

Is it possible to retrofit this to a previously made tome? Or will one need to reprint the whole thing?
You can drill a hole in the existing tome to retrofit it. I don't know what size of drill bit you'll need. The hole should be about 10mm in diameter, though.
What length of strapping needs to be used? Either I missed it in the videos/PDF, or you didn't specify it. I want to make sure I get the right length.
That's a good question! I cut about 77" or ~6.4' or ~1.9 meters or 1955.8mm of strap before sewing everything together. I'll include this in the description.
I second benutne's question.
I answered benutne's question, just FYI. If you have a drill bit that call make a 10mm hole, you should be able to retrofit it with the strap
Neat! Are there two pads for left or right shoulders, or are they intended to be used as upper/lower?
The flat edge of the pad should be oriented toward your neck when you wear the book bag. Either pad can be used for left or right. The logo on them is going to be covered by the strap, so it doesn't really matter. However, I know some people might be particular about the orientation of the logo even if others can't see it, so I decided to just provide both orientations of the logo.
Also neat! Final thought as I go to assemble my own; for those of use who haven't made a strap before it would be helpful to have more instruction. For example, are the two sliders both to be used, or is one an alternate? And what's the order of objects to be looped through when building the strap? What's a good "rule of thumb" length to cut?
In the set of files you download there's a file called "Book Bag Strap Assembly Guide" that shows how to sew the 3D printed pieces onto the strap before you attach it to the book bag.
As far as how long you need the strap, you'll want to make it longer than you need because the strap slider will enable you to change the size of the strap once it's assembled.
What I did is I draped the strap over my left shoulder and cut it so the strap ends came down to my right knee